
Reaching level 100 in Sword x Staff within 30 days is entirely possible with an optimized daily routine.
Because the game heavily utilizes idle AFK progression, careful resource management from Day 1 will allow you to keep pace with spending players without dropping any cash.
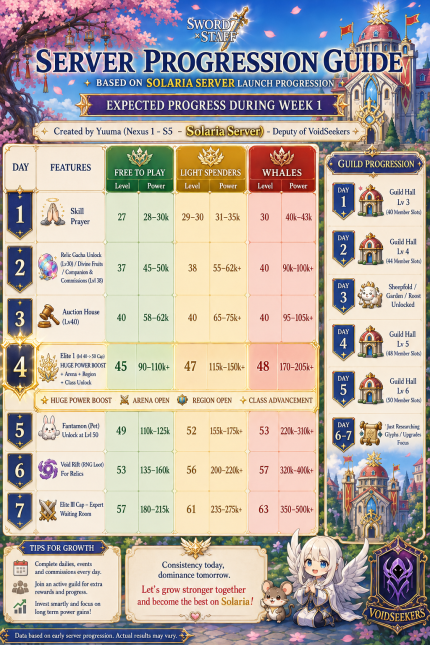
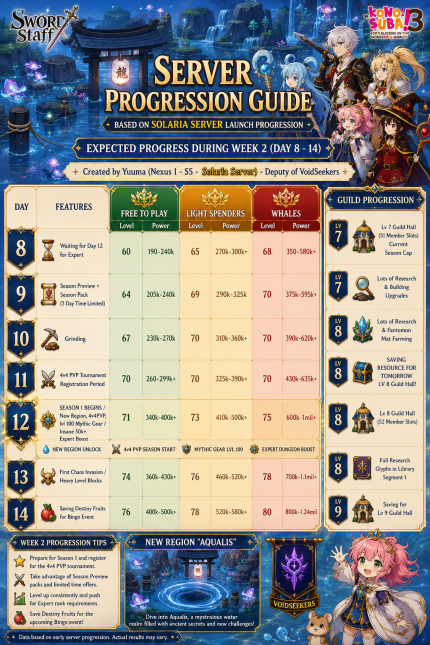
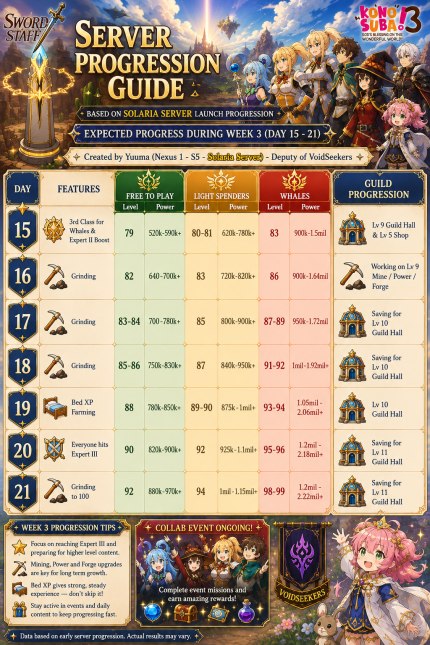
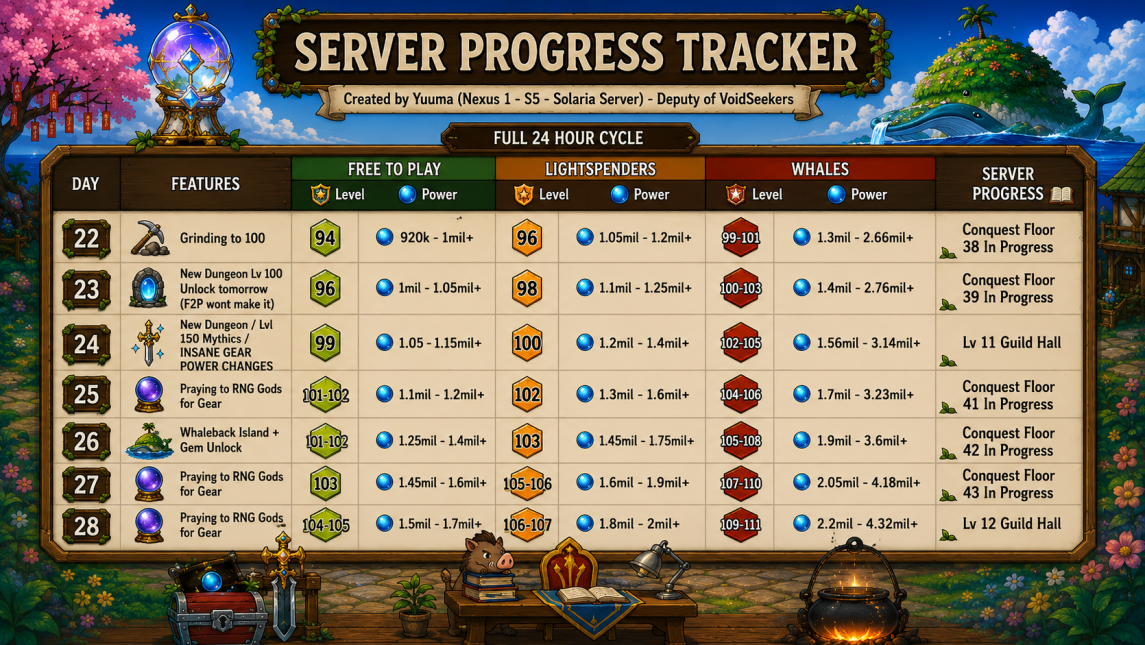
See the Visual Leveling Chart for expected daily progression. You should be able to do it in 25 days at the earliest and 29 days at the latest.
Table of Contents
Offer Terms
Earn up to $84.35, on 10 goals in 30 days.


- Homepage: https://swordxstaff.boltray.com/
- Discord: https://discord.gg/swordxstaff
- Facebook: https://www.facebook.com/p/Sword-x-Staff-61579592385490/
- Offer Link: https://appm.swagbucks.com/games/apps/1697563/sword-x-staff?rb=UdPkjitj6yCiLLSo
Offer Guide
Daily Priority Tasks
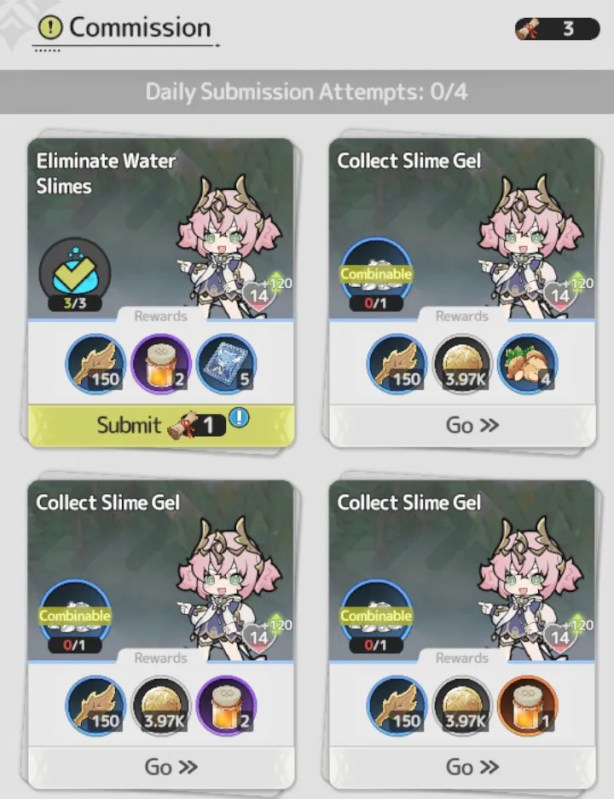
Commissions First: Once you have unlocked daily commissions at level 30, do them all before doing other tasks in game.
- Stamina Utilization: Never let your stamina cap (unlikely in early game). Picking up resources or fighting mobs on the world map costs 5 stamina each. We do this to upgrade our gear.
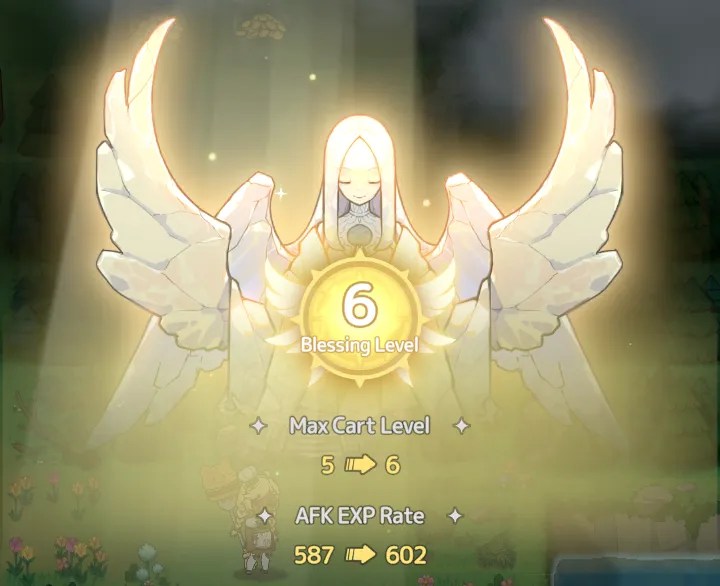
Zone Exploration: Push map boundaries in newer regions constantly, as uncovering zones provides permanent passive stacking percentage gains to your overall progress (Angel/Goddess Statues).
For tips on how to get the AFK resting and daily commission routine just right:
Progression and Resource Management
- Upgrade Evenly: Balance your gear, skill levels, and Fantomon pets concurrently rather than over-investing in a single category. When upgrading skills, it is the Slot that gets the upgrade; not the skill. So you can freely swap skills without losing progress.
- Join an Active Guild: Early guild hall access grants crucial group rewards, passive buffs, and cooperative boosts that significantly cut down time-to-level.
Multiplayer: The game makes heavy use of group battles and dungeons.
- Add active players to your friends list and keep an eye on the chat log for party invites. Sharing the location of a mining node or a boss monster spawn will earn you Affection Tokens for participation.
Strategy
You must balance active zone exploration on the map locations, strict stamina management, and maximizing your idle AFK resting experience (bed).
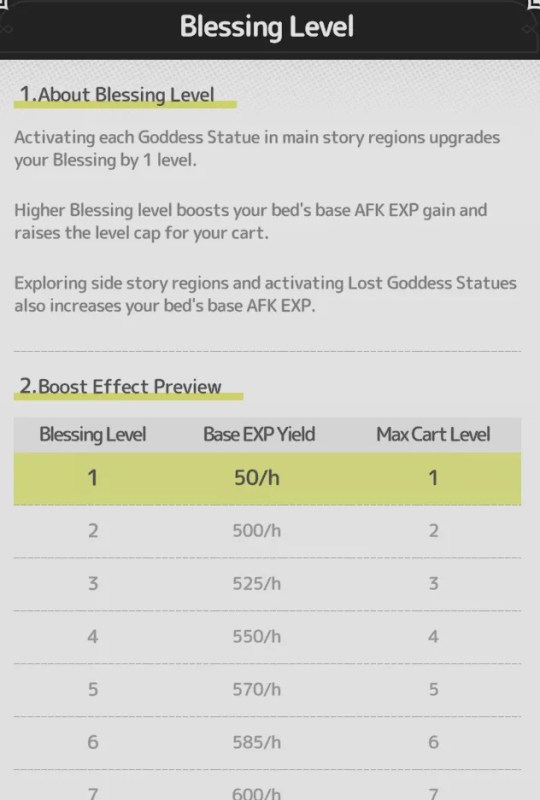
Angel statues will boost your bed’s exp multiplier.
Lunar Sage statues give a permanent boost to HP.
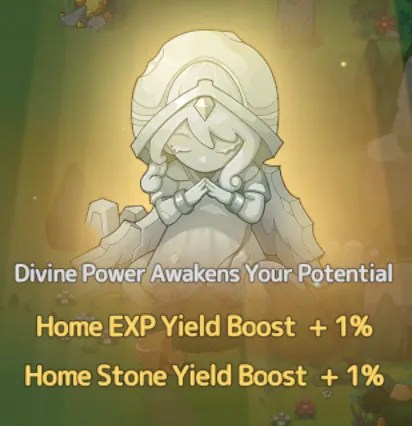
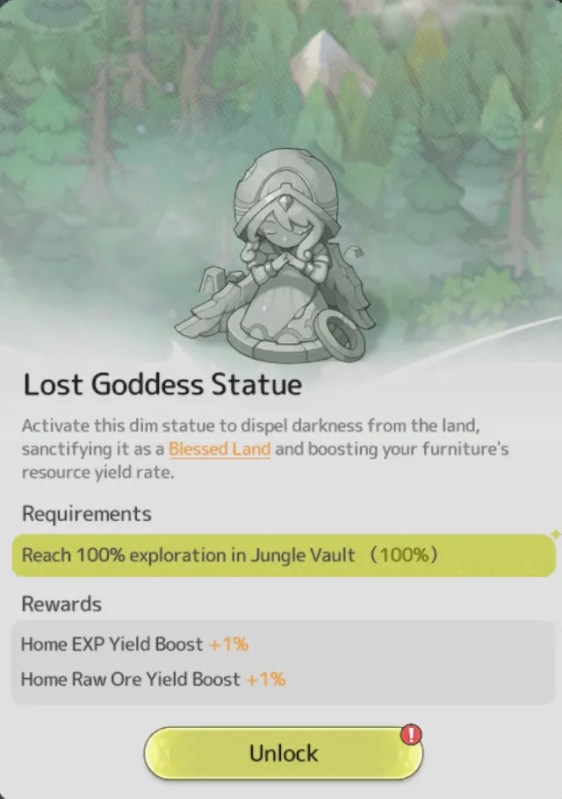
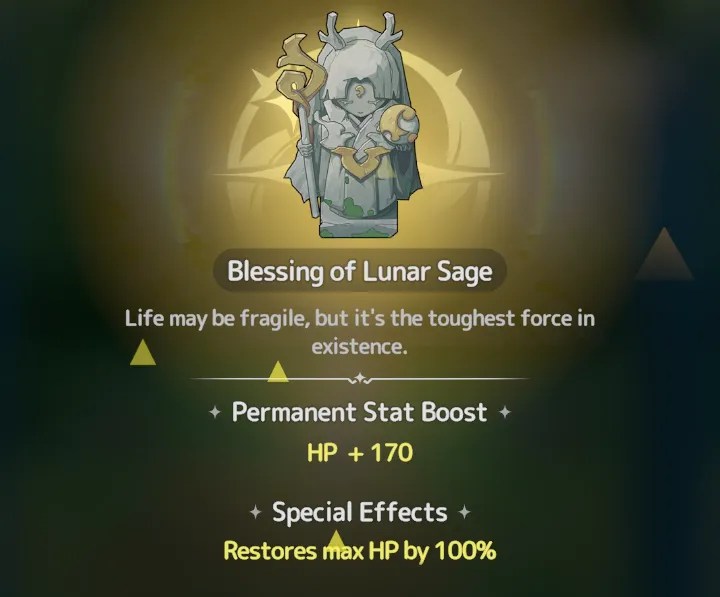
Your idle reward cart accumulates resources and materials over time. Prioritize upgrades to the cart for items that can be used to boost your Skill and Gear.
After you unlock Commissions (Level 35?), always clear your daily commissions completely before working on map exploration. You can use Quest Scrolls purchased from Shops to complete additional commissions each day.
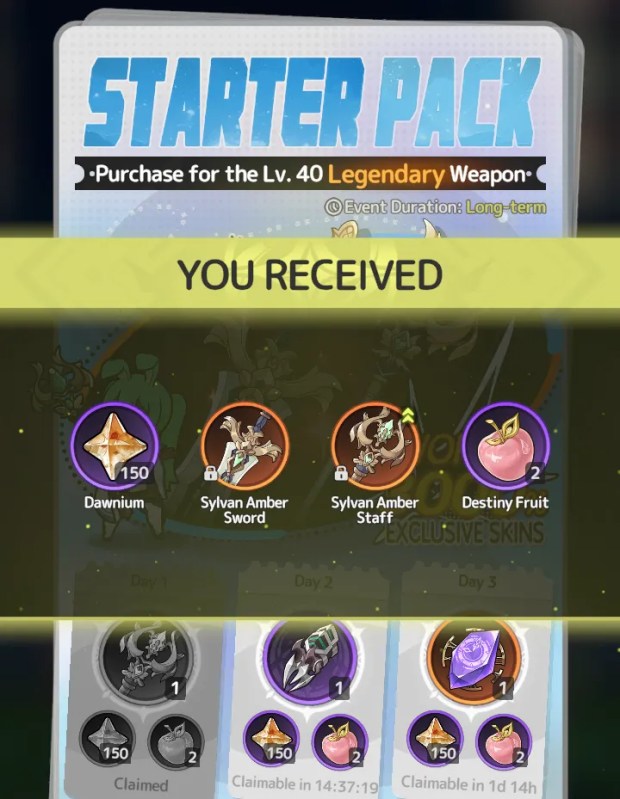
I reached level 20 on the first day and level 30 the second day.
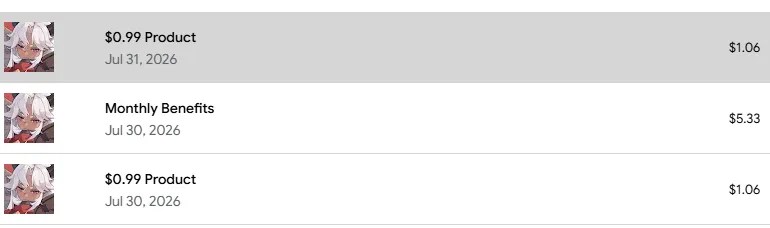
I purchased the Starter Pack (0.99), Monthly Benefits (4.99), and a 99-cent pop up offer.
Super Critical Steps for F2P
Every single day, navigate to your vault to claim your free stamina (30 pts).
You must also use your accumulated free currency to purchase Destiny Fruits, Refined Ore, and Quest Scrolls. These are non-negotiable must-buys for F2P account scaling.
If there is an active Event or Collab Event, check the shop to see if they have any of the above mentioned items.
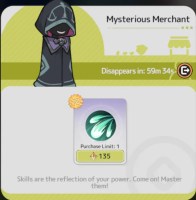
Above Mythic gear is Primordial. The Mysterious Merchant will offer these items later in game. Consider saving your premium currency for this exchange if you plan on continuing play after clearing the paid offer.
TIP: If you hit a wall in power rating, try upgrading your gear and skills. Use any destiny fruits you have to get more resources to spend on upgrades. Check the chat log for group dungeons you can join, special monster spawns, or free Resource Nodes. Lastly, hand out in the Guild Hall and collect Affection Tokens from the Sheepfold, Garden, and Roost.
General Game Knowledge
The daily server reset time is 8:00 (UTC-5).
Character Customization

The game includes a fully customizable character avatar and several cosmetic outfits and accessories you can swap between.
Selecting a Class
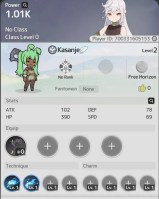
You can either choose Mage or Warrior. I took Mage, but I think the Warrior looks more survivable. I see other players with self healing abilities that are more effective than the single spell I have learned.
Learning and upgrading Skills from Prayers will improve your Class Level. Every 10 Class Levels, you move up a Rank. Some world map game content is gated behind Class Levels and Ranks.
Player Profile
Your profile page displays all character stats including gear, skills, and clothing.
This page is what other players will see when viewing your profile.

Other functions include consuming Food for stat bonuses, healing, and viewing your Player ID (used in social media events).
The face icon on the bottom of the screen can be used to access your character sheet. There are links to access your Skill loadouts and your Class rank.
Clothing on your characters avatar can be adjusted using the Styling panel (top-right).
Additional clothing items are earned from Events, the Trading House (Level 40), or can be purchased through the Store for real money.
Raising your Style level will grant a small stat bonus to your character, but not so much that it gives players an unfair advantage.
A link to the Magic Cat is shown on the right side of the Styling Panel. Using a Shapeshifting Mirror you may alter your avatars appearance.
Other Players
On a player’s profile page there are options to send a private message, hold a practice sparring match, add the player to your friend list, exchange items from active events, block the player, or to report them.
Possible reporting options for players include: Player Name, Fantomon Name, Cheating, or Unauthorized Trading.
Guild Hall
Joining a Guild allows you to complete tasks to earn Fantomon Aptitude items, gain gacha tokens, and Affection tokens.
Other resources are earning from setting your character to AFK in a facility.
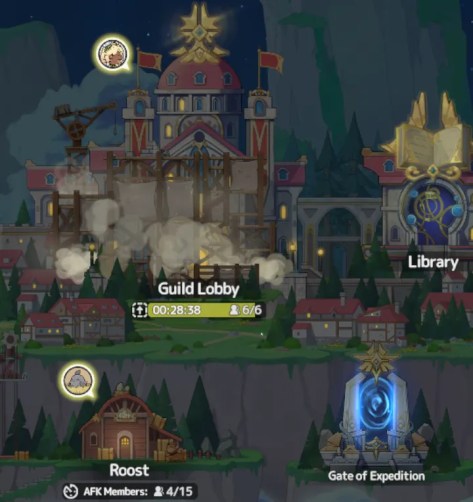
There is a 2-hour cooldown between quitting a guild and joining a new one. If you have made all Daily attempts in one guild and then join a different one, you will not receive new attempts.
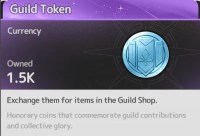
Guild Tokens may be spent in the Shop to get Sheep, Flowers, and Chickens among other items.
Guild Structures
Guild Lobby
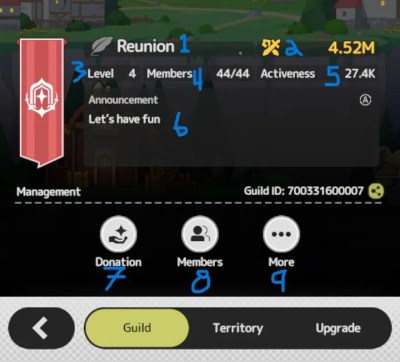
- Guild Name
- Total Member Power Rating
- Guild Level
- Number of Members
- Activeness Score
- Announcement (message)
- Donation
- Member List
- More Options
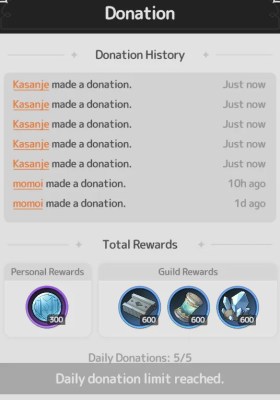
Donation: Each day you have 5 chances to donate Dawnium to your Guild. The first time each day is free, after that you may spend additional resources to donate again. Donating will improve your Contribution Score (Activeness). Donating will earn you Guild Tokens.
Member List: You can view all guild members and see which ones are online or offline. The guild leadership and deputies are visible.
Tapping on a guild members avatar will open their player profile.
I would advise you to add all guild members to your friends list to improve your Affection Token accrual rate.
More Options: You have either the option to leave the guild or to report the guild if there is a problem. Possible problems reportable include: Guild Name, Announcement, and Recruitment Slogan. Quitting a guild will start a 2-hour cooldown, after which you may join a new guild.
Territory Panel
This overview displays the guilds current Resource amounts, the current level of guild structures, gathering speeds, and the number of AFK members assigned to each structure. If an upgrade is in progress on a structure, the timer will be displayed here.
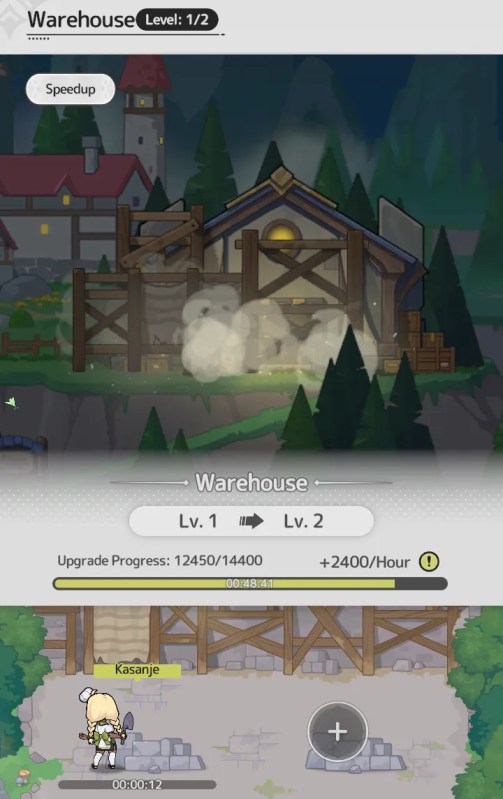
- Gate of Expedition: Guild Conquest Progress
- Shop: Unlocked Items
- Warehouse: Resource Limit
- Library: Activated Glyphs and active research.
Other Guild Structures
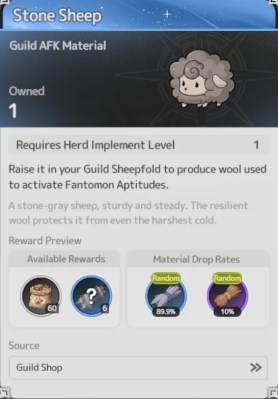
Fantomon Aptitude materials can be acquired by planting flowers, herding sheep, and roosting chickens. Upgrading the facility will increase the number of raising slots available to guild members.
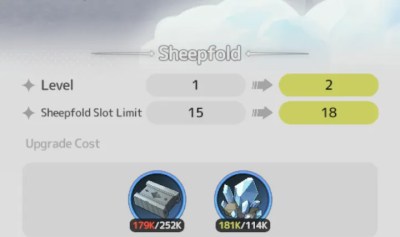
- You can help other members maintain or collect their AFK items.
- Each time you assist another member, you’ll receive Affection Tokens as a reward.
- When your own AFK items are collected by others, you can view and claim the rewards in the AFK Record.
The AFK Implements used to groom the sheep, chickens, and plants can be upgraded by repeatedly completing tasks in the facility.
| Implement | Completions | Yield Boost |
|---|---|---|
| Tender | 40 | 10%/30% |
| Lunar | 160 | 20%/60% |
| Solar | 480 | 30%/90% |
| Dreamy | 1440 | 40%/120% |
Spending time checking the three guild item facilities is a good source of Affection Tokens, beyond those you earn from completing group battles with friends.
Also, because other guild members can collect your completed sheep/flower/chickens, you don’t need to worry about checking on your items. Just go to the Record page to collect the rewards.
Fantomon Pets
Gacha System
Prayer
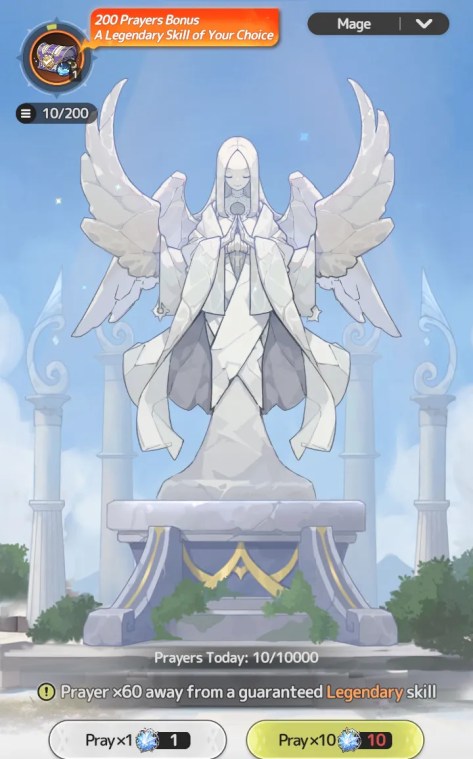
This function allows users to spend Stellatie tokens in a gacha to gain skills for their Class. A filter at the top of the panel allows users to switch between Mage and Warrior. At level 100, a player may switch their Class.
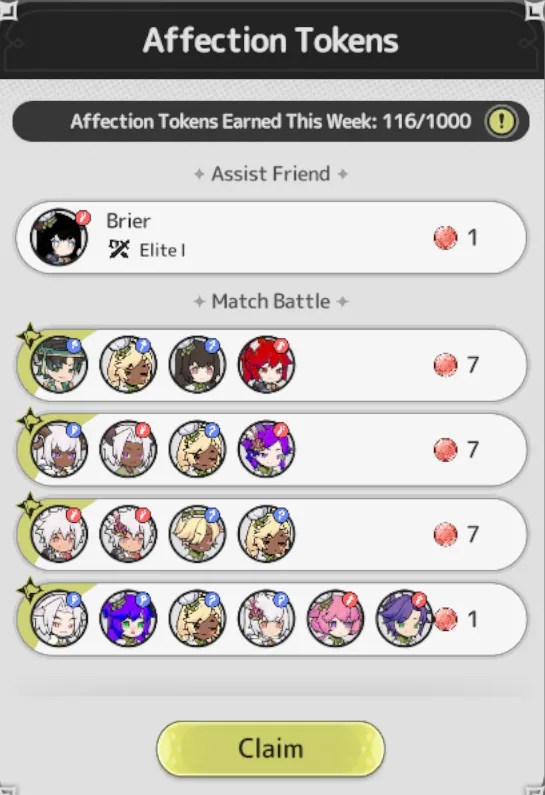
Affection Tokens may be used for Prayer.
Similarly, 1 point is earned for each Affection prayer.
Completing sets of prayers and earning points will earn the player Covenite. Each Standard Prayer grants 1 point.
Goddess Chronicles are earned by completing Affection Prayer milestones.
On the Exchange Panel you may swap Skill Shard Vouchers for an unlearned skill or gain a set of shards for skill you have already learned.

Aeonic Gacha
Using Auroral Badges, players may attempt the gacha to receive Relics that provide additional stat bonuses and set bonuses to the player.
There are four types of gacha available with varying rarity. Rare, Epic, Legendary, and Mythic.
Players are limited to 10k gacha draws each day.
Relics are specific to each World Map location. A toggle in the upper right of the panel can be used to switch locations. Below this toggle is a gray button used to access the Relic Gallery catalog. Here you can view all Relics and see their potential stat bonuses.
| Map | Relics |
|---|---|
| Verdantglade | 70 Sylvan Relics |
| Cinder Ridge | 70 Machina Trove |
| Other | 30 |
Vendor Booth
The selection of items refreshes daily every 24 hours. Discounted resources are available through the Vendor Booth General tab. The Vault tab includes your daily free Stamina (30 pts), Quest Scrolls, Auroral Badges, and Material Realm collection implements.
Other items include a Rename Card, Shapeshifting mirror to change your appearance, and the Golden Beetle used to clear complex puzzles on the World Map.
Destiny Fruit Tree
The large peach tree in the town grows fruits which can be used on the World Map to gain resources and chests without the normal stamina cost to pick up items.
Commercium
This game function unlocks at player level 40 and includes three options.
The Trading House includes items that can be purchased using premium currency (Luminium) which is purchased using real money.
Players may also sell their own items in the Trading House, however, you may only receive Dawnium for items that sell. You cannot trade for the premium Luminium currency.
The Auction House includes Mythic Gear and Recipes that may be bid on using Luminium. Players may auction their own gear.
The Ledger displays all past trades and auctions and shows the player their earning from transactions and any fees paid.
Journal
Along the bottom of the screen next to the face icon is a book (Journal). In this panel you may access Daily Tasks including: Daily Dungeon, Map Exploration, Resource Hunt, Competition, Material Realms, Weekly Events, Daily Events, and Fantasia Ascent.
Daily Events
Initially the only function shown here is the Crucible of Hieromon which was previously unlocked on the World Map.
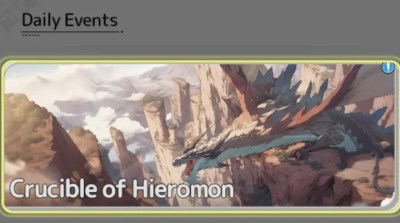
This is a 6-person boss battle that will run for 10 rounds, or until all players are defeated. The total damage dealt will determine your rewards.
Each reward can only be earned once per period. A timer in the upper-right of the screen shows the current countdown period.
The boss monster starts with 200 life bars. You can challenge the boss as many times as you want to try and get the highest score.
Weekly Events
Void Rift
During the event, pass through the portal on the map and challenge Void Rift with a team of up to 4 adventurers.
Void Rift has up to 5 floors. After clearing a floor, you have a chance to discover the portal to the next floor. The challenge ends when you reach the highest floor or find no portal to proceed.
Defeating monsters on each floor grants random rewards. The deeper you go, the greater the chance to obtain rare rewards.
You have 10 reward attempts during the event. When you finish each Void Rift challenge, 1 attempt is automatically deducted to claim all rewards from the cleared floors.
Reward Preview:
| Rolla: use them for gear enhance, ascension, and buying items from the shop. |
| Mythic Auroral Badge: use 10 to get a capsule from the Aeonic Gacha. |
| Legendary Auroral Badge: use 10 to get a capsule from the Aeonic Gacha. |
| Epic Auroral Badge: use 10 to get a capsule from the Aeonic Gacha. |
| Rare Auroral Badge: use 10 to get a capsule from the Aeonic Gacha. |
Chaos Invasion
After a 7-day countdown, the Chaos Invasion begins.
Once the event starts, chaos monsters will invade Kanstein. Defeat them to protect Kanstein!
Phase 1: Defeat Chaos monsters to collect Chaos Shards. The number of Chaos Shards collected varies depending on the team size and the monsters defeated:
- Small Monster Scale: 5-20
- Medium Monster Scale: 25-50
- Large Monster Scale: 50-100
You can collect up to 100 Chaos Shards per event.
Phase 2: Once you collect 100 Chaos Shards, you can travel through Chaos Rifts to challenge the Chaos Tyrant. You can team up with other adventurers who have collected enough Chaos Shards to face the challenge.
The first challenge against the Chaos tyrant guarantees a fixed number of Chaos Crystals. For a limited time after the event ends, you can exchange your Chaos Shards and Chaos Crystals with the Mysterious Merchant in your Home for various items. Available items vary based on your Rank.
Repulsion Rewards: Each adventurer’s highest DMG dealt to the Chaos Tyrant will contribute to the server’s total DMG. When the total DMG reaches a milestone, all adventures will receive repulsion rewards. Reward amounts vary based on your Rank.
Ranking Rewards: Every time you challenge the Chaos Tyrant, your total DMG dealt will be recorded. Ranking are based on the highest DMG dealt in a single challenge, with separate categories for different classes. After the event ends, you will receive ranking rewards based on your final placement. Reward amounts vary based on your Rank.
Rewards Overview:
| Rank | Reward |
|---|---|
| No. 1 | 30x Primal Forge Shards, 20x Covenite, 20x Legendary Auroral Badges and 200x Chaos Crystal |
| No. 2-3 | 25x Primal Forge Shards, 18x Covenite, 15x Legendary Auroral Badges and 180x Chaos Crystal |
| No. 4-5 | 20x Primal Forge Shards, 16x Covenite, 15x Legendary Auroral Badges and 180x Chaos Crystal |
| No. 6-10 | 15x Primal Forge Shards, 15x Covenite, 10x Legendary Auroral Badges and 160x Chaos Crystal |
| No. 11-20 | 15x Primal Forge Shards, 14x Covenite, 10x Legendary Auroral Badges and 160x Chaos Crystal |
| No. 21-50 | 15x Primal Forge Shards, 13x Covenite, and 140x Chaos Crystal |
| No. 51-100 | 10x Primal Forge Shards, 12x Covenite, and 140x Chaos Crystal |
| No. 101-200 | 10x Primal Forge Shards, 11x Covenite, and 120x Chaos Crystal |
| No. 201-500 | 10x Covenite and 120x Chaos Crystal |
| No. 501+ | 8x Covenite and 100x Chaos Crystal |
Daily Dungeon
You receive 2 Free Attempts each day to challenge the boss with a group of 4 players (2 extra may be purchased using Dawnium).
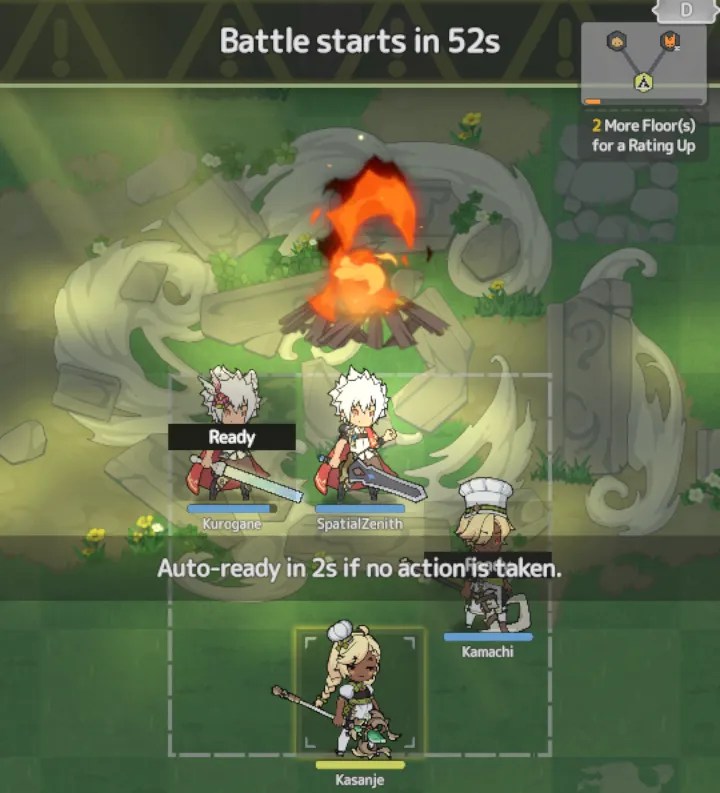
The battle uses a matching system with other players that are online. Combat involves clearing enemies from map locations before advancing to the next location. Players may vote on which location to travel to by tapping on the tile.
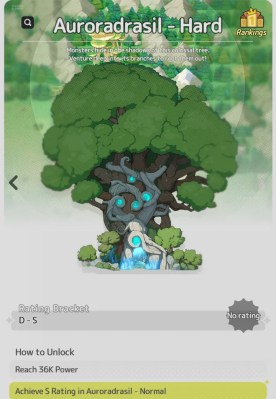
Some map locations include additional chest rewards and others are rest locations where players may use food to heal and add temporary buffs to their character.
Depending on the number of floors successfully cleared, the battle will receive a grade (A, S, etc.) and rewards will be issued. In addition to the regular rewards, you have 2 chances each day (more with spending) to claim Gear from the fight.
After Reaching Cinder Ridge, you may receive Mythic shards or even completed Mythic gear from the Daily Dungeon. A B rating will earn 6 Mythic shards, A gives 7, and S gives 8 shards.
Map Exploration
There are two functions available in this mini panel. Resource Hunt and Destiny Fruits.
Resource Hunt
Select the resource you want and the game will load the highest earning area for that item.
Tapping the Cog icon on the left of screen will open the Auto-Play menu. Select the number of attempts you want to use and it will display the total resources collectable.
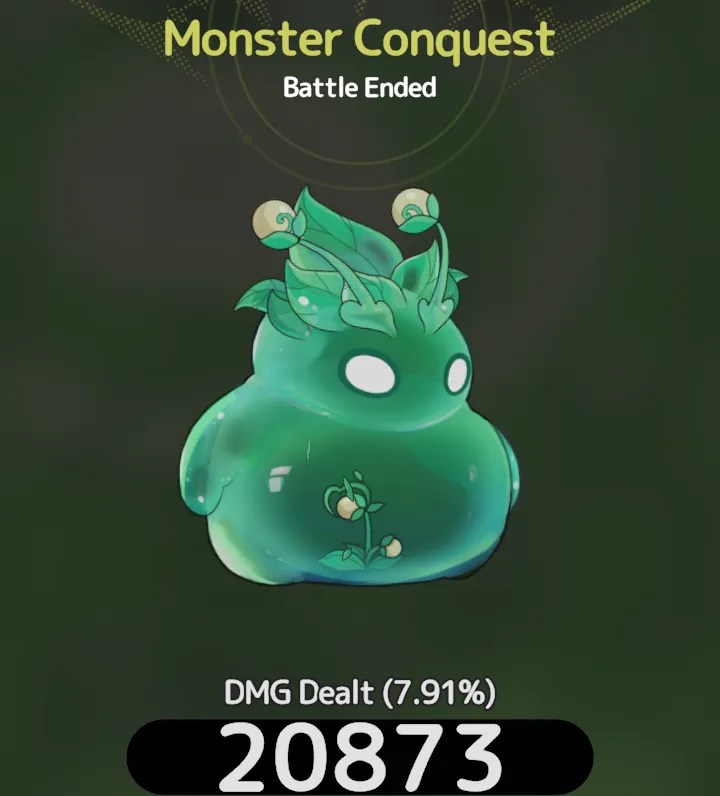
Tap Enable to start the collection activity.
While collecting, there is a chance for a special monster to spawn and for Mining Nodes to appear.
Inviting players to harvest the node will earn you Affection Tokens. Defeating the special monster rewards Dawnium and Merchant exchange currency (Feathers/Alloy).
Destiny Fruits
Collect your daily fruit supply and then move to the map to use the fruits to gain free resources and chests. Additional fruits may be collected from the tree in your village.
World Map
Players start on the island of Originisle to play the tutorial. The next location is Verdantglade (20), followed by Cinder Ridge (40).
Tapping on the mini-map open the full map viewer. you may scan the area for uncompleted regions, special monster spawns, and resource nodes.
Other structures viewable are temporary stat boosting statues, merchant trading areas, and locked bonus areas.
Using a key, a drill, or the acid potion, you may access some locked areas of the map. These are all optional and will provide extra resources.
Commissions
Starting at level 30, Commissions may be completed. Each successfully cleared commission will grant points towards the associated Partner character.

Partners will provide further stat bonuses to your character and may join you in battle for certain tasks.
Commission rewards can be used in cooking and for exchange at either Merchant in Verdantglade or Cinder Ridge.
Gear and Skills
Other than ascending a skill, when you perform an upgrade, it affects the slot where the skill is located, not the skill itself. This way you can swap skills and retain the benefits of the upgrade.
Gear can be upgraded or you can wait to get higher level gear from combating monsters. Raising your gear to set levels will unlock Resonance bonuses improving your stats overall.

Gear is frequently swapped for better stuff as you progress through the game.
Until you reach Cinder Ridge, Mythic gear will be unavailable.
The first Mythic items you can equip are earned through the Daily Dungeon. You will need 100 Mythic shards to combine for a new item.
It is widely suggested to choose a weapon for your first Mystic gear. Another option is to replace your weakest piece of gear.
Player Guides from Discord
All Relic Special Stats in Different Kingdom/Seasons
Author: QY_Maple.
https://qymaple.github.io/sxs-research-global/maple-sxs-specialrelic
Stellaris Rewards List
Author: Jinjiko.
- 15000 Main Weapon Visage: listen to the world
- 18000 PvE DMG RES +4.8% (Relic)
- 22000 Membership Badge
- 26000 Hairstyle & Headwear Visage: Listen to the World
- 30000 PvP Bonus DMG +4.8% (Relic)
- 40000 SPD +1.5% permanently (Dish)
- 50000 Home EXP Yield Boost +5% (Relic)
- 60000 PvP DMG RES +4.8% (Relic)
- 70000 ATK +1.5% permanently (Dish)
- 80000 Outfit Visage: Listen to the World
- 90000 PvE Bonus DMG +4.8% (Relic)
- 100000 ATK +1.5% permanently (Dish)
- 120000 Hero’s Handbook Star-up (Relic)
- 140000 PvE DMG RES +4.8% (Relic)
- 160000 ATK +3% permanently (Dish)
- 190000 Off-Hand Weapon Visage: Listen to the World
- 220000 PvP Bonus DMG +4.8% (Relic)
- 260000 ATK +7% permanently (Dish)
- 300000 Backwear Visage: Listen to the World
- 360000 PvP DMG RES +4.8% (Relic)
- 420000 HP +3% permanently (Dish)
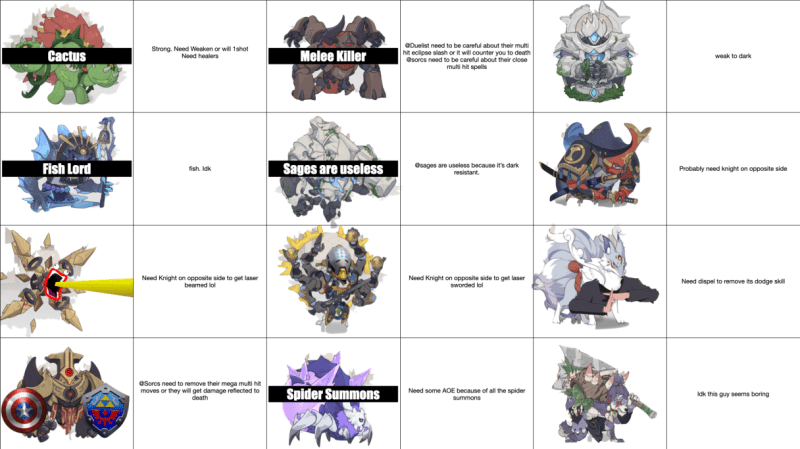
Silly Conquest Guide
Author: Teefling.
Server Progression Guide
Author: Yuuma.
Textual version for accessibility: https://docs.google.com/spreadsheets/d/1Y9xLvPMgB8tnoxOkf39KMpHDwjMxv5G6z_qWA5eiT_0/edit?gid=0#gid=0
 FatWallet Refugee