Last Updated: June 6th, 2026
Meet various medieval characters and enjoy romantic experiences, guiding your heir’s future and planning marriages. Rule your lands in sandbox mode, enhance productivity through strategic supply chains, and explore alliances, engaging in diplomacy or conflict for territory growth.
The game is a variation of the Kings Throne / King’s Choice format of castle simulations.
Game Info
Useful Links
- Homepage: https://www.37games.com/official_website/index.html?name=yyhofficial&store=1&srtl=3284.0.0.0#/
- Discord: https://discord.com/invite/yb2F9ZmWaz?cid=official&scid=homebtn&srtl=3284.0.0.0&op_scid=DXPFsMDrnogKp2UpMv7A7&customFrom=global-website
Structures and Functions
| Name | What it Does |
|---|---|
| Backyard | the main screen. |
| Post House | set paths to meet new lovers or gain resources. you can create a map with pen and paper. |
| Lover Tower | date your lovers to make more kids. |
| Marriage | pair your children with other players kids to gain bonuses. |
| Town | your primary structure, level gates all other structures. |
| Smithy | generates income. |
| Farm | generates income. |
| Council Chamber | free rewards if the exclamation mark is showing. |
| Asylum | you cook food for the homeless at this location. |
| Vagrant Shelter | homeless gather here to be fed. after fed they become members of your town. |
| College | retainers can be slotted to gain EXP for a set period of time |


Backyard
The Backyard is where you handle your lovers, your kids, and your family alliances. Getting this loop right gives you a massive power boost.
Getting Lovers
You unlock them by hitting certain Kingdom Power milestones, bumping into them randomly while exploring outside via the Post House, or picking them up during special events.
Dating
In the Lover Tower, you can pay resources to Summon a specific lover (best way to get a pregnancy) or do Random Dates for cheap intimacy points. You can also give them items like intimacy flowers to boost their stats.
Raising Kids
Your kids hang out right below the tower. Tap the little up arrow to level them up. Every time they reach a growth milestone, you get to choose their specialization—just pick whatever matches their highest natural talent.
Arranging Marriages
Once they are adults, move them to the Marriage screen. You can post a proposal to the server or accept one from someone else. When your kid marries another player’s kid, you permanently inherit the other kid’s stats.
Town
Your kingdom needs to generate cash (gold) to keep moving. Here is how to keep the economy flowing.
Level Cap
Your Town (the main hall) dictates everything. You can’t upgrade any other building past your current Town level. Once it hits Level 10, you can finally move your buildings around to organize your city.
Earning Gold
Buildings like the Farm and Smithy print money. Upgrade them 5 times, and you unlock a slot to assign a servant to them. You can eventually stack up to 3 servants per building to max out your gold income.
Exclamation Marks
Check in on real-time buildings like the Council Chamber and Backyard. If you see an exclamation mark floating over them, it means their cooldown reset and you have free rewards or actions waiting.
Feeding Homeless
Go to the Asylum outside your gates to cook broth. Use the broth to invite vagrants into your kingdom. They sit in the Vagrant Shelter until you build enough houses for them. Once you officially check them into a house, your passive gold production goes up permanently.
Battles and Retainer Upgrades
Fights
Honestly, combat is just a math check. If your military power is higher than the enemy’s and you have enough gold to fund the fight, you win. Just hit “Go” or use “Quick Battle” to breeze through them.
Retainer Stats
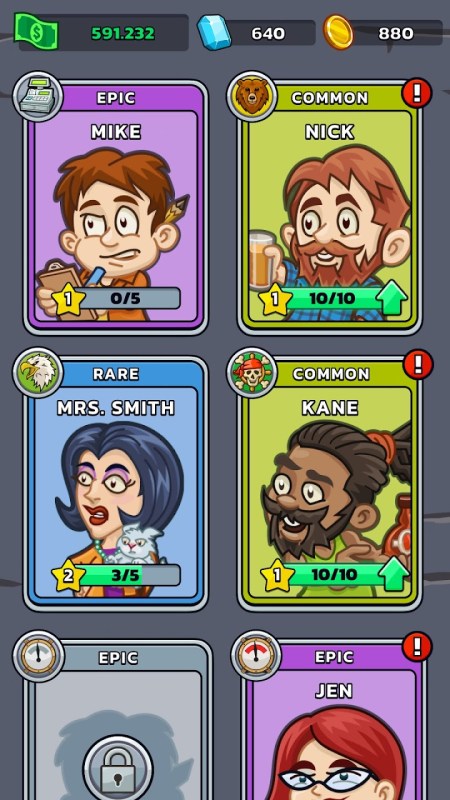
Retainers are your main commanders. They have four stats: Military (fighting), Politics (resource yields), Commerce (gold generation), and Wisdom (EXP/admin yields). You get more retainers by leveling up your main character profile or winning events.
Upgrading Retainers
Use your combat EXP to level them up. To upgrade their actual skills, build the College and send them there to study for a few hours.
Lover Benefits
Every lover is linked to a specific retainer. When you raise a lover’s intimacy and upgrade their skills, it directly boosts the stats of their paired retainer. Don’t ignore your lovers, or your fighters will stay weak.
Tips
Don’t have kids right away: The rarity and stats of your kids depend entirely on how high your intimacy is with the parent. Use your gifts on one or two favorite lovers first. High-intimacy parents make high-tier kids, which means bigger stat boosts for you when they marry.
Look past the main quest: The tutorial quest at the bottom left of your screen is a bit blind. It completely skips over some functional buildings. Manually click your Build icon every now and then—if it has a red dot, you have a new building available that the game forgot to tell you to make.
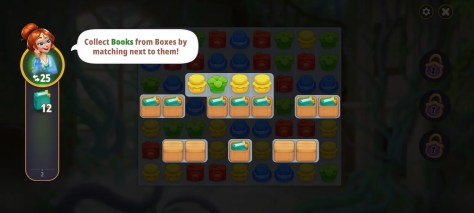
Play the mini-games: The limited-time events are actually decent. They are usually totally separate puzzle or board games that give great rewards. It’s the best way to progress if you don’t want to spend real money.
Join an Alliance immediately: As soon as you build the Alliance hall, join a group. It opens up an extra shop, daily missions, and co-op bosses that give you a steady stream of extra materials.