Tag Archives: Swagbucks

Swagbucks: Sword x Staff

Reaching level 100 in Sword x Staff within 30 days is entirely possible with an optimized daily routine.

Because the game heavily utilizes idle AFK progression, careful resource management from Day 1 will allow you to keep pace with spending players without dropping any cash.

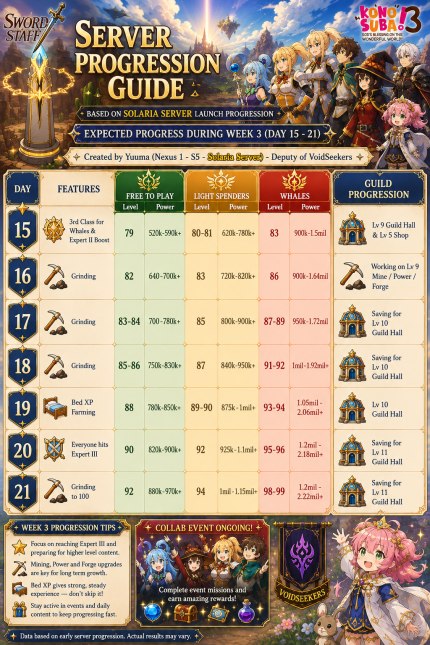
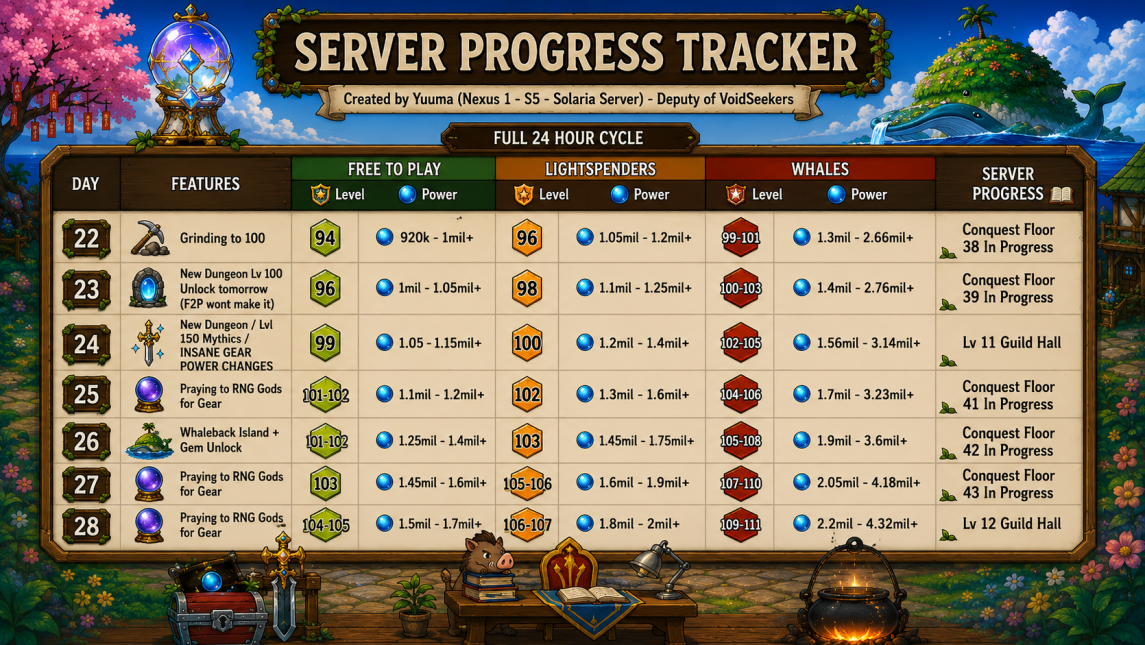
See the Visual Leveling Chart for expected daily progression. You should be able to do it in 25 days at the earliest and 29 days at the latest.


Table of Contents
  1. Offer Terms
    1. Offer Guide
      1. Daily Priority Tasks
      2. Progression and Resource Management
        1. Strategy
        2. Super Critical Steps for F2P
    2. General Game Knowledge
      1. Character Customization
        1. Selecting a Class
      2. Player Profile
        1. Other Players
      3. Guild Hall
        1. Guild Structures
          1. Guild Lobby
          2. Territory Panel
          3. Other Guild Structures
      4. Fantomon Pets
      5. Gacha System
        1. Prayer
        2. Aeonic Gacha
      6. Vendor Booth
      7. Destiny Fruit Tree
      8. Commercium
      9. Journal
        1. Daily Dungeon
        2. Map Exploration
          1. Resource Hunt
          2. Destiny Fruits
      10. World Map
      11. Commissions
      12. Gear and Skills

Offer Terms

Earn up to $84.35, on 10 goals in 30 days.

Offer Guide

Daily Priority Tasks

Commissions First: Once you have unlocked daily commissions at level 30, do them all before doing other tasks in game.

  • Stamina Utilization: Never let your stamina cap (unlikely in early game). Picking up resources or fighting mobs on the world map costs 5 stamina each. We do this to upgrade our gear.

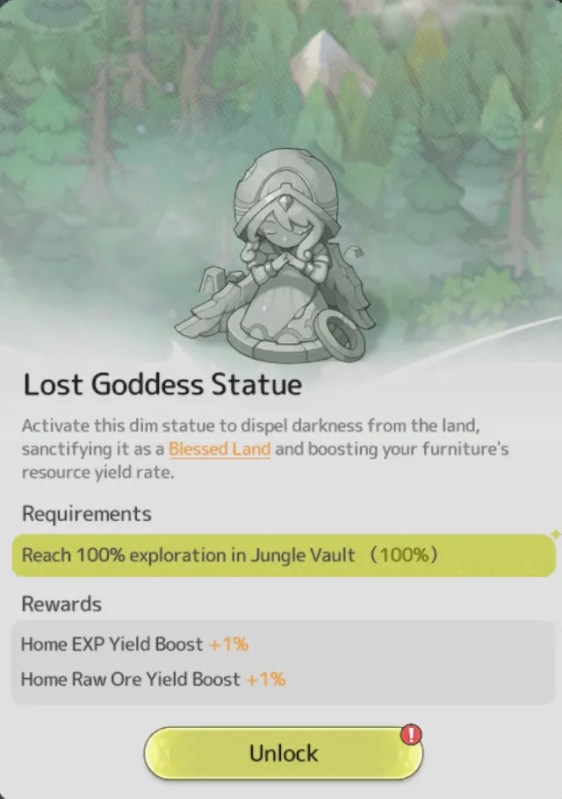
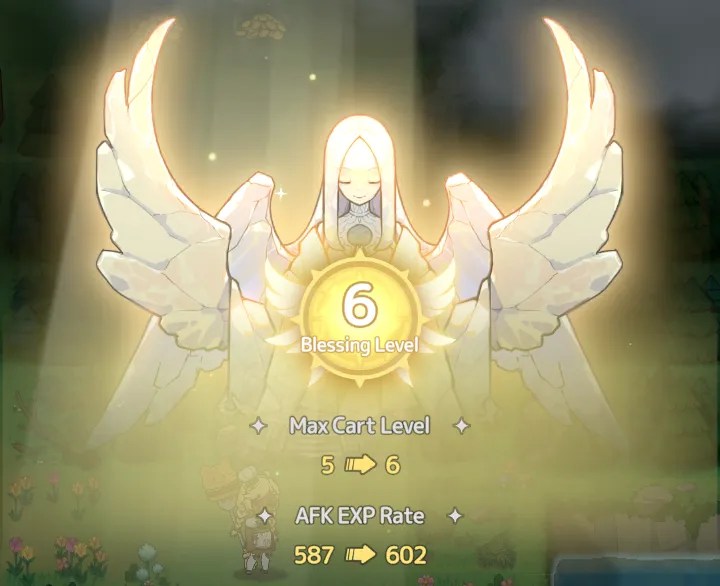
Zone Exploration: Push map boundaries in newer regions constantly, as uncovering zones provides permanent passive stacking percentage gains to your overall progress (Angel/Goddess Statues).
For tips on how to get the AFK resting and daily commission routine just right:

BEST tips to power up FAST in Sword x Staff

Progression and Resource Management

  • Upgrade Evenly: Balance your gear, skill levels, and Fantomon pets concurrently rather than over-investing in a single category. When upgrading skills, it is the Slot that gets the upgrade; not the skill. So you can freely swap skills without losing progress.
  • Join an Active Guild: Early guild hall access grants crucial group rewards, passive buffs, and cooperative boosts that significantly cut down time-to-level.

Multiplayer: The game makes heavy use of group battles and dungeons.
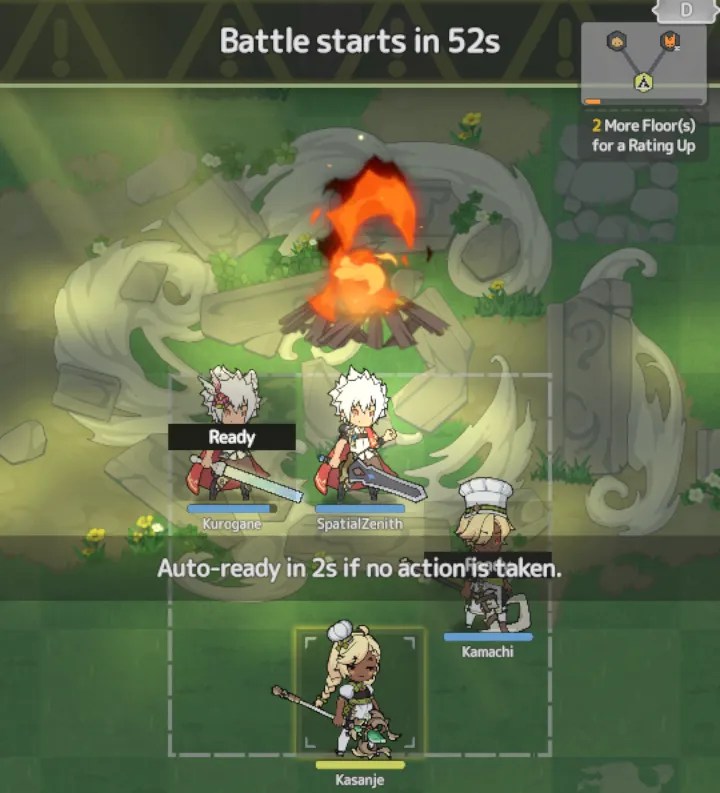
  • Add active players to your friends list and keep an eye on the chat log for party invites. Sharing the location of a mining node or a boss monster spawn will earn you Affection Tokens for participation.
Strategy

You must balance active zone exploration on the map locations, strict stamina management, and maximizing your idle AFK resting experience (bed).
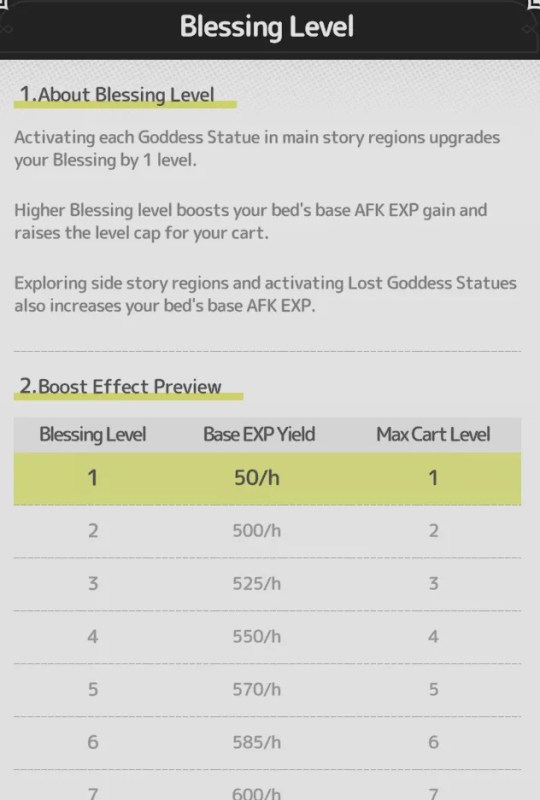
Angel statues will boost your bed’s exp multiplier.

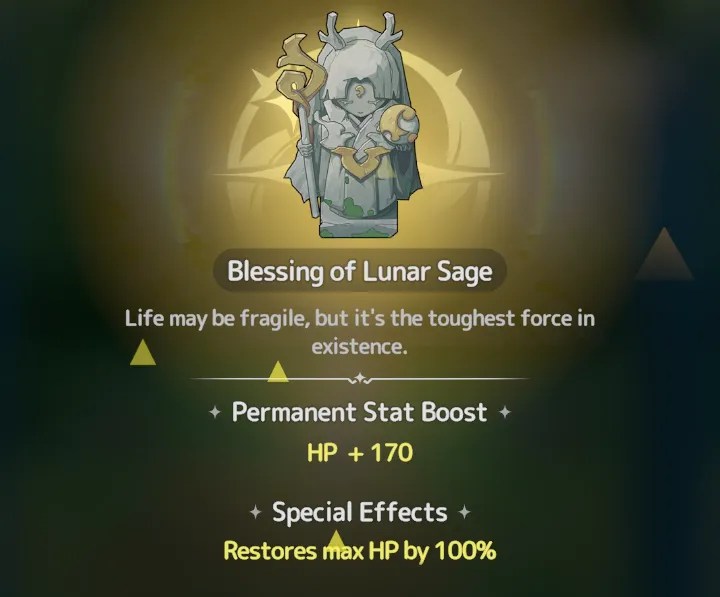
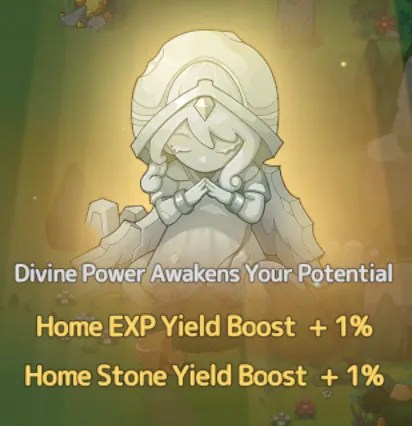
Lunar Sage statues give a permanent boost to HP.
Your idle reward cart accumulates resources and materials over time. Prioritize upgrades to the cart for items that can be used to boost your Skill and Gear.

After you unlock Commissions (Level 35?), always clear your daily commissions completely before working on map exploration. You can use Quest Scrolls purchased from Shops to complete additional commissions each day.
I reached level 20 on the first day and level 30 the second day.

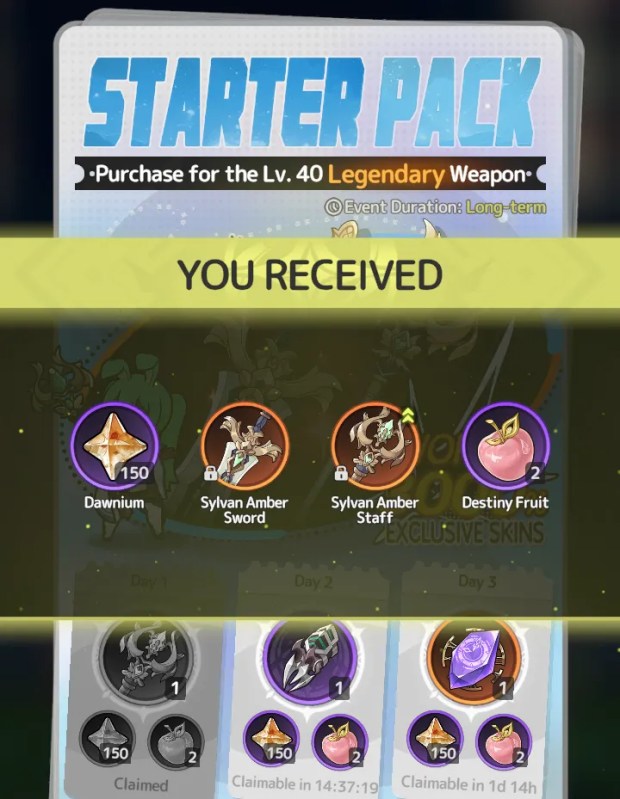
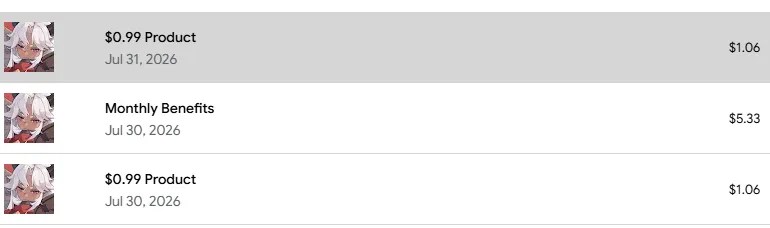
I purchased the Starter Pack (0.99), Monthly Benefits (4.99), and a 99-cent pop up offer.
Super Critical Steps for F2P

Every single day, navigate to your vault to claim your free stamina (30 pts).

You must also use your accumulated free currency to purchase Destiny Fruits, Refined Ore, and Quest Scrolls. These are non-negotiable must-buys for F2P account scaling.

If there is an active Event or Collab Event, check the shop to see if they have any of the above mentioned items.

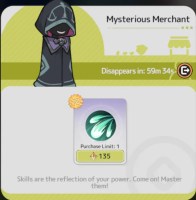
Above Mythic gear is Primordial. The Mysterious Merchant will offer these items later in game. Consider saving your premium currency for this exchange if you plan on continuing play after clearing the paid offer.
TIP: If you hit a wall in power rating, try upgrading your gear and skills. Use any destiny fruits you have to get more resources to spend on upgrades. Check the chat log for group dungeons you can join, special monster spawns, or free Resource Nodes. Lastly, hand out in the Guild Hall and collect Affection Tokens from the Sheepfold, Garden, and Roost.

General Game Knowledge

The daily server reset time is 8:00 (UTC-5).

Character Customization

The game includes a fully customizable character avatar and several cosmetic outfits and accessories you can swap between.

Selecting a Class
Level 1

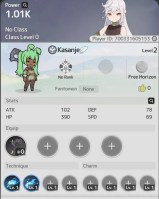
You can either choose Mage or Warrior. I took Mage, but I think the Warrior looks more survivable. I see other players with self healing abilities that are more effective than the single spell I have learned.

Learning and upgrading Skills from Prayers will improve your Class Level. Every 10 Class Levels, you move up a Rank. Some world map game content is gated behind Class Levels and Ranks.

Player Profile

Your profile page displays all character stats including gear, skills, and clothing.

This page is what other players will see when viewing your profile.

Other functions include consuming Food for stat bonuses, healing, and viewing your Player ID (used in social media events).

The face icon on the bottom of the screen can be used to access your character sheet. There are links to access your Skill loadouts and your Class rank.

Clothing on your characters avatar can be adjusted using the Styling panel (top-right).

Additional clothing items are earned from Events, the Trading House (Level 40), or can be purchased through the Store for real money.

Raising your Style level will grant a small stat bonus to your character, but not so much that it gives players an unfair advantage.

A link to the Magic Cat is shown on the right side of the Styling Panel. Using a Shapeshifting Mirror you may alter your avatars appearance.

Other Players

On a player’s profile page there are options to send a private message, hold a practice sparring match, add the player to your friend list, exchange items from active events, block the player, or to report them.

Possible reporting options for players include: Player Name, Fantomon Name, Cheating, or Unauthorized Trading.

Guild Hall

Joining a Guild allows you to complete tasks to earn Fantomon Aptitude items, gain gacha tokens, and Affection tokens.

Other resources are earning from setting your character to AFK in a facility.
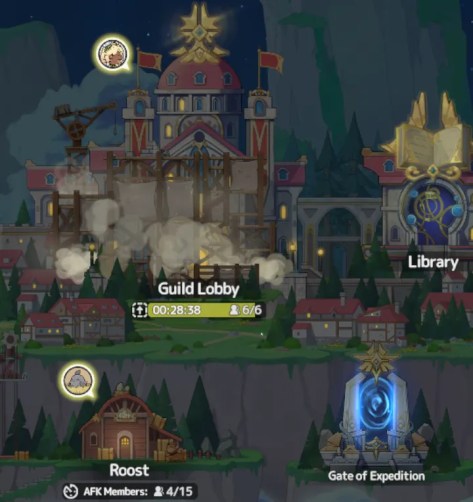
There is a 2-hour cooldown between quitting a guild and joining a new one. If you have made all Daily attempts in one guild and then join a different one, you will not receive new attempts.

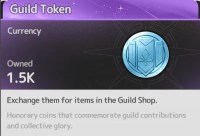
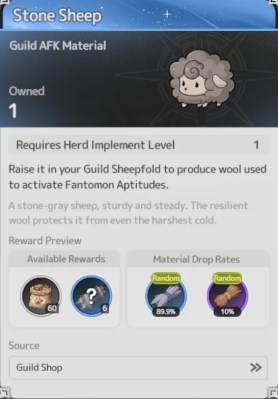
Guild Tokens may be spent in the Shop to get Sheep, Flowers, and Chickens among other items.
Guild Structures
Guild Lobby
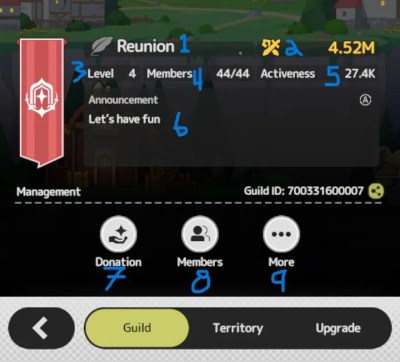
  1. Guild Name
  2. Total Member Power Rating
  3. Guild Level
  4. Number of Members
  5. Activeness Score
  6. Announcement (message)
  7. Donation
  8. Member List
  9. More Options

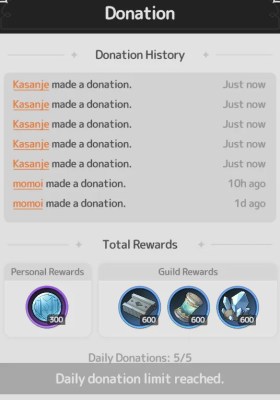
Donation: Each day you have 5 chances to donate Dawnium to your Guild. The first time each day is free, after that you may spend additional resources to donate again. Donating will improve your Contribution Score (Activeness). Donating will earn you Guild Tokens.
Member List: You can view all guild members and see which ones are online or offline. The guild leadership and deputies are visible.

Tapping on a guild members avatar will open their player profile.

I would advise you to add all guild members to your friends list to improve your Affection Token accrual rate.

More Options: You have either the option to leave the guild or to report the guild if there is a problem. Possible problems reportable include: Guild Name, Announcement, and Recruitment Slogan. Quitting a guild will start a 2-hour cooldown, after which you may join a new guild.

Territory Panel

This overview displays the guilds current Resource amounts, the current level of guild structures, gathering speeds, and the number of AFK members assigned to each structure. If an upgrade is in progress on a structure, the timer will be displayed here.
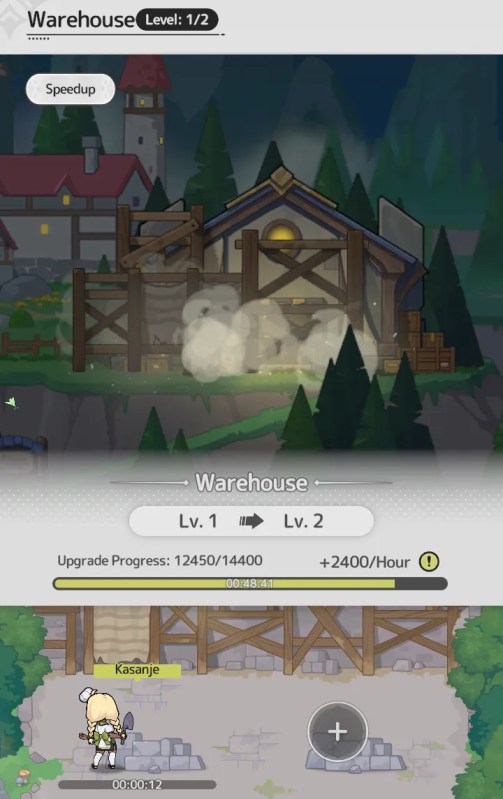
  • Gate of Expedition: Guild Conquest Progress
  • Shop: Unlocked Items
  • Warehouse: Resource Limit
  • Library: Activated Glyphs and active research.
Other Guild Structures

Fantomon Aptitude materials can be acquired by planting flowers, herding sheep, and roosting chickens. Upgrading the facility will increase the number of raising slots available to guild members.
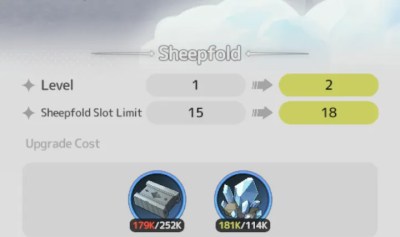
  • You can help other members maintain or collect their AFK items.
  • Each time you assist another member, you’ll receive Affection Tokens as a reward.
  • When your own AFK items are collected by others, you can view and claim the rewards in the AFK Record.

The AFK Implements used to groom the sheep, chickens, and plants can be upgraded by repeatedly completing tasks in the facility.

ImplementCompletionsYield Boost
Tender4010%/30%
Lunar16020%/60%
Solar48030%/90%
Dreamy144040%/120%

Spending time checking the three guild item facilities is a good source of Affection Tokens, beyond those you earn from completing group battles with friends.

Also, because other guild members can collect your completed sheep/flower/chickens, you don’t need to worry about checking on your items. Just go to the Record page to collect the rewards.
Fantomon Pets

Gacha System

Prayer
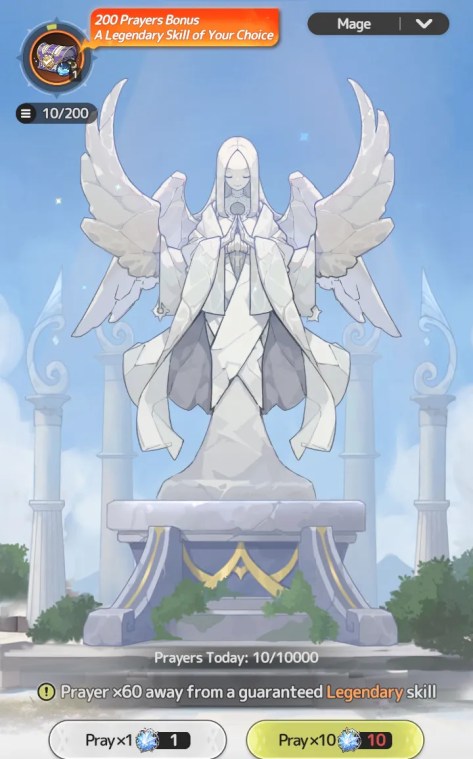
This function allows users to spend Stellatie tokens in a gacha to gain skills for their Class. A filter at the top of the panel allows users to switch between Mage and Warrior. At level 100, a player may switch their Class.
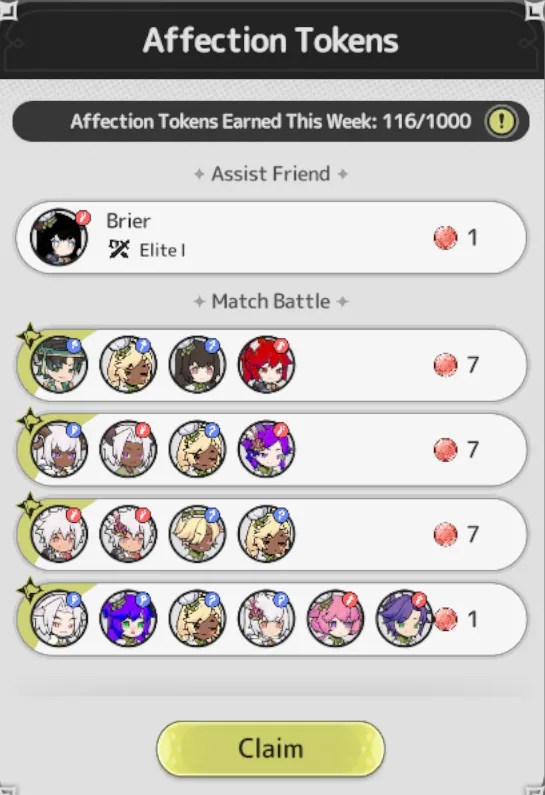
Affection Tokens may be used for Prayer.

Similarly, 1 point is earned for each Affection prayer.

Completing sets of prayers and earning points will earn the player Covenite. Each Standard Prayer grants 1 point.

Goddess Chronicles are earned by completing Affection Prayer milestones.

On the Exchange Panel you may swap Skill Shard Vouchers for an unlearned skill or gain a set of shards for skill you have already learned.

Aeonic Gacha

Using Auroral Badges, players may attempt the gacha to receive Relics that provide additional stat bonuses and set bonuses to the player.

There are four types of gacha available with varying rarity. Rare, Epic, Legendary, and Mythic.

Players are limited to 10k gacha draws each day.

Relics are specific to each World Map location. A toggle in the upper right of the panel can be used to switch locations. Below this toggle is a gray button used to access the Relic Gallery catalog. Here you can view all Relics and see their potential stat bonuses.

MapRelics
Verdantglade70 Sylvan Relics
Cinder Ridge70 Machina Trove
Other30

Vendor Booth

The selection of items refreshes daily every 24 hours. Discounted resources are available through the Vendor Booth General tab. The Vault tab includes your daily free Stamina (30 pts), Quest Scrolls, Auroral Badges, and Material Realm collection implements.

Other items include a Rename Card, Shapeshifting mirror to change your appearance, and the Golden Beetle used to clear complex puzzles on the World Map.

Destiny Fruit Tree

The large peach tree in the town grows fruits which can be used on the World Map to gain resources and chests without the normal stamina cost to pick up items.

Commercium

This game function unlocks at player level 40 and includes three options.

The Trading House includes items that can be purchased using premium currency (Luminium) which is purchased using real money.

Players may also sell their own items in the Trading House, however, you may only receive Dawnium for items that sell. You cannot trade for the premium Luminium currency.

The Auction House includes Mythic Gear and Recipes that may be bid on using Luminium. Players may auction their own gear.

The Ledger displays all past trades and auctions and shows the player their earning from transactions and any fees paid.

Journal

Along the bottom of the screen next to the face icon is a book (Journal). In this panel you may access Daily Tasks including: Daily Dungeon, Map Exploration, Resource Hunt, Competition, Material Realms, Weekly Events, Daily Events, and Fantasia Ascent.

Daily Events

Initially the only function shown here is the Crucible of Hieromon which was previously unlocked on the World Map.
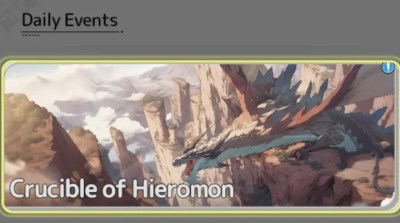
This is a 6-person boss battle that will run for 10 rounds, or until all players are defeated. The total damage dealt will determine your rewards.

Each reward can only be earned once per period. A timer in the upper-right of the screen shows the current countdown period.

The boss monster starts with 200 life bars. You can challenge the boss as many times as you want to try and get the highest score.

Weekly Events
Void Rift

During the event, pass through the portal on the map and challenge Void Rift with a team of up to 4 adventurers.

Void Rift has up to 5 floors. After clearing a floor, you have a chance to discover the portal to the next floor. The challenge ends when you reach the highest floor or find no portal to proceed.

Defeating monsters on each floor grants random rewards. The deeper you go, the greater the chance to obtain rare rewards.

You have 10 reward attempts during the event. When you finish each Void Rift challenge, 1 attempt is automatically deducted to claim all rewards from the cleared floors.

Reward Preview:

Rolla: use them for gear enhance, ascension, and buying items from the shop.
Mythic Auroral Badge: use 10 to get a capsule from the Aeonic Gacha.
Legendary Auroral Badge: use 10 to get a capsule from the Aeonic Gacha.
Epic Auroral Badge: use 10 to get a capsule from the Aeonic Gacha.
Rare Auroral Badge: use 10 to get a capsule from the Aeonic Gacha.
Chaos Invasion

After a 7-day countdown, the Chaos Invasion begins.

Once the event starts, chaos monsters will invade Kanstein. Defeat them to protect Kanstein!

Phase 1: Defeat Chaos monsters to collect Chaos Shards. The number of Chaos Shards collected varies depending on the team size and the monsters defeated:

  • Small Monster Scale: 5-20
  • Medium Monster Scale: 25-50
  • Large Monster Scale: 50-100

You can collect up to 100 Chaos Shards per event.

Phase 2: Once you collect 100 Chaos Shards, you can travel through Chaos Rifts to challenge the Chaos Tyrant. You can team up with other adventurers who have collected enough Chaos Shards to face the challenge.

The first challenge against the Chaos tyrant guarantees a fixed number of Chaos Crystals. For a limited time after the event ends, you can exchange your Chaos Shards and Chaos Crystals with the Mysterious Merchant in your Home for various items. Available items vary based on your Rank.

Repulsion Rewards: Each adventurer’s highest DMG dealt to the Chaos Tyrant will contribute to the server’s total DMG. When the total DMG reaches a milestone, all adventures will receive repulsion rewards. Reward amounts vary based on your Rank.

Ranking Rewards: Every time you challenge the Chaos Tyrant, your total DMG dealt will be recorded. Ranking are based on the highest DMG dealt in a single challenge, with separate categories for different classes. After the event ends, you will receive ranking rewards based on your final placement. Reward amounts vary based on your Rank.

Rewards Overview:

RankReward
No. 130x Primal Forge Shards, 20x Covenite, 20x Legendary Auroral Badges and 200x Chaos Crystal
No. 2-325x Primal Forge Shards, 18x Covenite, 15x Legendary Auroral Badges and 180x Chaos Crystal
No. 4-520x Primal Forge Shards, 16x Covenite, 15x Legendary Auroral Badges and 180x Chaos Crystal
No. 6-1015x Primal Forge Shards, 15x Covenite, 10x Legendary Auroral Badges and 160x Chaos Crystal
No. 11-2015x Primal Forge Shards, 14x Covenite, 10x Legendary Auroral Badges and 160x Chaos Crystal
No. 21-5015x Primal Forge Shards, 13x Covenite, and 140x Chaos Crystal
No. 51-10010x Primal Forge Shards, 12x Covenite, and 140x Chaos Crystal
No. 101-20010x Primal Forge Shards, 11x Covenite, and 120x Chaos Crystal
No. 201-50010x Covenite and 120x Chaos Crystal
No. 501+8x Covenite and 100x Chaos Crystal
Daily Dungeon

You receive 2 Free Attempts each day to challenge the boss with a group of 4 players (2 extra may be purchased using Dawnium).

The battle uses a matching system with other players that are online. Combat involves clearing enemies from map locations before advancing to the next location. Players may vote on which location to travel to by tapping on the tile.
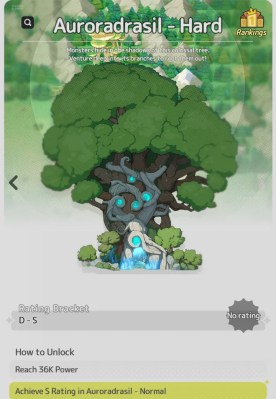
Some map locations include additional chest rewards and others are rest locations where players may use food to heal and add temporary buffs to their character.

Depending on the number of floors successfully cleared, the battle will receive a grade (A, S, etc.) and rewards will be issued. In addition to the regular rewards, you have 2 chances each day (more with spending) to claim Gear from the fight.

After Reaching Cinder Ridge, you may receive Mythic shards or even completed Mythic gear from the Daily Dungeon. A B rating will earn 6 Mythic shards, A gives 7, and S gives 8 shards.

Map Exploration

There are two functions available in this mini panel. Resource Hunt and Destiny Fruits.

Resource Hunt

Select the resource you want and the game will load the highest earning area for that item.

Tapping the Cog icon on the left of screen will open the Auto-Play menu. Select the number of attempts you want to use and it will display the total resources collectable.
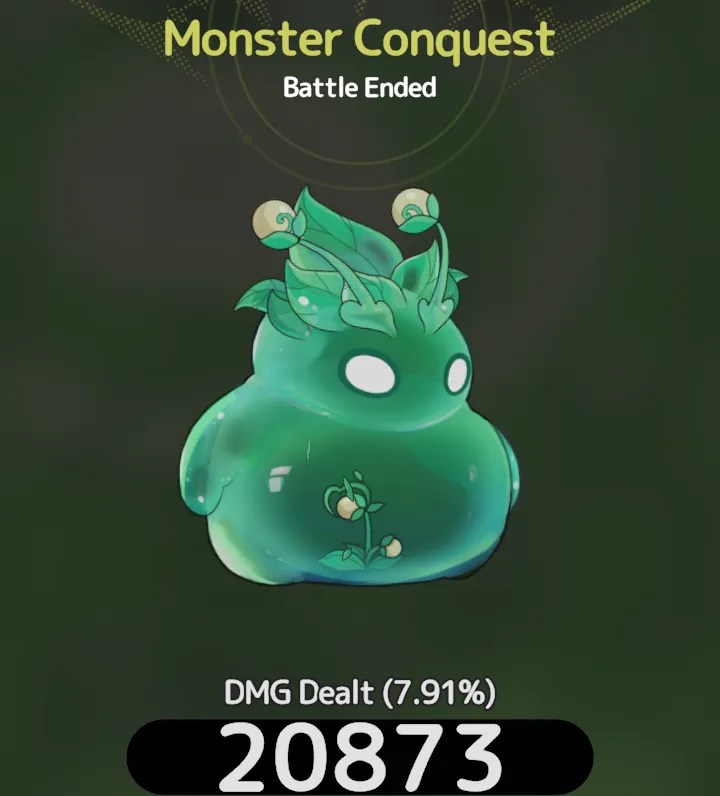
Tap Enable to start the collection activity.

While collecting, there is a chance for a special monster to spawn and for Mining Nodes to appear.

Inviting players to harvest the node will earn you Affection Tokens. Defeating the special monster rewards Dawnium and Merchant exchange currency (Feathers/Alloy).

Destiny Fruits

Collect your daily fruit supply and then move to the map to use the fruits to gain free resources and chests. Additional fruits may be collected from the tree in your village.

World Map

Players start on the island of Originisle to play the tutorial. The next location is Verdantglade (20), followed by Cinder Ridge (40).

Tapping on the mini-map open the full map viewer. you may scan the area for uncompleted regions, special monster spawns, and resource nodes.

Other structures viewable are temporary stat boosting statues, merchant trading areas, and locked bonus areas.

Using a key, a drill, or the acid potion, you may access some locked areas of the map. These are all optional and will provide extra resources.

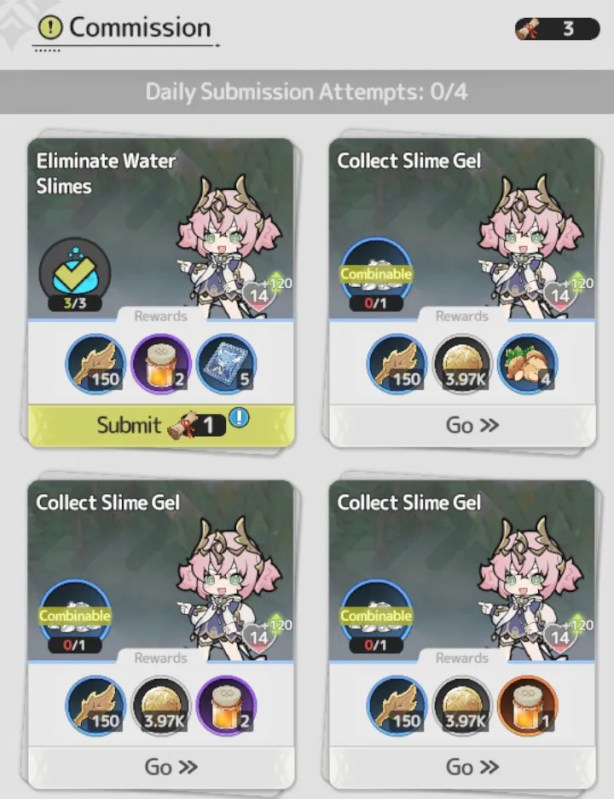
Commissions

Starting at level 30, Commissions may be completed. Each successfully cleared commission will grant points towards the associated Partner character.

Partners will provide further stat bonuses to your character and may join you in battle for certain tasks.

Commission rewards can be used in cooking and for exchange at either Merchant in Verdantglade or Cinder Ridge.

Gear and Skills

Other than ascending a skill, when you perform an upgrade, it affects the slot where the skill is located, not the skill itself. This way you can swap skills and retain the benefits of the upgrade.

Gear can be upgraded or you can wait to get higher level gear from combating monsters. Raising your gear to set levels will unlock Resonance bonuses improving your stats overall.

Gear is frequently swapped for better stuff as you progress through the game.

Until you reach Cinder Ridge, Mythic gear will be unavailable.

The first Mythic items you can equip are earned through the Daily Dungeon. You will need 100 Mythic shards to combine for a new item.

It is widely suggested to choose a weapon for your first Mystic gear. Another option is to replace your weakest piece of gear.

Player Guides from Discord

All Relic Special Stats in Different Kingdom/Seasons

Author: QY_Maple.

https://qymaple.github.io/sxs-research-global/maple-sxs-specialrelic

Stellaris Rewards List

Author: Jinjiko.

  • 15000    Main Weapon Visage: listen to the world
  • 18000    PvE DMG RES +4.8% (Relic)
  • 22000    Membership Badge
  • 26000    Hairstyle & Headwear Visage: Listen to the World
  • 30000    PvP Bonus DMG +4.8% (Relic)
  • 40000    SPD +1.5% permanently (Dish)
  • 50000    Home EXP Yield Boost +5% (Relic)
  • 60000    PvP DMG RES +4.8% (Relic)
  • 70000    ATK +1.5% permanently (Dish)
  • 80000    Outfit Visage: Listen to the World
  • 90000    PvE Bonus DMG +4.8% (Relic)
  • 100000    ATK +1.5% permanently (Dish)
  • 120000    Hero’s Handbook Star-up (Relic)
  • 140000    PvE DMG RES +4.8% (Relic)
  • 160000    ATK +3% permanently (Dish)
  • 190000    Off-Hand Weapon Visage: Listen to the World
  • 220000    PvP Bonus DMG +4.8% (Relic)
  • 260000    ATK +7% permanently (Dish)
  • 300000    Backwear Visage: Listen to the World
  • 360000    PvP DMG RES +4.8% (Relic)
  • 420000    HP +3% permanently (Dish)
Silly Conquest Guide

Author: Teefling.
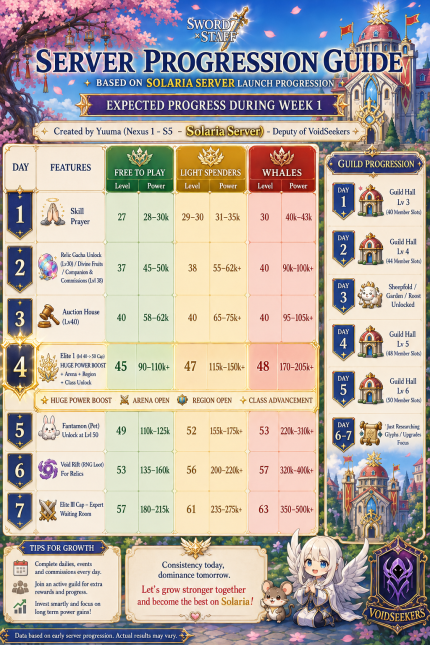
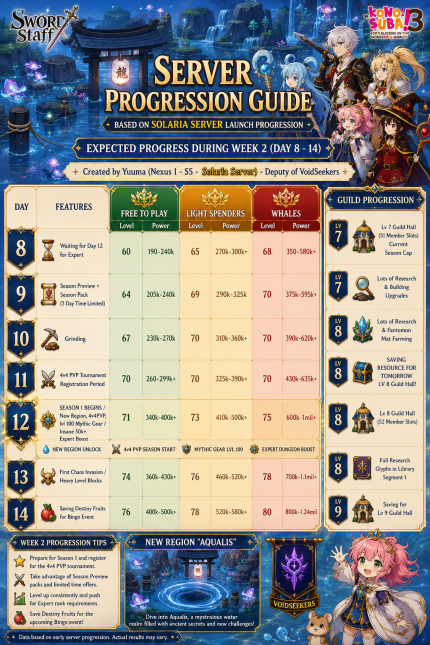
Server Progression Guide

Author: Yuuma.

Textual version for accessibility: https://docs.google.com/spreadsheets/d/1Y9xLvPMgB8tnoxOkf39KMpHDwjMxv5G6z_qWA5eiT_0/edit?gid=0#gid=0
Yarn Loop

Yarn Loop is a calming and visually satisfying puzzle game where colorful bobbins glide along a conveyor, collecting matching stitches to complete cozy knitted patterns.

Manage each bobbin’s capacity wisely—use them fully to clear them, or save the remaining thread on the rack for your next strategic move. Reach the listed goals to earn!

Offer Link: https://www.swagbucks.com/games/apps/1672893/yarn-loop?rb=69384823

Offer Terms

  • Must be installing Yarn Loop for the first time to receive SB.
  • In-app purchases and upgrades are available.
  • Award will pend for 5 days.
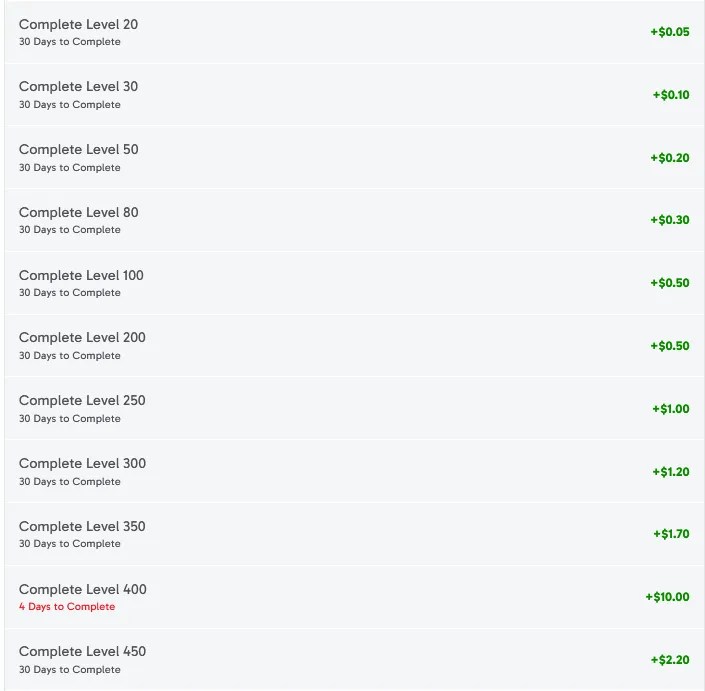
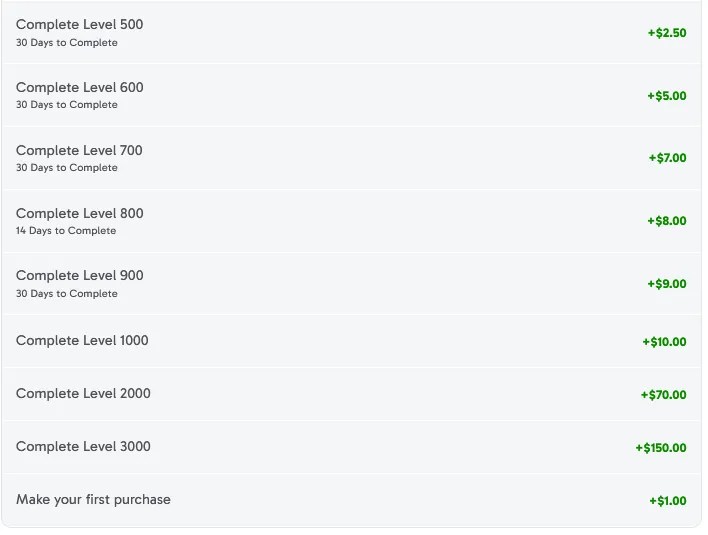
  • You must complete goals within 60 days of installing to receive Up to 28,025 SB.
The community has reported mixed results with completing this offer. The puzzles can be tricky for some folks.

Yarn Loop Tips

  • Do not open reward tabs (like the “duck event”) immediately. Save them until you actually run out of lives to maximize the “hours of free lives” granted by events.
  • If you make a mistake, it is often faster to restart the level immediately rather than trying to fix it, especially since level layouts (spool spawning) remain consistent upon restarting.
  • Be prepared for a time commitment; individual levels can take anywhere from 2 to 10 minutes to complete.
  • Remember that spools will always spawn in the same locations unless you use a power-up to mix up the board.
  • Check for new events every two days to earn free lives and avoid having to watch ads for extras.
  • The game only speeds up at the very end of a level once a win is officially guaranteed.

Idle Distiller Tycoon Game

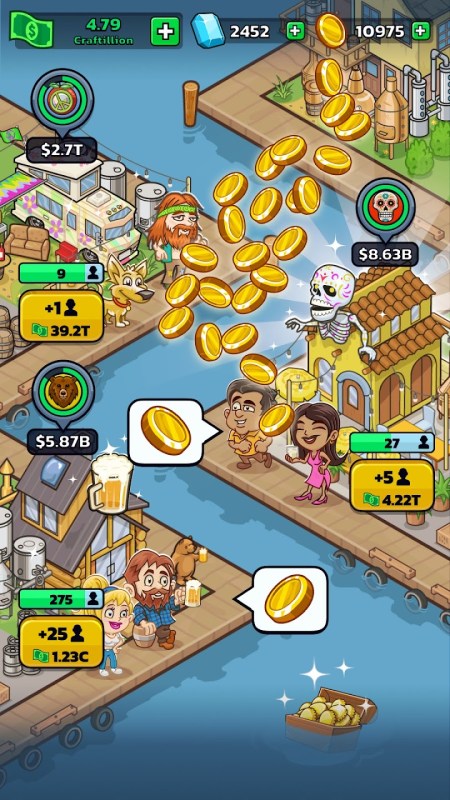
Welcome to Idle Distiller Tycoon, the world’s greatest idle tycoon game – it is a simulation game that mixes beer factory management and earning money to become a rich capitalist billionaire. Reach listed events to earn!

About

  • Must be installing Idle Distiller for the first time to receive SB.
  • In-app purchases and upgrades are available.
  • Award will pend for 10 days
  • You must complete goals within 30 days of installing to receive Up to 11,190 SB

Social Links

Specifications

  • Developer: Kano Games
  • Category: Tycoon / Idle Game
  • File Size: 177 MB
  • Released on: Jul 6, 2021

Swagbucks Link: https://www.swagbucks.com/games/apps/1672268/idle-distiller?rb=69384823 (Android)

Idle Distiller Guide

We’re given 30 days to clear the objectives.

For reference, I was only able to clear level 50 on Idle Monster Tycoon by purchasing two monthly passes and playing every day. That was on FreeCash and I had a full 45 days.

Update 4/11: Reached Season 15 on day 4. Have spent $2 for a small Diamond pack.

Spending

Here we only get 30 days, so I only expect to make it to level 40 for this offer. There are also the spending goals to consider.

The first purchase is reimbursed by only $1, and the Pass offers just $2 in reimbursed funds, but it costs $15. These are not good numbers for purchase reimbursements.

Strategy

These Tycoon games all follow the same format. You will have a single game screen with a number of shops active on the board generating cashflow. Shops must be actively tapped on to collect the generated cash.

Cash may be spent to hire additional staff for the shops, with milestones (50-100) either rewarding the player or completing a task.

Each level (Episode) has a set number of tasks that need to be completed before you can advance to the next stage. In addition to hiring staff at shops, you may also assign a manager to automate the cash collection.

As you advance through the game, the required level of the managers to use automatic cash collection increases. On some maps, certain shops will be omitted. You may max out a manager only to have them not take part in a particular map, slowing your progress.

In between stages, there will be a speed tapping function to receive a bonus for the next round.

I’ve found that using 3 fingers to “drum” the screen works well.

Alternatively, hover a finger over the screen and then using your other hand rapidly tap on the back of the finger. This will cause a bouncing effect that will allow you to tap faster.

Tasks

The game does not take previous task completions into account for future tasks. That is, you only get credit for currently active tasks.

So, it is important to consider whether completing a task may negatively impact your progress on a given stage.

For example, if you could possibly hire more staff at a shop, but you do not currently have a task to do so, then refrain from hiring more until a relevant task appears.

Sometimes, you do need to hire more staff to hit a milestone and increase cashflow to a higher ranking, just remember there are costs to all our actions.

Event Stages

During the course of regular gameplay there will be limited time (1-3 day) event maps with different themes. The rewards from these events maps will be key to clearing the main map for levels 25 and above.

Clearing Milestones will guarantee benefits back on the main game after the event ends. Ranking high on the Leaderboard on an event map will result in special rewards including Epic Boost Cards.

Consider saving and only spending Diamonds on the event maps to secure the highest score possible.

Though, keep in mind that regular players will also be competing for a high ranking, and as with any game there will be whales (big spenders).

Newer Businesses will quickly outperform older ones, so open the next Business as soon as you are able! Each time you jump ahead, focus heavily on your newest Business.

Tips
  • There is no benefit to increasing shop staff beyond the MAX limit.
  • You don’t need to swipe to open crates, tapping the screen works fine.
  • Watch Ads to double your cashflow and gain cash bonuses.
  • Advertisements will often include local businesses, may also contain marketing materials for nicotine or controlled substances.
  • Tap the Pelican to watch an ad and receive cash.
  • Purchasing Card in the shop will count towards task completions.
  • I recorded free Coins appearing every 6 minutes on the event map and Trades every 20 minutes. This did not seem to happen on the main map
  • Be mindful of the Trades you are offered, some may take away precious cards for upgrades. Its okay to decline a trade if you don’t have any active quests to complete Trades.
Gallery

Top 10 Best Games Completed

I have been using Swagbucks since 2020 and FreeCash since 2022, and in that time I have played many games. Though never more than once (for an offer).

I like to check both sites before deciding which platform to use. I also check MyPoints and InboxDollars, although I mostly get referrals from those sites.

Challenges

I have revisited some titles to check if the offer terms have been changed or if the instruction and tips I have offered are still relevant. Sometimes it is necessary to re-install a game to simulate completing an offer, challenging myself to reach most of the goals listed.

Two titles in particular, Raid: Shadow Legends and The Grand Mafia. With these two, I challenged myself to a simulated playthrough several times as the offer terms continued to change.

I have my favorite titles that I have played, there are some that I continued to play well after completing the offer. Some games just had the right hook to keep me playing.

But the top 10 best games I have completed would have to be those that I had the easiest run through and earned me the greatest payouts.

Top 10 Best Games

10. Fable Town

Type: Merging

I made a really nice guide for this one, but I spent too much money on it. I only earned $13.19 after spending $38.90. In hindsight, I think it could be done with little to no spending.

9. Puzzles and Conquest

Type: 4X Game and Match3

I earned $14.48 after spending on this title. One of the early games I attempted, I enjoyed the Match3 mechanics.

Publisher: 37Games Global

8. RAID: Shadow Legends

Type: Grid Battle and MMORPG

I did this one a long time ago and earned $20 after clearing spending goals of $25 to buy Shards.

Later the terms changed to reaching levels without spending being necessary.

7. Battle Night

Type: Grid Battle and Idle RPG

I did this one when it was first released for $20 with no spending needed.

Years later, I did a playtest and found that $100 was likely achievable.

6. Idle Bank Tycoon

Type: Tycoon

This was a challenge. Tycoon games are all about micromanagement.

There was a 10 day time limit and I finished on day 7 to earn $36.83. I only spent $1 on this game.

5. Panthia

Type: Merge

I spent $14.91 on this game and earned $39.86. It was an easy game to play.

4. Sea of Conquest

Type: 4X Game and Naval.

I did a really robust guide on this game when I was playing it.

I earned $54 from the offer, sadly, I missed the final objectives before time ran out.

I continued playing a few weeks after finishing the offer because I liked it so much.

3. State of Survival

Type: 4X Game and Apocalypse

I earned $56 playing this Zombie Apocalypse game through Adgem.

The publisher frequently runs cross-over events with other franchises in the genre.

I only spent $5.33 on the starter pack with Lucky.

2. West Game

Type: 4X Game

This county western game was one of the early big wins I had.

I played it on FreeCash about 4 years ago and earned $62.64 after reaching the final goal.

I only spent $1 on a beginner pack.

1. Call of Dragons

Type: 4X Game and Historical

My best game completion yet. I managed to earn $142 after spending $54.36 on packs.

Tier 4 Troops takes some time but is worth attempting.

Merge Gardens

I’m doing this one through FreeCash. It is a Merging game with Match3 puzzles for advancement through the game.

Update (Day 10): I gave up. Uninstalled it yesterday. I was struggling to progress through the puzzles and I hated playing the game.

I usually enjoy Merge games. Not this one.

I could have made it to 30, but the amount of time needed felt like a waste for only $1.88.

I checked the offer terms for Swagbucks and didn’t like the time limits on completing stages. They also had too many purchase requirements. The offer through FreeCash doesn’t include any purchases and has set time limits.

I’m not pleased with the game.

The only thing you really need to do is clear the puzzles, but all the micromanagement stuff is drawing my attention and wasting time that could be spent on puzzles.

It’s addictive.

But honestly, neither site has a good deal. I wouldn’t suggest this offer. A third of the reward is relegated to bonus goals that are unachievable.

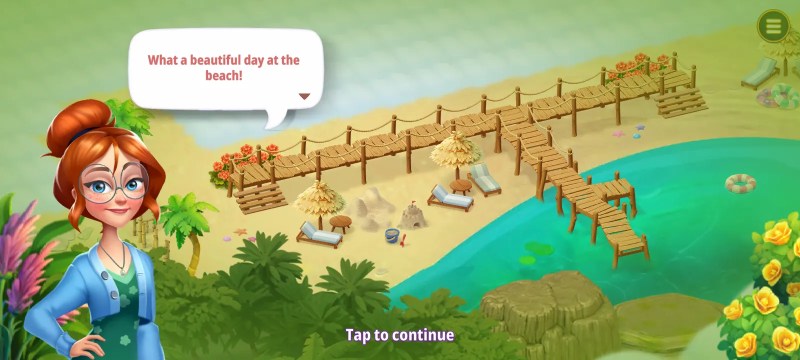
tropical beach event in merge gardens

Terms

It’s 60 days to complete the offer with the first regular goal at level 30 for $1.88. The next goals are level 40, 50, and 60 by day 45 for $3.08, $6.15, and $12, respectively. Only getting 15 days to clear 30 levels is really not enough.

The final leg of the offer is levels 70 through 100 with only another 15 days to finish. This last bit is worth $258.75. If you add the lost rewards from the bonus goals, it becomes $437.50 out of total offer of $469.88.

So, realistically, I will only be able to earn $32.38 from Merge Gardens on FreeCash. As I said before, I wouldn’t recommend this offer.

Game Strategy & Support Tips

Guide credit goes to Swagbucks community on Reddit.

Lets get started with some efficient merging and resource management by always waiting to merge five items at a time, especially for those mysterious veins and gems to the max.

You should never buy baskets or hampers since its better to save your gems for missions or continuing puzzles.

After you hit level 50, keep a cache of 5-7 daily supplies so you aren’t stuck waiting for days.

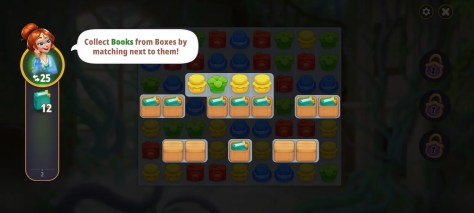
basic instructions on how to merge blocks in the puzzles

For puzzles and wildlife, only do match-3 puzzles if they are necessary for leveling up or events, and focus on merging stars up to level 5 before tapping to get swan nests for your wildlife score.

Honey trees are going to be your basic source for money and eggs too.

If you can, the 30-day gem pack is worth it for a steady supply, but just spend what you need to reach goals since the game can become a grind.

missions or goals to complete to level up character

You’ll want to grind your birds throughout the day whenever they have full energy. For levels 1-50, focus on merging basics and using events for infinite lives or boosts.

Once you’re in the level 50-70 range, start saving your daily boxes and trade bags until a quest actually requires them, and prioritize honey bees for your wildlife score.

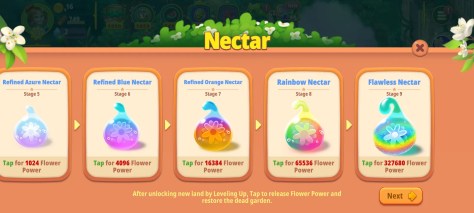
Flawless Nectar. The highest tier of nectar in the game.

For the high levels up to 99, keep grinding high-value items, but keep in mind that many think level 99 is basically impossible without a massive time investment.

If you run into issues with getting credited, make sure to provide timestamped screenshots to support and ask for an escalation to a senior specialist if they push back.

Lastly, remember that the game eventually gives you “pity rounds” after enough fails, and you can always use 25 gems for extra moves on the tough puzzles.

Swagbucks: Fable Town

Last Updated: Feb 15th, 2026

I got the credit after submitting a ticket and proofs. My total earnings from this game offer was $13.19.

Offer Completed: Day 30

Last night with about 14 hours left on the offer, I was still in Una’s area. I realized I had miscounted the number of merges I would need to complete the Limestone and that got me thinking I could finish the offer in time.

I went all in and spent an additional $27.17 to purchase, two hero chests and 2,300 Gems.

I spent Gems to fast mine and build the remaining Limestone blocks.

I managed to reach Chapter 5 and Install the Drum, but I did not receive credit for the objective. I will submit a ticket in a couple of days.

The final objective is still not clear. I completed 5 quests and still haven’t encountered the last quest to, Clear the Trash. If I can get credit for the Drum, I will have a $10 profit for this offer.

Welcome to Fable Town! Merge, renovate, and discover the magic of Witch’s Garden!

In this engaging merge puzzle adventure, explore the wise witch’s grand mansion filled with secrets. Combine magical artifacts and enchanting plants to restore her beautiful garden.

Face majestic dragons and solve puzzles to reveal the wonders of this offline game. Use your merging skills to build a vibrant sanctuary and let your creativity flourish in a garden of surprises!

Join Ginny, Merlin’s talented granddaughter, as she returns to Fable Town to uncover the truth behind the enchanted fog and find true love.

Important Things to Know

  • Must be installing Fable Town for the first time to receive SB.
  • In-app purchases and upgrades are available.
  • Award will pend for 10 days
  • You must complete goals within 30 days of installing to receive Up to 9,909 SB

Offer Link: https://www.swagbucks.com/games/apps/1672106/fable-town?rb=69384823

  1. Important Things to Know
    1. Main Goals
      1. Optional Goals
        1. Buying Land
        2. Trophies
        3. Warning!
  2. How to Play
    1. Elf Tasks
    2. Tips and Tricks
      1. Tips: Event Islands
      2. Tips: Chests and Energy
      3. Tips: Miscellaneous
      4. TapJoy Rewards
      5. Upgrade Timers
      6. Gem and Coin Conversion Rates
      7. Houses
    3. Game Progression
      1. Save Merlin (Chapter 1: Return to Fable Town)
        1. Rebuild Merlin’s Castle (Day 1)
        2. Renovate the Library (Day 1)
      2. Restore the Habitat (Chapter 2: Crystal of Secrets)
        1. Clean the Garden Library (Day 2)
        2. Build the Altar (Day 3-4)
      3. Chapter 3: Tailor with a Twist
        1. Rescue Una (Day 5)
        2. Install Water Wheel (Day 8)
      4. Chapter 4: Diva in Distress
        1. Enchant the Tree (Day 12)
        2. Rebuild Water Sculpture (Day 17)
        3. Install the Drum (Day 30)
      5. Chapter 5: Sweet Magic (level 40)
        1. Clear the Trash
  3. Other Functions
    1. Side Islands & Order Rush (3-Day Event)
    2. Tokens (Wizards, Creature, and Decoration)
      1. Wizards
    3. Creatures
    4. Decorations
    5. Item List
  4. Fable Town Shop List
    1. Gem Packs
    2. Special Offers
    3. Pop-Up Sales

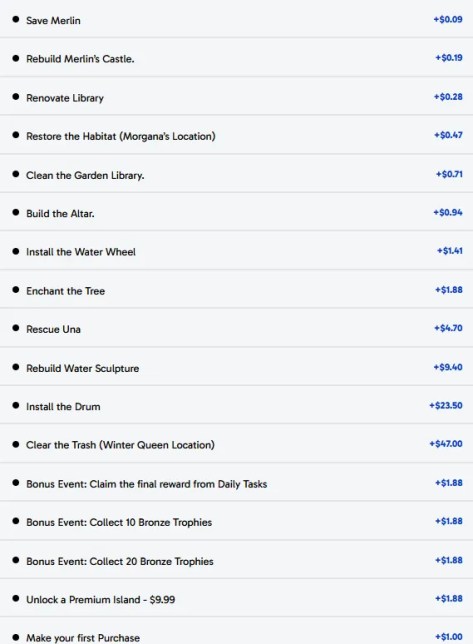
Main Goals

  • Save Merlin +$0.09
  • Rebuild Merlin’s Castle. +$0.19
  • Renovate Library +$0.28
  • Restore the Habitat (Morgana’s Location) +$0.47
  • Clean the Garden Library. +$0.71
  • Build the Altar. +$0.94
  • Install the Water Wheel +$1.41
  • Enchant the Tree +$1.88
  • Rescue Una +$4.70
  • Rebuild Water Sculpture +$9.40
  • Install the Drum +$23.50
  • Clear the Trash (Winter Queen Location) +$47.00
  • Total: $90.57
Optional Goals

The following objectives are optional and may require purchases:

  • Bonus Event: Claim the final reward from Daily Tasks +$1.88
  • Bonus Event: Collect 10 Bronze Trophies +$1.88
  • Bonus Event: Collect 20 Bronze Trophies +$1.88
  • Unlock a Premium Island – ($9.99) +$1.88
  • Make your first Purchase +$1.00
  • Total: $8.52
Buying Land

For the Premium Island, this just means unlocking a section of tiles on the main map. You need to spend at least $9.99 to clear the objective. I got the 10.99 Enchanted Treasures section. It had around 400 Gems and 600 Coins in it.

I strongly advise against spending 500 Gems on Lost Treasures. The items in there were barely worth 100 Gems.

Trophies

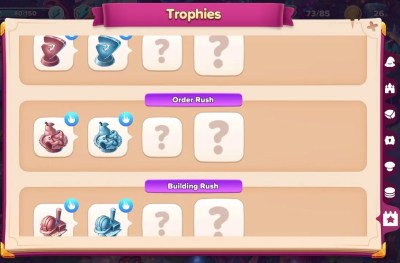
Bronze Trophies are earned by completing the Rush challenges. You’ll get 6-7 of them. They fill up tiles but don’t give you much reward. There are 4 Tiers for each Trophy, but for this offer we won’t get the benefits of the upgraded versions.

TIP: It may not be necessary to do any side islands. The 3-day Rush events provide 15-18 Trophies, nearly enough to meet all offer terms.

These include the 3 day merge, build, energy, and crop events in the Main area and the 3 day recurring mini event running with separate event energy.

For the main area events, it’s usually rewarded on the 15th task, the last one. For the 3 day limited time event area, it’s either the 11th or the 15th reward

Warning!

If you use a Samsung device with Game Center support, the game ads can trigger “Instant Install,” (without consent) if you mistakenly tap the ad when trying to hit the close button.

How to Play

Fable Town is very similar to Mergeland: Alice’s Adventure, if you’ve played that before you will do fine with Fable Town.

– Сombine 3+ identical objects to get an upgraded one as a result of this fusion. It is better to merge items in groups of 5.

– Merge artifacts to disenchant wizards.
– Grow plants and trade fruits and vegetables for magic wands.
– Use magic wands to restore Fable Town.

Optional Ads can be watched to gain additional rewards. They can be skipped if you don’t like ads, or you can pay to remove ads (I advise against this).

Main Screen Overview and Legend
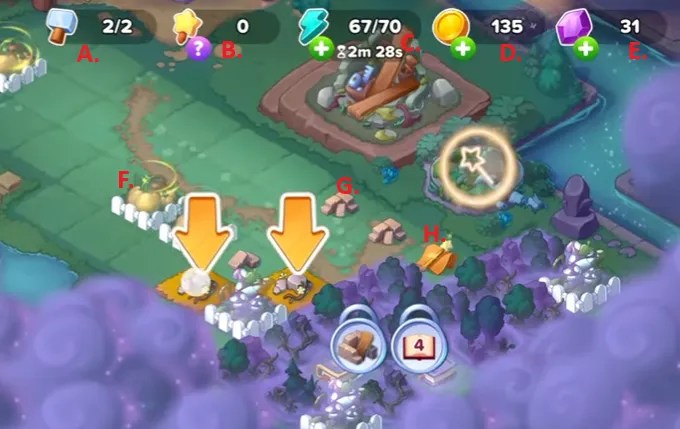
A. Worker Elves
B. Wands in Inventory
C. Energy
D. Coins
E. Gems
F. Pumpkin Patch (Produce)
G. Stone
H. Wand
Main Screen Overview and Legend
  • A. Worker Elves
  • B. Wands in Inventory
  • C. Energy
  • D. Coins
  • E. Gems
  • F. Pumpkin Patch (Produce): used to create wands.
  • G. Stone: used to construct facilities (castle, library, etc.) on the map.
  • H. Wand: are used to unlock new areas and land pieces, renovate the Elves House.

The Greenhouse generates some food and seed items for only 5 energy.

The Mine can also generate a smaller amount of seeds, it also make the Artifact and Construction Materials, so it is the preferred way to clear the missions..

Your character profile is shown at the top-left of the screen, below it is the current task list. Further down the left side of the screen you will find your Inventory and Daily Quests.

Produce, including Pumpkins and Mushrooms, takes 3 hours to produce goods. This can be sped up using 36 Gems. Produce field may be moved around the map. Produce can be exchanged for Magic Wands by the Elves.

Basic Stones have 8 tiers. Starting at the third tier, they will require construction using an Elf. They come in different colors depending on the Chapter you are in and have higher Tier levels.

Elf Tasks

Once a task reaches 30 seconds, you may skip the remaining time for free in the Task interface.

The task list from the Elves will often ask for foods you don’t have.

You can tap the Trash button to ask for a new task, this will start a two minute cooldown. There is no penalty for throwing out a task.

Some tasks will offer the same reward but accept different amounts of items.

Tier (Time)RequiresReward
1 ()2 Items total (Pumpkin, Pear, Berry, or Mushroom)1 Basic Wand,
1 Energy,
10 Points
2 (10 min)4 Items total 2 Basic Wands,
1 Energy,
20 Points
2 (20 min)6 Items total 1 Ore
1 Basic Wand
1 Advanced Wand
30 Points
3 (30 min)11 Items total 2 Ore,
2 Advanced Wands,
1 Creature Orb,
40 Points
3 (30 min)11 Items total 2 Ore,
2 Advanced Wands,
1 Energy Orb,
40 Points
3 (25 min)11 Items total 2 Ore,
2 Advanced Wands,
1 Fauna Box,
40 Points

Tips and Tricks

  • Try to limit spending gems and coins for daily quests (spend 5 gems get 7 in return). They are best saved for buying Energy and popup offers.
  • The Daily Reward objective requires you unlock Daily Quests and complete them 5 days in a row. It is advised that you start the game in the morning so you have time to clear the beginner quests and unlock daily quests. Daily Tasks become available after completing the Boot Camp.
  • Claiming the Free Chest is a Daily Task. If you accept the chest before completing the Boot Camp, you will not be able to complete the Daily Task on the first day of play.
  • In the Shop, there is a green button for “Free Gems,” this leads to TapJoy offers that may be completed to get Gems.
  • In the Shop you will find free items available every 6 hours.
  • This game does not use Codes, instead they offer Daily Freebies through MY.GAMES Market. Your Player ID is found in settings.
Tips: Event Islands
  • For the Event area (Peacat/Mammoth), DO NOT merge the chests. Spam the 2 hit obstacles + 15 energy mine. Because you get points from merging objects, so 5 of low level objects would yield more points than getting 3 of the next tier.
  • For the Event Islands, only the primary creature provides a reward, other objectives are optional. The Bronze Trophy is earned early, but if you clear all 32 stages, you get a giant Gem and Coin Chest.
Tips: Chests and Energy
  • The contents of a Chest will be converted as you advance to new areas and will include items for those new areas. Leftover items will also convert, however, if you have not opened the next area, then the old items will turn into Coins.
  • Energy may be purchased in the Shop for 350 Coins (90 Energy) or 90 Gems (100 Energy). You may also watch two Ads to get 30 Energy.
  • The Energy Lotto is only available during set periods of the day, however, you can skip the timer for 45 Gems or 175 Coins during Rush. Completing the lotto is required for the Daily Reward objective. I saw (12pm-3pm) and (12pm-11am).
Tips: Miscellaneous
  • Keep an eye out for glowing lights floating above the map. This can be tapped to get random items.
  • Occasionally, after merging items, a hot air balloon will appear. Most balloons will cost 20-100 Gems (depending on rarity), but lower value items may allow you to Watch an Ad to get it for free.
  • On rare occasions, you will see a balloon with a timer and an Energy gauge. By spending 90 Energy, you will get to keep the present’s the balloon is carrying. The balloon timer and the presents timer are separate. You can wait until 1 minute is left on the balloon and still get the full 30 minutes from the presents after claiming the balloon.
  • You do not need a Facebook account to get the 30 free Gems. When the popup appears, simply tap the button and then close the window that opens.
TapJoy Rewards

Fable Town includes access to the TapJoy Rewards platform. This is an offer wall like what we have on Swagbucks. The offers all award Gems.

I wouldn’t suggest doing any offers that you haven’t already completed on Swagbucks, as these offers will log your Google ID and could potentially prevent you from completing the same offer though #GetPaidTo sites like Swagbucks.

I was able to easily clear several objectives from just doing surveys through TapJoy Rewards. This also makes buying Energy much easier.

The quiz games worked, the visit site and click through offers were hit or miss for me, video watches worked, all auto insurance offers worked the first time but many had different pictures but were all the same company (tons of SPAM in Email and Text/Calls).

The 5-day trial of Background Checker for $1 worked, but make sure you cancel the next day. Also, only do it when the Double points are active. The recurring charges are $50 per month. I used a virtual card but will still cancel. Here is the number (833) 714-0641, you can also do it in the account settings of the website.

Upgrade Timers

Artifacts will merge instantly, while building resources have timers.

Stone
  • Tier 3: 30 Seconds
  • Tier 4: 40 Seconds
  • Tier 5: 1 Min
  • Tier 6: 2 Min
  • Tier 7: 4 Min
  • Tier 8: 15 Min
Slate
  • Tier 1-2: Instant
  • Tier 3: 40 sec
  • Tier 4: 1 min
  • Tier 5: 5 min
  • Tier 6: 15 min
  • Tier 7: 1 hour
  • Tier 8: 8 hours
Tent (Canvas)
  • Tier 1-2: Instant
  • Tier 3: 40 sec
  • Tier 4: 1 min
  • Tier 5: 5 min
  • Tier 6: 15 min (Skip for 12 Gems)
  • Tier 7: 1 hour
  • Tier 8: 4 hours
  • Tier 9: 6 hours (Skip for 107 Gems)
Limestone (11 Tiers)
TierTimeSkip Cost
1-2Instant
340 sec1 Gem
41 min2 Gem
55 min3 Gem
615 min4 Gem
71 hour12 Gem
84 hours20 Gem
98 hours127 Gem
1016 hours175 Gem
111 Day200 Gem
Cryolite (11 Tiers)

Uses the same timing as Limestone.

Fairy Lantern Timers
  • Tier 1-2: Instant
  • Tier 3: 45 sec
  • Tier 4: 1 min 30 sec
Fairy Lantern 1: 1 Crown
Fairy Lantern 2: 3 Crowns
Fairy Lantern 3: 10 Crowns
Fairy Lantern 4: 35 Crowns

The game will have you run out of Energy during the Tutorial, so as to introduce the Shop function and the option to purchase Energy. You will get 70 Energy for free as an introduction.

At level 6, your Energy capacity will start to increase. Initially by +5 points.

Gem and Coin Conversion Rates
Tier 1Merge to Use
Tier 21 Gem/Coin
Tier 33 Gem/Coin
Tier 410 Gem/Coin
Tier 530 Gem/Coin
Tier 690 Gem/Coin
Houses

The fully constructed homes of the Wizards will produce items daily. The Lantern resources can be claimed for Crowns which are points used to upgrade the various home’s.

The upgrades go in order starting with Merlin’s home and then on to Morgana’s home. There are three stages to each upgrade. Having all three upgrades will result in extra daily production of items.

You may tap on any home to see which items may be produced and the current upgraded level. The pillar of Crowns rising from a home is a visual indicator of the current progress on Crown collection for a given home.

Game Progression

A short intro titled Magic Bootcamp, which includes basic game functions, will play out with dialog between Ginny and the Elves.

The satchel from the first Daily Rewards will include an Advanced Wand that can clear the Mermaid Fountain and should bring your level to 4.

The game storyline is not entirely linear. Some objectives can be completed concurrently.

Save Merlin (Chapter 1: Return to Fable Town)

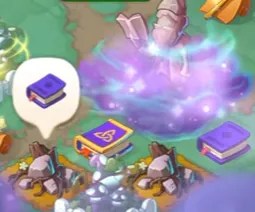
Merlin turned into a statue. You will need a Tier 4 Tome of Magic to unseal Merlin and save him.

These books can be found at the base of the statue.

You will need to merge them to get the correct Tier of tome.

The nearby rocks can be mined to gain further tomes for merging.

The large rock takes 20 Energy to clear, the medium rock is 15 Energy.

Once you save Merlin, the tutorial ends and the second map area is opened up.

Rebuild Merlin’s Castle (Day 1)

In the second map area after the Tutorial ends we begin the task of rebuilding Merlin’s House.

Restore Merlin’s House7 Wands
Repair the Bridge8 Wands
Open the area SouthMerge Tier 5 Stone
Save the WizardMerge a Tier 7 Crystal Ball
(50 Coins and 10 Gems)

The first restoration will raise you to level 5 and reveal more of the map. This also reveals the next Wizard trapped in a statue.

After accessing the second map section, you will be offered the Enchanted Treasures area. It adds 14 tiles and a bunch of Chests for $10.99. Check the Shop List for other purchases.

You do get a dollar back on the first purchase, I’m not sure if it is worth it. This offer shows up on most new map areas. It might be good if you find you run out of space quickly.

New items in the area of the map include Rocks and Crystal Balls.

  • Orange Rock (Coins): Can be claimed at tier 2 onwards. More coins the higher you merge.
  • Crystal Ball (7). Reach Tier 5 to earn 35 Lotto Tokens and 10 Energy.
  • Stone (8). Reach Tier 6 to earn 10 Coins and 5 Gems.

You will continue to merge Wands and Stones. The stone becomes a little cottage. The highest Tier Wands can be collected.

The area south of the bridge includes rocks that contain Crystal Balls, Rocks, Stone, and Pumpkin Patch pieces.

Renovate the Library (Day 1)

The library is just up the stairs from Merlin’s House. The Castle is the structure to the left of the house.

For this stage you will need 49 Wands.

Renovate the Library (1/3)9 Wands (25 EXP, and 5 Gems)
Restore the Tower 2/315 Wands
(10 Energy, 10 Coins, and 1 Gem)
Restore Merlin’s Castle 3/3Merge Tier 8 Stone
(25 EXP, and 5 Gems)
Heal the Oak10 Wands
(25 EXP and 1 Gem)
Tidy up the Area15 Wands
(25 EXP and 1 Gem)

Fairy Island is the first limited time island map you can access. The Ginger Cat creature is available after playing on the fairy map for the first time.

The side islands are a good option if you run out of Energy on the main island or if you want to gain extra chests or Creatures.

The only objective you need to clear on these optional islands is the main creature shown by tapping on a nearby pedestal.

The Shop on each island is independent of the others. You can watch ads for energy on multiple islands if concurrent events are active.

Restore the Habitat (Chapter 2: Crystal of Secrets)

The Habitat is the area to the east where you will see a picture of the Polar Owl. I unlocked this at level 10.

After completing the Castle, any remaining Stones will automatically convert to Fairy Lanterns of the same Tier.

Magic Orbs are converted to Scissors. Resources in the Mine will switch to the new items.

For this stage you will need 15 Wands.

Reveal the HabitatCollect Polar Owl
Restore the Habitat15 Wands

This last objective should begin Chapter 2: Crystal of Secrets. The reward includes 50 Coins and Energy and a Wizard Card Chest (Energy and a random card).

For this stage you will need 105 Wands.

Build the Extension 1/3Requires: 15 Wands
Rewards: 50 EXP and 1 Gem
Unlock more of the HabitatRequires: Tier 3 Slate, Level 11
Save the WizardRequires: Tier 8 Scissors
Rewards: 15 Coins and 3 Gems
Install the Fountain 2/3Requires: 15 Wands
Rewards: 50 EXP and 1 Gem
Build the TerraceRequires: 15 Wands
Rewards: 50 EXP and 1 Gem
Unlock more of the HabitatRequires: Tier 4 Slate, Level 12
Repair the DockRequires: 15 Wands
Rewards: 50 EXP and 1 Gem
Finish the Meditation Center 3/3Requires: Tier 9 Slate
Rewards: 50 EXP and 1 Gem
Fix the Decor AreaRequires: Free
Rewards: 1 Gem
Restore the HabitatRequires: 15 Wands
Rewards: 50 EXP and 1 Gem
Clear DebrisRequires: 15 Wands
Rewards: 50 EXP and 1 Gem
Build the CottageRequires: 15 Wands
Rewards: 50 EXP and 1 Gem

New Resources: Fairy Lanterns, Scissors, and Slate.

The Slate has 9 Tiers and is used to construct Morgana’s House. Completing the Extension brought me to level 11, a requirement to unlock more of the Habitat.

The Fountain and Meditation Center are both part of Morgana’s home area.

Clean the Garden Library (Day 2)

The Garden is in Morgana’s area of the map. If it is taking you a while to clear her objectives, you may advance to this stage early.

We start to see a jump in the Wand cost to clear missions starting with the Garden cleanup.

For this stage you will need 110 Wands.

Clean the GardenRequires: 15 Wands
Rewards: 50 EXP and 1 Gem
Beautify the PondRequires: 25 Wands
Rewards: 50 EXP and 1 Gem
Return the Magic LotusRequires: 15 Wands
Rewards: 50 EXP and 1 Gem
Restore the HabitatRequires: 25 Wands
Rewards: 50 EXP and 1 Gem
Clear the DebrisRequires: 15 Wands
Rewards: 50 EXP and 1 Gem
Heal the TreeRequires: 15 Wands
Rewards: 50 EXP and 1 Gem

The Resources in Una’s area may produce Guardian Stones on occasion.

Guardian Stones are broken down by your unlocked Creatures. Each one can be once per day, unless you spend Gems to wake them up.

Guardian Chests contain blue flames that can be merged to form Guardian Animals: Owl, Cat, Fox, Wolf, Boar, etc. There are 17 different animal forms. This will take up a large portion of your map.

The Pondside Cottage and Tea Treehouse within Morgana’s area will produce small Guardian Chests daily.

Build the Altar (Day 3-4)

The altar is a spot to place a Decoration item like the Stone Dias or the Peacat decoration. The steps lead up to an old tree which gets renovated into a tea party space.

Clearing these objectives should bring you to level 20 and open the next area with the third Wizard, Prince.

For this stage you will need 130 Wands.

Build the AltarRequires: 25 Wands
Rewards: 50 EXP and 1 Gem
Build the StepsRequires: 25 Wands
Rewards: 50 EXP and 1 Gem
Build the TerraceRequires: 15 Wands
Rewards: 50 EXP and 1 Gem
Set Up a Tea PartyRequires: 25 Wands
Rewards: 50 EXP and 1 Gem
Fix the Decor AreaRequires: 15 Wands
Rewards: 50 EXP and 1 Gem
Fix the StairsRequires: 25 Wands
Rewards: 50 EXP and 1 Gem

Around this time, I finished the Fairy Island with 1 hour and 23 minutes left on the clock. I cleared the entire map of objectives, but there was no additional reward for the other items. So, only the Peacat will provide a reward.

Chapter 3: Tailor with a Twist
Rescue Una (Day 5)

I reached this area on the 5th day of play. But by the 8th day I had not rescued the wizard.

Una is the 5th wizard (area at the top of them map). She is a guitar player and her item you need to save her is a guitar. She is physically located in Princes’ area of the map, but her area comes after you finish the Sewing Workshop.

The guitars can begin spawning during the previous section if you have cleared Morgana’s home. New items in this area include Tents (Canvas).

During chapter 3, I failed the Mammoth island event by not focusing on the primary objective. Immediately afterward, two new event islands opened up: Chasing Jackalopes and Fauxhall Station. I aced both of these, but then failed the Wizard of Oz island that came next.

I have been spending Coins and Gems to clear the optional island maps. I have found the time spent on the other maps helps to pass the time on the main map and it gives me some extra chests to use.

For this stage you will need 430 Wands, plus the Tier 9 Canvas and Guitar.

Save the Wizard (Una)Requires: Tier 9 Guitar
Rewards: 25 Coins and 5 Gems
Clear the BushesRequires: 25 Wands
Rewards: 50 EXP and 3 Gems
Fix the StairsRequires: 35 Wands
Rewards: 50 EXP and 3 Gems
Build the StablesRequires: 45 Wands
Rewards: 50 EXP and 3 Gems
Set a Sewing MachineRequires: 55 Wands
Rewards: 50 EXP and 3 Gems
Restore the WorkshopRequires: Tier 9 Tent
Rewards: 50 EXP and 3 Gems
Repair the SwingRequires: 25 Wands
Rewards: 50 EXP and 3 Gems
Restore the GazeboRequires: 35 Wands
Rewards: 50 EXP and 3 Gems
Decorate the GazeboRequires: 45 Wands
Rewards: 50 EXP and 3 Gems
Restore the HabitatRequires: 25 Wands
Rewards: 50 EXP and 3 Gems
Restore the HabitatRequires: 35 Wands
Rewards: 50 EXP and 3 Gems
Clear the DebrisRequires: 25 Wands
Rewards: 50 EXP and 3 Gems
Build the Workshop (Day 7)Requires: 35 Wands
Rewards: 50 EXP and 3 Gems
Tidy Up the AreaRequires: 45 Wands
Rewards: 50 EXP and 3 Gems
Install Water Wheel (Day 8)

For this stage you will need 365 Wands.

Install the Water WheelRequires: 45 Wands
Rewards: 50 EXP and 3 Gems
Start Production (Day 9)Requires: 55 Wands
Rewards: 50 EXP and 3 Gems
Clear the AreaRequires: 25 Wands
Rewards: 50 EXP and 3 Gems
Build the AtelierRequires: 35 Wands
Rewards: 50 EXP and 3 Gems
Set Up the PodiumRequires: 45 Wands
Rewards: 50 EXP and 3 Gems
Renovate the StageRequires: 35 Wands
Rewards: 50 EXP and 3 Gems
Install the CanopyRequires: 55 Wands
Rewards: 50 EXP and 3 Gems
Host the Fashion ShowRequires: 35 Wands
Rewards: 50 EXP and 3 Gems
Fix the Stairs*Requires: 35 Wands
Rewards: 50 EXP and 3 Gems

*Fix the Stairs, is the final task for Una’s area of the map.

You should be close to restoring the workshop by this point if you haven’t done so already.

That will bring you to level 30 and open up the next section of map, Una’s area. The Ice Queen’s Palace must be in the level 40 area after Una.

Chapter 4: Diva in Distress

New resources for this are include Limestone (Building) and Ice Cream (Artifact). Both go to Tier 10. I had ice cream start spawning before I hit level 30.

I saved up 125 Wands before I finally finished the Sewing Workshop and moved into Una’s area of the map.

Enchant the Tree (Day 12)

The tree is the third part of Una’s house and will trigger the goal “Enchant the Tree.”

Total: 280 Wands to clear this section.

Save the Wizard (#6)Requires: Tier 10 Ice Cream
Reward: 25 Coins and 5 Gems
Clear the AreaRequires: 25 Wands
Rewards: 50 EXP and 3 Gems
Build the Guest HouseRequires: 35 Wands
Rewards: 50 EXP and 3 Gems
Install the GazeboRequires: 45 Wands
Rewards: 50 EXP and 3 Gems
Enchant the TreeRequires: 55 Wands
Rewards: 50 EXP and 3 Gems
Build the FenceRequires: 75 Wands
Rewards: 100 EXP and 3 Gems
Finish Castle RockRequires: Tier 10 Limestone
Rewards: 50 EXP and 3 Gems
Clear the Trash (not the finish)Requires: 35 Wands
Rewards: 50 EXP and 3 Gems
Rebuild Water Sculpture (Day 17)

The Water Sculpture has four parts: Place the Sculpture, Starts the Light, Arrange the Lanterns, and Plant the Flowers.

Total: 905 Wands to Clear this section.

Place the SculptureRequires: 45 Wands
Rewards: 50 EXP and 3 Gems
Start the LightRequires: 55 Wands
Rewards: 50 EXP and 3 Gems
Arrange the LanternsRequires: 55 Wands
Rewards: 50 EXP and 3 Gems
Plant the FlowersRequires: 85 Wands
Rewards: 100 EXP and 3 Gems
Restore the HabitatRequires: 35 Wands
Rewards: 50 EXP and 3 Gems
Restore the HabitatRequires: 45 Wands
Rewards: 50 EXP and 3 Gems
Clear the BushesRequires: 35 Wands
Rewards: 50 EXP and 3 Gems
Repair the StageRequires: 45 Wands
Rewards: 50 EXP and 3 Gems
Install the Canopy (Day 18)Requires: 55 Wands
Rewards: 50 EXP and 3 Gems
Install the SpeakersRequires: 55 Wands
Rewards: 50 EXP and 3 Gems
Decorate the Stage (Day 19)Requires: 85 Wands
Rewards: 100 EXP and 3 Gems
Restore the HabitatRequires: 35 Wands
Rewards: 50 EXP and 3 Gems
Restore the HabitatRequires: 45 Wands
Rewards: 50 EXP and 3 Gems
Remove the Old Organ (Day 20)Requires: 35 Wands
Rewards: 50 EXP and 3 Gems
Install the KeysRequires: 45 Wands
Rewards: 50 EXP and 3 Gems
Add the Small PipesRequires: 55 Wands
Rewards: 50 EXP and 3 Gems
Add the Main PipesRequires: 55 Wands
Rewards: 50 EXP and 3 Gems
Open the Organ (Day 22)Requires: 85 Wands
Rewards: 100 EXP and 3 Gems
Clear the DebrisRequires: 35 Wands
Rewards: 50 EXP and 3 Gems
Install the Drum (Day 30)

At the end of Una’s Area, 240 Wands needed.

Install the DrumRequires: 45 Wands
Rewards: 50 EXP and 3 Gems
Paint the DrumRequires: 55 Wands
Rewards: 50 EXP and 3 Gems
Expand the DrumRequires: 65 Wands
Rewards: 50 EXP and 3 Gems
Decorate the DrumRequires: 75 Wands
Rewards: 50 EXP and 3 Gems

You need to finish the Limestone and Ice Cream to reach level 40 and open up the Ice Queen area.

Hero Chests will provide Artifacts (Ice Cream). If you have more than 100 Wands or 90 Gems, a pop-up offer will offer the Hero chest and 50 Energy in exchange for the Wands or Gems.

Similar offers for Wand Tree and Construction Rocks may show. These cannot be recalled once dismissed, so be careful.

Chapter 5: Sweet Magic (level 40)

Finishing the drum is the last objective before chapter 5 opens up.

You will notice after finishing the Ice Cream, chests will start spawning Cauldrons for the next trapped wizard. The mine will stop generating seeds and only provide Cauldrons and obsolete Limestone, until you begin the Cryolite construction stage.

Artifacts turn into Lanterns and Construction Materials become Coins.

Clear the Trash
Save the WizardRequires: Tier 11 Cauldron
Rewards: 25 Coins and 5 Gems
Clear the RuinsRequires: 25 Wands
Rewards: 50 EXP and 3 Gems
Place the Worker HutsRequires: 35 Wands
Rewards: 50 EXP and 3 Gems
Cool Down the FactoryRequires: 45 Wands
Rewards: 50 EXP and 3 Gems
Add the Caramel ShopRequires: 55 Wands
Rewards: 50 EXP and 3 Gems
Place the Candy ShopRequires: 75 Wands
Rewards: 50 EXP and 3 Gems
Repair the FoundationRequires: 25 Wands
Rewards: 50 EXP and 3 Gems
Prepare the MaterialsRequires: 35 Wands
Rewards: 50 EXP and 3 Gems
Place the SledRequires: 45 Wands
Rewards: 50 EXP and 3 Gems
Install the CoverRequires: 75 Wands
Rewards: 50 EXP and 3 Gems
Clear the Trash (You Win!)Requires: 25 Wands
Rewards: 50 EXP and 3 Gems
Total Wands Used440w

After reaching chapter 5, you only need to collect 440 wands to reach the last goal. It is not necessary to merge the artifacts or the construction materials. Only collect wands. So, focus on using the Green House and buying up all of the Foods in the Shop.

Total Wands: 3,020 for the entire game offer.

Other Functions

Side Islands & Order Rush (3-Day Event)

The optional islands are one of the ways to receive Bronze Trophies. Its not necessary to clear the entire island to get the Trophy, it is available at stage 24 of the event.

However, if you clear all 32 stages, you get a Tier 3 Treasure Chest (Tier 3: Coins and Gems)

You will also get them from the Order Rush event, but the majority come from these islands. The Rush events occur on your main island and include 5 potential Trophies.

Bronze Rush Trophies generate 1 Coin, Silver generate 3 Coins, and Gold generate 5 Coins.

EventBenefit
Merge RushCoin
Order RushCoin
Building RushCoin
Energy RushEnergy
Timeless FestEnergy
Gemstone Glow
Lucky Coins
Silver produces +3 and Gold +5

If you want to conserve space on the your main board, then don’t clear the entire side island. You will forfeit the Bronze Trophy reward, but it will save up to 14 tiles.

Trophies use the same merging mechanic to upgrade to Silver and Gold which provide greater rewards. If you collect them and save the full 5 to merge, then your looking at potentially 50-70 tiles covered at any given time.

I believe the islands are on a set loop starting with the Peacat and ending with the Polar Bear. On the second loop, new locations are added.

Bronze Animal Trophies generate 1 Creature Card, Silver generate 3 Cards, and Gold generate 5 Cards.

LocationTrophy
Enchanted Sands Peacat
Dragon Woods
Underwater Realm
Fauxhall StationPlatypus
Winter ForestWinter Fox
Guiding Star
Night WatchLion
Winged CouriersOwl
The Immortality Secret
Chasing JackalopesJackalop
Desert Riddles
Winds of Fate
Ever-Blooming Garden
Ice Age
Song of the Sea
Cave of Cerberus
Enchanted ForestHagrid
Beach Day Magic
Secret Ingredient
Capybara RetreatCapybara
Elves in WonderlandElf
Unicorn DreamlandUnicorn
Back to Magic SchoolWizard
Tideborn TreasuresCactapus
Midnight Carnival
Witch of the ValleyWitch

Tokens (Wizards, Creature, and Decoration)

The Wizard Card Case includes a single wizard card and 60 Energy. Wizards can be used on event island to remove special objects which in turn generate small energy orbs.

The more Wizard you have of a particular color, the faster you can clear the object. Wizards can be used once every 24 hours across all maps.

Wizards

Creatures

Green glowing stuff in bucket (don’t know name) can be Crushed by your creatures. Doing so places the creature on 15 hour cooldown timer. You can spend 50 Gems to wake them up sooner.

Clearing the glowy stuff produces a Guardian Chest which provides those florescent blue Animal tokens that are used to unlock sections of the Habitat.

Raising the level of a creature provides a set reward at each stage, with the final prize being a Wand Tree. The number of Creature cards needed to level up depends on the Tier of the creature and how many levels have already been achieved.

The following numbers have not been verified:

  • Dragon: 3 Paws, Progress 3/10, Cost 5 Cards.
  • Stellar Bear: 3 Paws, Progress 1/10, Cost 5 Cards.
  • Gryphon: 2 Paws, Progress 6/10, Cost 15 Cards.
  • Unicorn: 2 Paws, Progress 7/10, Cost 15 Cards.
  • Wolfion: 2 Paws, Progress 1/10, Cost 10 Cards.
  • Snow Llama: 2 Paws, Progress 1/10, Cost 10 Cards.
  • Sabertooth: 2 Paws, Progress 3/10, Cost 10 Cards.
  • Mammoth: 2 Paws, Progress 5/10, Cost 10 Cards.
  • Polar Owl: 1 Paw, Progress 7/10, Cost 25 Cards.
  • Ginger Cat: 1 Paw, Progress 9/10, Cost 25 Cards.
  • Jackalope: 1 Paw, Progress 7/10, Cost 25 Cards.
  • Capypig: 1 Paw, Progress 3/10, Cost 15 Cards.
  • Fluffypuff: 1 Paw, Progress 6/10, Cost 25 Cards.

If you use Universal Creature Cards, the cost increases compared with directly receiving cards from the Island completions.

  • 1 Paw Creature: 25 Cards = 125 Universal Cards, or 300 Gems.
  • 2 Paw Creature: 15 Cards = 150 Universal Cards, or 380 Gems.
  • 3 Paw Creature: 5 Cards = 200 Universal Cards, or 575 Gems.

Decorations

This are just aesthetic and don’t provide any benefits.

Item List

Game Item List

Artifacts

  • Spellbooks (Merlin)
  • Crystal Balls (Morgana)
  • Tailor’s Scissors (Prince Charming)
  • Musical Instruments (Una)
  • Ice Cream (Ice Queen)
  • Cauldrons (Wizard 6?)
  • Lucky Horseshoes
  • Stone Snakes
  • Free Weights
  • Magic Artifacts
  • Hammers

Buildings

  • Stone (Merlin’s House)
  • Slate (Morgana’s House)
  • Canvas (Prince Charming’s House)
  • Limestone (Una’s House)
  • Cryolite (Ice Queen’s House)
  • Peatstone
  • Cloverwood Objects
  • Marble
  • Granite
  • Blocks

Resources

  • Guardian Stone
  • Slate
  • Canvas
  • Limestone
  • Cryolite
  • Peatstone
  • Cloverwood
  • Marble
  • Granite
  • Blocks

Miscellaneous

  • Orange Rocks > Coins
  • Crystal Ball
  • Wands
  • Magic Tomes
  • Coins
  • Magic Chests
  • Treasure Chest (3 Tiers) > Gems and Coins
  • Fancy Chest
  • Nautical Chest
  • Gems
  • Common Fauna Ball > Creature Tokens
  • Fairy Lantern
  • Energy Orb
  • Slate (Purple Stone in a Bucket/Wheelbarrow)
  • Fairy Chest
  • Mystic Chest
  • Shatter Stones > Remove Obstacles
  • Animal Guardians > Animal Tokens

Produce

  • Pumpkin Patch > Pumpkins
  • Pumpkins
  • Mushroom Patch > Mushrooms
  • Mushrooms
  • Pears
  • Burst Berries

Fable Town Shop List

The wizard flying overhead makes it difficult to see each chest type. I guessed on some.

Gem Packs

When buying a $5 or higher pack, the game will offer a bonus if you use their market payment portal instead of Google. You cannot use Google Play credit in the Market.

  • Stack of Gems $2.49 (300 Gems)
  • Pile of Gems $5.49 (800 Gems)
  • Heap of gems $10.99 (1,200 Gems)
Special Offers
  • Begin Well-equipped: $2.99 (200 Gems, 700 Coins, and 300 Energy)
  • Enchanted Treasures: $10.99 (14 Tiles and Chests)
  • Lost Treasures 500 Gems (12 Tiles)
  • Ancient Treasures: $5.49 (13 Tiles and Chests)
  • Fairy Treasures $22.99 (16 Tiles)
  • Keepsake Chest $0.99 (2 Hero Chests)
  • Special Bundle $5.49 (250 Energy, 3x Construction Chests T3, and 3x Seed Bags T3)

Currency

Large Coin Chest999 Gems5,500 Coins
Medium Coin Purse499 Gems2,500 Coins
Small Coin Purse199 Gems900 Coins
Pile of Coins35 Gems150 Coins
Few CoinsFree

Energy Tab

NameCost | Daily LimitContents
Watch An AdFree (Limit 1)25 Energy
Energy350 Coins (Limit 3)90 Energy
Energy100 Gems100 Energy
Medium Chest$0.99
(One Time Offer)
200 Energy
Large Chest990 Coins (Limit 1)300 Energy

Produce

NameCost | Daily LimitContents
Seed Bag (1)Free
(Every 6 Hours)
1x item
Seed Bag (2)150 Coins (Limit 3)1x item
Seed Bag (3)90 Gems (No Limit) Cost Increases1x item
Seed Bag (3)$0.99
(One Time Offer)
2x items
Pumpkin75 Coins (Limit 6)5x Pumpkins

Buildings

NameCost | Daily LimitContents
Pile of Coins35 Gems (Limit 2)150 Coins
Purse of Coins199 Gems1k Coins
Large Purse of Coins499 Gems2.5k Coins
Chest of Coins999 Gems5k Coins
Few CoinsFree
(Every 6 Hours)
10 Coins

Special

The items listed here are specific to the section of map you are on. In area 2, it is crystal balls.

NameCost | Daily LimitContents
Crystal Ball (1)55 Coins (5 times)5x items
Crystal Ball (2)25 Gems (5 times)5x items
Feathered Chest90 Gems (once)1x Chest
Feathered Chest $0.99
(One Time Offer)
2x Chests
Small ChestFree
(Every 6 Hours)
1x Chest
Pop-Up Sales
NamePrice (USD)Contents
Order Rush Time10.996x Tier 3 Seed Sacks and 650 Gems
Fast Track Your Progress100 Wands50 Energy and T3 Construction Chest

Battle Night

Update December 2024: I occasionally run play tests to see whether offer terms are achievable. In a recent playtest, I managed to get 15 Orange heroes in 40 days.

MyPoints was referenced for this offer; however, it is currently (as of July 2025) only available through InboxDollars.

Of the advertised 251 USD, it should be possible to earn 100 USD through goal completions.

Additionally, there are two reimbursed purchases totaling 30 USD. Taxes or VAT may increase the purchase cost.

  1. The Offer
  2. VIP Cost
  3. Strategy
  4. Game Codes
  5. Friends
  6. Lineup
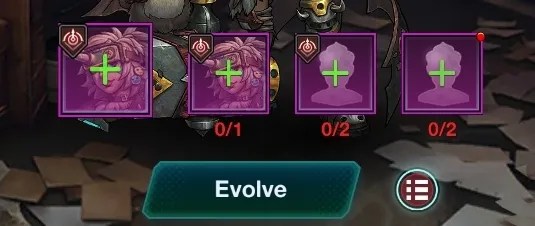
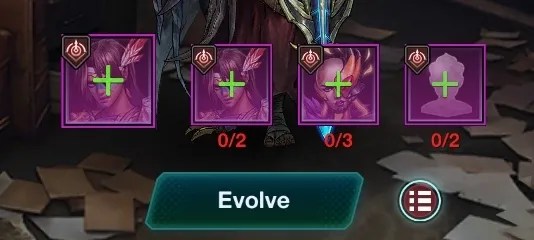
  7. Camps (Evolve)
  8. B.C.P.D (Police)
  9. Mart (Shop)
  10. Events
  11. Gear
  12. Halidoms

The Offer

Finish the following events within 45 days to receive up to 251.11 USD.

  • Must be a new user of Battle Night.
  • Must finish requirements within 45 days to earn Points.
  • The award will pend for 31 days

InboxDollars does not provide direct links. You may navigate to the site to begin the offer. If you do not have an account, here is my referral link.

https://www.inboxdollars.com?rb=111005361

The purchases are optional; however, they are reimbursed and will set you on your way, so I would suggest spending the money.

Both purchases can be made on the first day. This is especially useful for the “Month Card.”

The VIP 4 goal requires you to spend $79.95 (if you also buy the Premium Pass) or $ 109.94 if you buy only Diamonds.

I advise against either option. The reward for reaching VIP 4 is not worth the cost. I also do not believe it is possible to get a Red Hero in the allotted time of this offer.

You would need to be extremely lucky and obtain multiple copies of a single premium hero through all your gacha pulls and events.

Please refer to the chart below for VIP pricing.

Month Card (4.99)
Premium Pass (29.99)

VIP Cost

LevelPoint NeededPrice (USD)
1254.99
27514.98
315029.99
430059.98
550099.99
6800159.97
71,500299.97
83,000599.94
97,0001,399.86
1012,0002,399.76
1120,0003,999.60
1230,0005,999.40
1340,0007,999.20
1450,0009,999.00
Total Cost of VIP165,30033,066.63
Points are not Cumulative

Strategy

The heroes you will be dealing with for this offer come in 4 colors: Green, Blue, Purple, and Orange.

The “12 and 15” Orange Hero requirements for this offer may be difficult to achieve without an obvious focus on specific heroes.

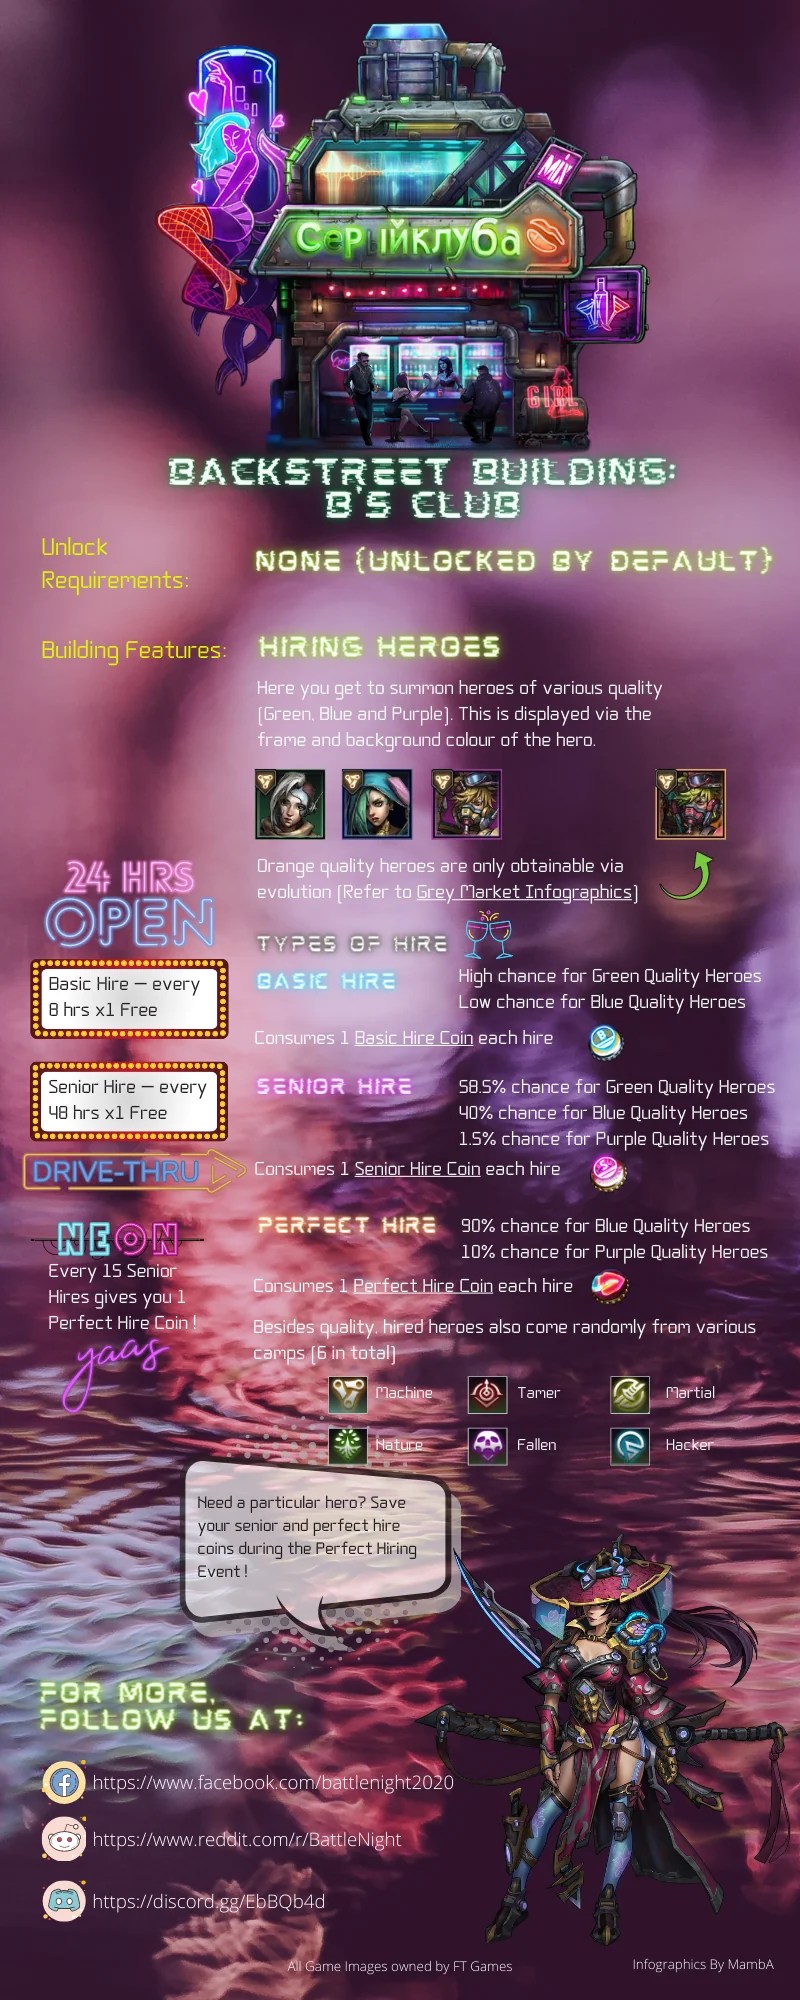
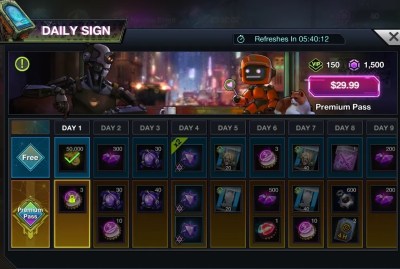
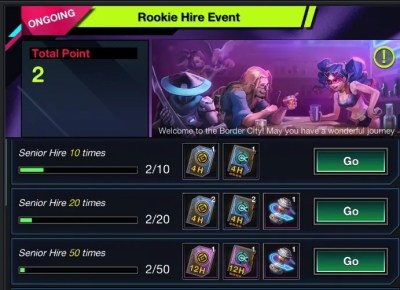
Make sure you finish all steps of your Daily Quests and also collect each of the Online rewards in the control panel. The Hire coins you receive from these activities will be useful for the Hiring Events.

Game Codes

The following codes were available on social media and worked for me as of August 15th, 2024. You can check Instagram, Discord, or Facebook for new codes.

Code (Case-Sensitive)Reward
Happy4th (valid until Nov 30th)10 Senior Hire Coins and 1k Diamonds
BNCyber1k Diamonds
Th7771k Diamonds
Th77771k Diamonds
BN2024HNY10 Senior Hire Coins and 500 Diamonds

To redeem the codes you need to tap on the Heart icon on your Player Info screen.

Friends

A game function includes a friends list with other players on your server. You can request people to add you to their list in the World chat.

Each day, you may send and receive flowers. The free flowers are Blue and provide a small number of points for exchange in the Mart. Purple flowers require Diamonds and give a larger amount of points for exchange.

Some players will only add friends who promise to send Purple flowers.

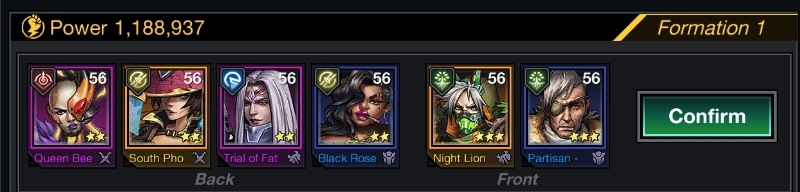
Lineup

My team changed quite a bit during the first week of play. I mostly placed higher-quality heroes in the front and blue/green in the back. However, this was not a proper lineup for battle.

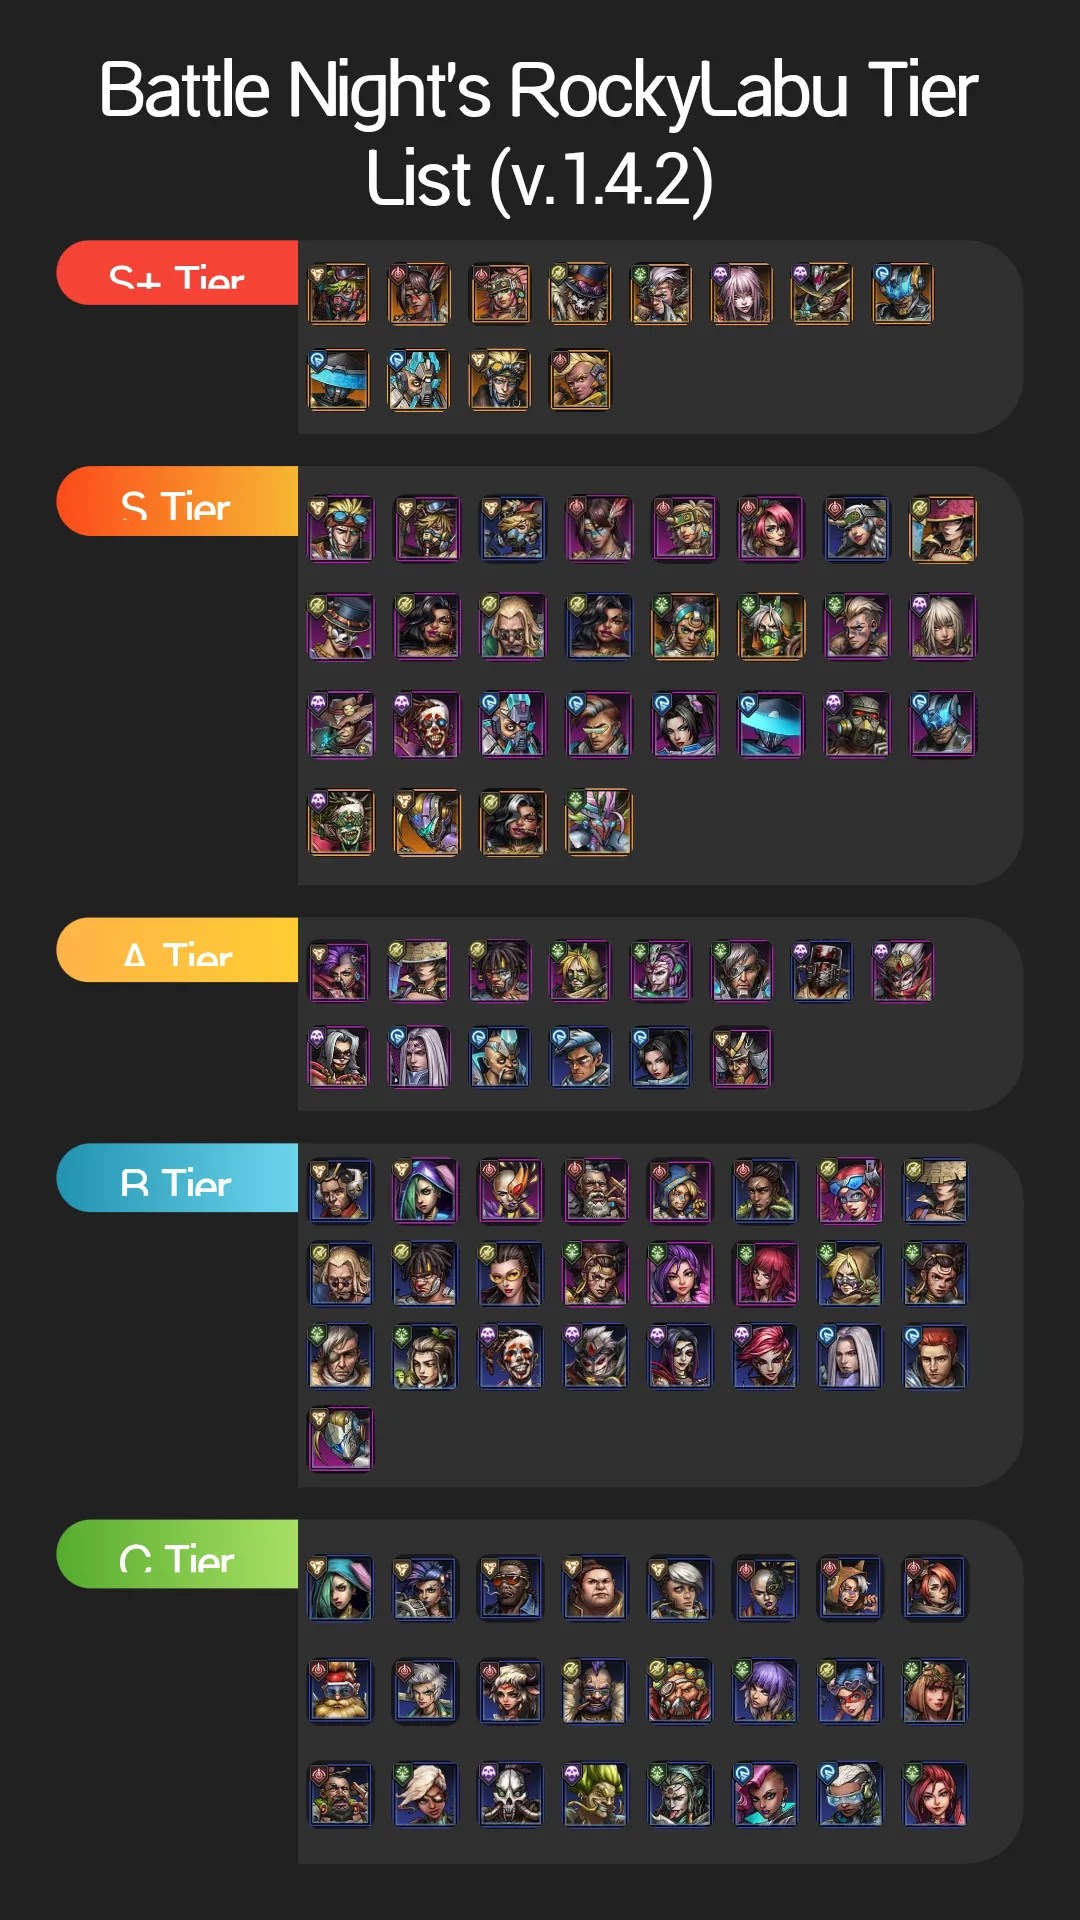
After gaining access to PvP battles, I was able to observe better synergies with heroes and which ones had the best survivability. I also checked some YouTube videos on the game and found that some of the early game heroes were very good for PvE and PvP combat.

Kratos, Harpe, Charlotte, Fino, A-Zhao, and Arae.

My Tank is Kratos, and the Off-Tank is Harpe. The middle is occupied by Charlotte and Fino. The back row has A-Zhao and Arae.

Both Kratos and Charlotte have self-healing abilities. Kratos has a very high defense, which pairs with the healing to make for an excellent tank.

Kratos and Arae are acquired through Senior hires most often. Harpe is a reward from logging in on Day 5, Day 7, and the Trials. Charlotte is the 4th reward from the Perfect Hire event after spending 20 Coins. A-Zhao comes with a beginner’s event and some early purchases.

Early to Mid Game: Around level 70, the above lineup started to fail at PvE, and so I rearranged the group and replaced some members. I kept Fino for his group buff effect in battle. New members of my lineup include Charlotte and Phoebe.

BackMiddleFront
A-ZhaoHarpeCharlotte
PhoebeFinoKratos

Charlotte has a more frequent self-healing ability compared to Kratos, and she also has a chance to stun enemies. Phoebe is a Crowd-Control type Warrior; she has a primary attack that can stun enemies. I found it pairs well with Charlotte’s Stun ability.

Both Charlotte and Phoebe can be evolved to Orange, and so this works well for the offer.

Camps (Evolve)

The game includes characters from 6 factions (called Camps), each Camp will have a Blue hero you will want to keep as a required ingredient to form an Orange hero.

It is important to note that of the Blue heroes that you get from Rookie/Senior hires, only those listed below in the “Fodder For” column can be evolved to Orange.

You may get “lucky” and pull a Purple hero that also has an Orange or Red version; however, you will still need 2 more copies of that hero and then 5 extra Purples from the same camp to complete the Evolution.

To make an Orange, you will need two Purple copies of the hero, plus 2 Purples from the same camp, and two random Purples. A total of six Purple heroes are needed to make an Orange from the first set of heroes listed below.

To make an Orange from the advanced heroes listed below, you will need three copies of the original, three copies of the fodder, and two Purples from the same camp.

Check your Mart and Exchange Shops every day for the copies you need. Save up Perfect Hire coins, General and Royal tokens, and Bullets for the weekly events.

Check to see how much you need to use to reach a milestone, and then stop there and save the rest until the next event. We have 6 weeks to complete the offer.

NameCampRarityFodder For
HeloiseMachineBluePoll
LeahTamerBluePhoebe
MayneMartialBlueA-Zhao*
CamillaNatureBlueKratos
EvelynnFallenBlueDreyfus
DariaHackerBlueSamuel
HarpeNatureBlue/Purple/OrangeHarpe*
TigerMartialBlue/PurpleWassily
AraeTamerBlue/PurpleNymeria
NaomiMachineBlue/PurpleGilbert
LyseNatureBlue/PurpleRaphael
GrinborthFallenBlue/PurpleArngreene
AttisFallenBlue/PurpleMisteltein
GassolHackerBlue/PurpleBeamon
FinoHackerBlue/PurpleSayung
Blues to Keep

*Harpe and Zhao may be the easiest to get to Orange because the tutorial and tasks provide copies of these heroes. Some of the early game purchases will also provide more copies.

by beb700

A recycling function is available on the Backstreet Map that will allow you to dismantle your unwanted Green and Blue heroes in exchange for resources to upgrade the keepers.

B.C.P.D (Police)

You can unlock 4 tasks daily, with additional uses available with VIP status. Tasks can be refreshed using Bullets or Diamonds. Police Badges will open a new task after completing the currently available tasks. Each task will require heroes from different Camps, varying Star and Quality ranks, and each hero can only be assigned to a single mission at a time. Your score during the Bounty Event will be based on the number of completed tasks.

Mart (Shop)

You can purchase items from the Mart using Gems and occasionally Gold. Many additional shops will become available as you increase in level and unlock the Arena and similar features.

If you see Senior or Rookie Hire Coin, I would advise you to purchase these. The Hero fragments only need to be bought if they correspond with one of the heroes on the Camp chart provided.

Sometimes you will encounter discounted prices on items either in the Mart or on the Chapter Stages. Always buy items that are available for Gold.

Please consult the chart below for item values.

ItemOriginal Cost
Basic Hire
Senior Hire250 D (60 FP)
Perfect Hire1,200 D
General Poker50 D (30 FP for 2) [250 AP for 2]
Royal Poker
Orange Blueprint3,000 D
Blue Fragment800 D
D= Diamond, FP= Friend, AP= Arena

Events

The in-game events last a week and run monthly on a set cycle.

Bounty > Perfect Hire > Arcade + Dawn Event

You can save unused items from the events for the next time around. We have 6 weeks to complete the offer terms, so you will get a chance to use them again.

Specifically, we are looking for Perfect Hire Coins and Blue/Purple Fragments for select heroes. Consult the chart for the names of your upgrade materials.

The Arcade

Rookie Hire

Perfect Hire

You will want to save up your Perfect Hire coins. In the events panel, you will receive rewards for completing sets of hires. See pictures for details. I had 20 coins available when the event started.

Dawn Commission

You need to reach level 50 before completing tasks for this event. As you play, you will receive Dawn Cinema Tickets, which can be used to refresh commissions at the Dawn Cinema.

You can complete 5 missions each day, and using a filmstrip will unlock an extra play. You get more points from Purple missions, so keep refreshing to get purples and complete them. You can also give yourself a handicap in exchange for a % increase in rewards.

The Dawn Commission Shop includes Fragments for Purple heroes for 70k points.

Bounty Event

Complete bounty tasks at the B.C.P.D. to earn points to redeem.

You’ll want to keep refreshing the available tasks until a Purple one shows up. We need to complete 30 Purple tasks to receive 2 Blue copies of Charlotte. We will also get 16 Senior Hires, 1 Perfect Hire, and 1,200 Diamonds.

We need to earn 264 points in the Bounty Event to spend in the Bounty Store. This is enough to purchase all of the Hire Coins, Purple Fragments, Poker Chips, and Energy Orbs.

Gear

Using the Workshop on the Backstreet Map, you can craft gear for your heroes. Part of the tutorial will include instructions on how to manage this function.

Halidoms

These become available to heroes level 45 and above. They are an additional form of equipment that adds extra enhancements to your hero’s stats. The Halidoms come in different Quality levels of Green, Blue, Purple, Orange, and Red. Upgrade materials can be acquired from the Chapter Missions.

Goblins Wood: Lumber Tycoon

Updated 8/03/25: New offer terms and goal achievements. The reward increased to 4,046 USD, and the time limit is extended to 60 days.

Update August: An Update to the guide is in progress.

We have another Tycoon offer from the same developer* as Gold and Goblins.

Are you ready for a new addictive mining simulator game – Goblins Wood: Lumber Tycoon?

Link to offer: https://www.swagbucks.com/games/apps/1163704/goblins-wood?rb=69384823

Terms

Join this exciting idle merge adventure and enjoy a lot of challenging levels! Reach the listed levels to earn up to 404,620 SB!*

We are given 60 days to clear 100 levels in this Tycoon game. Reaching level 35 is worth $12.24 or $14.24 if you complete the purchase goal.

The rewards have been balanced since the last update to this offer. The level 90 goal was altered to be $200 instead of $266. The difference in value has been distributed among the lesser goals.

  • Must be installing Goblins Wood for the first time to receive SB.
  • Must complete events within 60 days of installing to receive SB.
  • In-app purchases and upgrades are available.
  • The award will pend for 10 days

My Experience: I played in 2024 when the reward was less than 100 dollars.

I only reached level 35, which took 25 days. I had caught the flu early on in the offer and was bedridden to the point where I could not even play games.

Whether or not the lost 5 days would have been enough to reach the next goal is difficult to say. I earned $14.50, including a reimbursed purchase. Not really worth the time invested.

With the new goals and values, I think this offer is worth attempting.


Strategy

I think a key point to these Tycoon-type games is how you set up your workers for the periods when you will be idling or offline.

Generally, when you are getting ready for bed, this is a good time to set your Goblins to work on a particularly stubborn tree. Somewhere in the 6-10 hour range.

Any other blocks of your day where you will not have ready access to your goblin workforce should also be delineated in the same manner.

Events

During regular gameplay, when you have run into a slowdown or a lull in lumber clearance rates, this is a good time to switch over to whichever Event map is currently active.

As with the Gold variety of Goblins, Lumber also runs Event maps concurrently with your main field for this offer. You should definitely take advantage of these events for the rewards they provide.

I would suggest saving your premium currency to use exclusively in Events.

The higher your ranking in the event, the greater the rewards from the Leaderboard, which can be substantial, and more than you would get from spending on the main map.

Ads

I know they are irritating, but you need to watch them, every single one of them. You can set your phone down or walk away if you need to, but run those ads.

The boosts from watching ads can include big chunks of resources or even fully leveled Goblin workers. This will make a huge difference in the speed of clearing a map.

We have 90 maps to clear, so any boost will be of benefit in the long run.

Tips

As far as I know, there are no codes available in this game.

I have been unable to locate a Facebook page for the game or any other social media presence other than a YouTube video they released.

There is already a popular woodcraft business called “Goblin Wood” on Facebook.


*

It’s a different company; however, these games are often licensed out to publishers on a contract basis.

This is why you often see mobile games getting re-released by different businesses in the App Store.