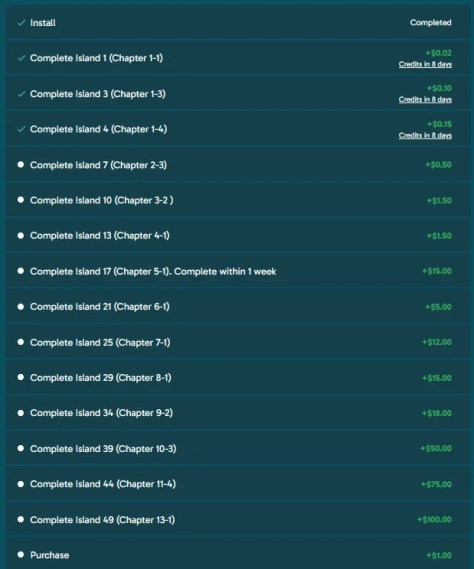
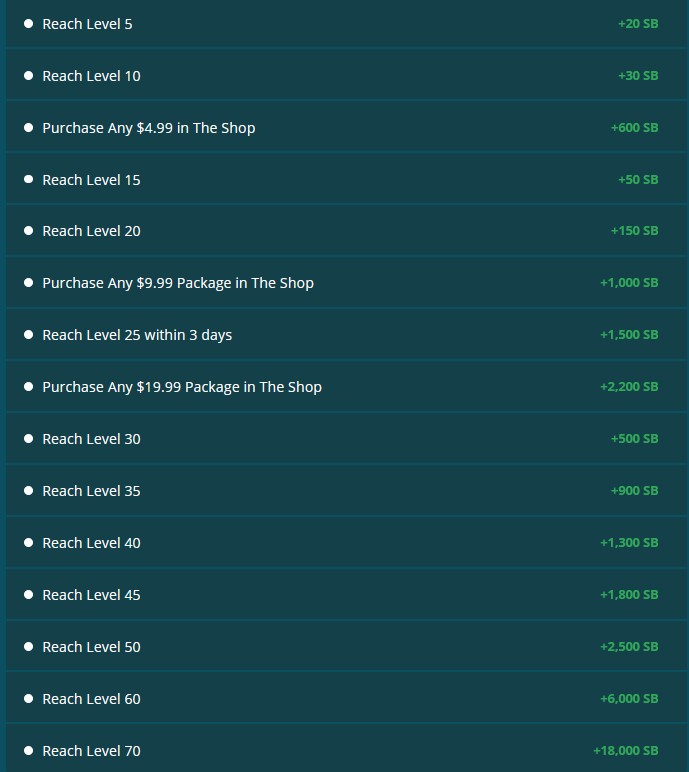
Organise attacks, spin the wheel, raid your friends, and develop your epoch! Install Age of Coins and unlock the listed epochs within 30 days to earn Up to 42,530 SB!*
SB will appear as Pending for 7 days after completing each event.
Must be installing the app for the first time.
Must unlock each Epoch within 30 days of install.
Award will pend for 7 days
No Guide
I played until Epoch 11, but when I went to check my progress on the Swagbucks website, I found that the offer had not been tracked properly.
The ‘Install’ didn’t get tracked so I had to give up on this offer.
I had sent the offer to my phone as a text, which usually works, but when I tried to play the game it said it needed a Facebook account to connect to. I didn’t have one and had to make an account.
I think this is where the tracking was lost.
There was a ‘guest’ login method I could have used, in hindsight, I should have used that method instead.
It’s just some bad luck is all. I wish you prosperity in completing this offer.
The time limit on this offer is now 30 days. Previously, it was a 14-day offer to reach level 25.
This title is from the same publisher as Roger That!, Solitaire Cruise, and Clockmaker. This offer has been, at times, available on both iOS and Android.
Gameplay
Bermuda Adventures is a farming game where you harvest basic resource items and craft them into processed goods. These goods can be used to build village properties or be traded to NPCs for experience points.
As with other games of this variety, you will gain experience points for completing missions on the main island. Side islands are mostly a distraction and can consume your energy. While some side islands can provide extra bonuses, I think the time spent unlocking them could be better used working on the main island.
It may be better to collect the free energy available at the start of a side island and then use it on the main island instead.
Be wary of overproducing goods. It is very easy to run out of storage space. Clearing rocks and trees is a good source of resources and will help to provide farming space for your village.
Gaining Experience
Other than disposing of unwanted items, there are three methods to gain experience points to level up your village.
First, you can complete the missions in the side panel on the left of the screen. These missions will populate as you gain levels and unlock new production options. There will also be some missions that are added as you increase in level.
Secondly, by completing the Task board missions at the tipi in the woods to the east of your village, you may gain experience points. These missions mostly require you to trade your excess resources.
The third and final method involves completing missions from the air balloon captain, who will occasionally pass through your village.
Production facilities are unlocked as you increase in level. Initially, you will collect Wood, Bark, Clay, and Stone, which can be used to construct the home base. Upon reaching level 2, you get access to the Grill and can begin cooking food to restore Energy.
Building
Level
Product
Ingredients
Time (H:M:S)
Workshop
2
Stone Knife, Stone Axe (lvl. 8)
3x Stone
00:02:00
Grill
2
Grilled Corn
3x Corn, 1x Onion, 1x Bark
00:05:00
Kiln
3
Bricks, Clay Bowl (lvl. 10)
3x Clay
00:02:30
Row
4
Corn
1x Corn Seed
00:02:00
Sewing Workshop
4
Rope
3x Bark
00:03:00
Well
4
Water
Free (6 Gems)
01:00:00
Sawmill
5
Boards
Mill
6
Flour
Village Facilities and Produced Goods
Tips
Stone and Clay resources are limited in the initial map area, however, there should be enough to complete most tasks unless you overspend.
The small red berry bushes can be harvested to gain Energy.
Small grasses, berries, and shrubs will regrow as you play, providing an unlimited supply of Onions, Bark, and Energy.
Keys can be used to open Chests, which could contain Energy or Unique items.
Explore, Expand, Exploit, and Exterminate. A genuine empire gameplay.
Finish all levels within 30 days to receive Up to 12,200 SB!
Ages
There are 13 Ages in the game and our final goal, the Early Imperial Age, is number 11 out of 13. The game uses the same map region system as Rise of Kingdoms or Sea of Conquest.
Age
Number
Reward (USD)
Install
–
–
Neolithic
1
–
Copper
2
–
Bronze
3
–
Iron
4
1.00
Early Feudal
5
–
High Feudal
6
1.00
Tech Pack Purchase
–
5.00
Late Feudal
7
–
Early Castle
8
3.00
Privileges Purchase
–
25.00
High Castle
9
6.00
Late Castle
10
30.00
Early Imperial
11
50.00
Purchase
–
1.00
High Imperial
12
–
Late Imperial
13
–
–
–
Total: $122.00
Ages Progression and Rewards
This game does not use building levels to advance. Instead, you will complete research in your most important buildings and this will allow you to advance the Age.
Nation
The Eastern Orthodoxy has a bonus to Research speed, so make sure you start as Russia. We will want to max out our food and storage upgrades in the Town Hall as soon as we start playing the game. Also, try to keep your Research Academy active all the time.
Military
Don’t try to research at all of your military buildings as this will limit your advancement. Just focus on two unit types to specialize in. I chose Cavalry and Priests based on intel from a veteran player.
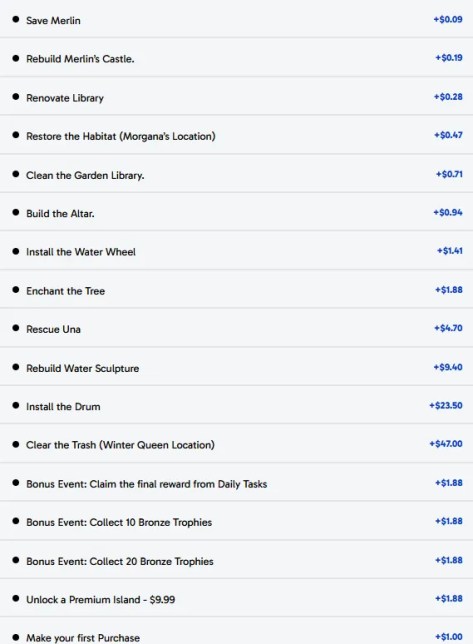
Unlock new items, explore new lands, and create your own wonderland through matching and merging! Install and reach the listed events within 30 days to earn Up to 51,550 SB ($515.50).
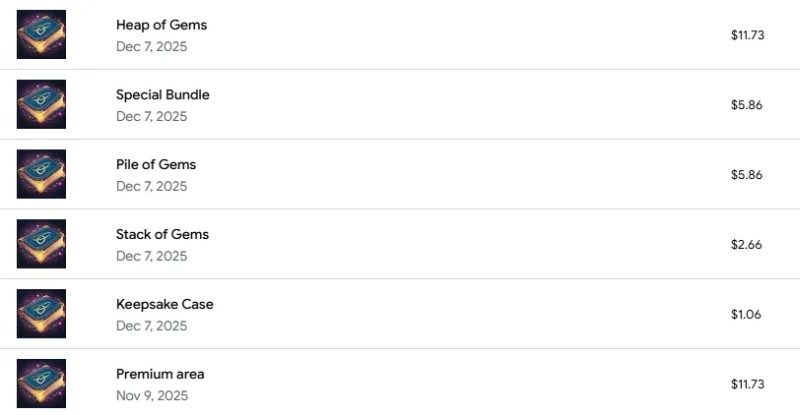
The reimbursed purchases on this offer do not cover the entire cost of the spending, except for the $19.99 Purchase. I usually avoid spending on these types of offers, however, it may become necessary if you are experiencing difficulty leveling up.
There is an offer to purchase Keys after you reach level 10. This purchase is $30 and will count for the above-listed purchase requirements of $1.99, $19.99, and $29.99.
I have confirmed that all purchases are cumulative, so if you miss or skip the keys offer, you can still buy $30 worth of small boosts to clear the spending goals.
You will only receive experience points and level up your map by completing the missions on the main island.
Side tasks and temporary islands do not provide experience on your main map.
Tips
It is always best to merge 5x, not 3x.
Complete the limited-time worlds. The bonuses help out a lot. Use Coins to get more Energy here, not in the regular world.
Always complete your Daily Quest. When you have the “Spend 7 Gems” one, do two 5-minute timers.
Always merge to the highest Tier. Avoid the temptation to collect Coins, Keys, and Gems.
Check the game often, as your Energy replenishes fast, but will not exceed your cap.
I would strongly advise against spending any Gold or Diamonds on any of the temporary Event islands. These events are best used as a means of getting extra Chests for your main map and supplementing your Coin/Diamond reserves.
Event islands will typically include a number of treasure troves with lots of coins and coin materials available for merging. You should clear these first, before completing any side objectives on event islands.
Functions and Facilities
Keys: These get used for unlocking additional land areas on the map. One of the early missions you receive will ask you to merge to the highest level Key.
After finishing the mission, it is a good idea to go to a Purple Key before consuming them.
Chests: If you can manage to wait (patience), it’s best to merge these chests in groups of 5 until you reach the largest size Chest.
You will receive higher-tier items and more of everything from a bug chest.
Coins: Making food provides Keys and Coin materials. Most weekly missions will include merging to the largest coin. The Event islands are also a good source of Coins. Use your coins to purchase the 80 Energy in the Shop.
Diamonds: I recall there was one mission to merge the big gem. It is up to you to decide where to stop merging for this premium currency. I found myself stopping at the Red Diamonds most often.
Character Houses
The first inhabitant you unlock is the White Rabbit. Character houses can process food items that dispense Keys and Coin materials. After finishing the construction, you can make the basic foods. Further upgrades will unlock better foods. Higher-tier food will provide improved Keys and Coins.
The initial resources used to build a house (wood, teapots, or iron) will also be used to complete any further upgrades to the building. Once all possible upgrades have been completed, the associated resource will be removed from the map.
Resources
Wood: These are used to build and upgrade the home of the White Rabbit.
Teapots: The Mad Hatter’s home is built with teapots, and upgrades to his Hat Shop also use the Teapots.
Lumber: The Chesire Cat’s house is built with Bells and then upgraded using Lumber.
Fans: The Dutchess’ house is built using Fans.
Iron: The Iron mine is your source of Cauldrons.
Log
The first purchase, “Newbie Special $1.99,” went pending for me without buying anything.
Day 1
On my first day, I made it to level 8. I think I could have gotten further, but I did not realize that the Keys could be merged into bigger Keys.
This meant that I was unable to unlock some of the larger areas of the map. I also began running out of empty map tiles pretty quickly.
Day 2
The game really slowed down on my second day. I went ahead and purchased the Piggy Bank ($4.99), and then later that day, I purchased the Newbie Special ($1.99). I reached level 9 on my second day of play.
I did not realize that there was an area on the map that could be unlocked with Gems. Bambi’s section can be unlocked for 799 Gems, so it would be a good idea to save up for this when you first start playing.
Day 3
Sometimes, on the morning of my third day, I reached level 10.
I merged the Madhatter, but I still needed to reach his house. I didn’t unlock the path until just yesterday, so I still have a lot of obstacles to clear.
The path to the Madhatter’s house is just past the Teapots. At level 10, you start getting Cheshire Cat items. Space is very much at a premium.
I did not get to the highest tier of the Key before I used it. I was worried that I would waste too much time without clearing the Teapots. If you are just starting out, I would definitely suggest getting the highest-tier Key unlocked early on.
Day 4
Finally reached level 11 this morning, well, maybe the middle of last night. I’ve been really grinding on this game far into my evenings. In fact, I almost missed a test on Sunday. That would have been embarrassing.
I am getting close to unlocking the Cheshire Cat, and I almost have enough teapots to make the second upgrade on the Madhatter house.
On the static Fairy Tale island, I still have a long way to go. I am a few merges away from being able to unlock the scarecrow. I am nowhere near getting the Three Little Pigs or the Tin Man done.
I have been working on clearing one of the Event islands, I think it is Rapunzel. It’s not the fairy tale island; this is one of the temporary islands. I am combining iguanas now to try to unlock an outfit. This map does generate quite a bit of Gold, but energy is very hard to come by, and most tiles cost 30 points to clear.
I was able to place one of the teapots to upgrade the facility. It makes coffee now. I am also occasionally getting level 2 Keys from the bakery at the White Rabbit.
Day 5
Level 12 took forever to reach. I barely have any space, and the game keeps churning out event islands and seasonal events. First, I was dealing with Shamrocks, then Flowers, and now it is Beanstalks. There is also some ultimate witch thing going on. I have no space.
I still have not managed to collect enough Diamonds to open up Bambi’s area. I am getting close to finishing the Cheshire Cat. That will also knock off the last upgrade to the Mad Hatter’s house.
On Fairytale Island, I managed to merge Piglet with Pooh’s area on the map. I now need to finish the Clock Croc for Peter Pan and Ariel for the mermaid section.
This island is slow. But it has been a good source of Gold and Diamonds. The Fairytale map does not use Energy; you are reliant on watching ads to get single items, daily freebies from the shop, and cross-over chests or other items from the other islands.
Day 15
Things have really slowed down. It took several days to reach level 15, and I now only have 15 days left on the offer. I think I may only get to level 18 before I run out of time. I have not purchased the $20 or $30 items. I am still on the fence about dropping that much money on the offer.
Day 16
I bit the bullet and made some additional purchases, including unlocking the small part of the map with the Diamonds for $3.99. This brought my total spending to $21.45, and it checked off the goals to “unlock land” and “spend $19.99.”
So, if you miss the keys offer or don’t feel it is worth it, you can still spend $30 to get all the spending goals. You could even buy 6 maxed-out piggy banks for total efficiency (4,800 Energy).
The old goal chart ended at reaching 12.5 million dominance (the old term was Sovereignty). Now the list caps out at 25 million, and they have added another level of VIP.
Reaching the last two objectives within a time limit of 15 days is really not feasible, in my opinion.
The time limit was previously set to 15 days. The new offer allows for a total of 30 days. So, I think it would be possible to reach some of the lesser goals.
I only made it to 1.58M Sovereignty ($4.82) after playing for 8 days. I’ve done much better in other games that use this format, such as King’s Throne and Game of Khans.
Discord: There is a permanent link to the official Discord server located inside the game (Profile > Settings > Links > Discord).
Reddit: The unofficial subreddit was flagged as nsfw.
Strategy
Your Sovereignty is the sum value of the Warden, Lovers, and Heirs stats. All you need to do for this offer is boost your Warden’s stats via in-game items and leveling them up.
Lovers and Heirs will provide minimal improvements to your Sovereignty score.
You will want to use Skill books to raise the stats of your Wardens. Each hero has one or more skills that they specialize in.
Some Wardens are “jack-of-all” types, such as Camilla, and these can be fed any type of Skill book.
We will want to level up our Wardens to level 30 for the Economic types (Allure, Intel, Spirit) that boost our resource disbursements.
The Strength types will be used for combat, especially in Campaign and PvP, so let’s level these heroes to 100 and promote them when able.
Other than that, you just need to clear mission objectives. Completing your Daily Tasks will reward additional items.
Mostly, we want to get skill books to raise the stats of our Wardens, which in turn will raise our Sovereignty score.
Resources
The game uses 3 resource types: Blood, Dark Blossoms, and Bats. The Blood is used to level up our Wardens, and the Bats are used to clear the Campaign stages.
Clearing the Campaign stages will be the primary source of EXP for the player. As our Player increases in level, their court rank will improve.
This court ranking function is used in some of the mini-games as a way to “boot” out lower-ranking players.
You can collect Resources in your Castle. Initially, the resources will refill every minute, but this timer gets extended as you increase in level.
But, you also get more distribution uses at higher levels. The amount of resources you receive depends on the associated stats from your Wardens.
Dark blossoms are used in the Masquerade to keep your Luck value high. This increases the chances of encountering one of the potential Lovers that can be unlocked via Masquerade.
Some take 5 encounters, while others need 10 before they will enter your harem. If you encounter a Lover you already have in your harem, they will receive one Intimacy point.
Wardens
You can further boost the stats of your hero by using Skill Scrolls to improve their specialist skills.
Each skill can have 5 possible ranks, although, in the beginning, you will only see 3 ranks available.
The success rate on the Skill Scrolls is 100% for first-rank skills, 50% for second-rank, and 33% for third-rank ones.
I would suggest avoiding the allure of gambling on success with the 33% skills and instead simply do the 50% or 100% skills.
You can use the Training function to improve the more difficult skills without a chance of failure later on.
The next way to improve your Warden’s stats will be to unlock their mates. Each of the Lovers has a matching Warden, which you can view from their profile page.
The synergy effect can be boosted on the Bond screen, and this will, in turn, improve your Sovereignty score.
VIP
Each day, you can receive up to 18 VIP points from completing the Daily Tasks. The first VIP level requires 499 points.
VIP 1: 28 Days
VIP 2: Days?
The VIP function is largely intended for “whales,” players who spend tens of thousands of dollars on mobile games.
Whenever you see a game offer that includes an objective to reach a particular VIP level, understand that it will cost money, and like far more money than the offer rewards.
You can find a full chart of the costs associated with similar games on the GoV Wiki.
My Progress
When I originally did this offer, the terms were to finish in 15 days. I gave up after day 8, when I realised how insane the scoring system was.
Day 1
I managed to reach 140k Sovereignty on the first day and cleared chapter 13 of the Campaign. However, I was prevented from getting further by one of the missions that required the player to complete a daily action twice.
I saved up my Diamonds from completing Daily Tasks and then used them to purchase the Advancement pack, which included lots of Blood and Bats. I unlocked two Training slots for Wardens and two slots for Children. I also got 5 Lovers added to my harem.
The server reset time was at midnight for me (EST). This was nice since the last game offer I finished (Sea of Conquest) used an international clock and had inconvenient hours.
Day 2
On the second day, I reached 300k Sovereignty; however, because I was going too fast on the offer, I lost track and did not receive credit for the 200k objective.
I was once again stopped from further progress when I reached mission 154, which required a daily function.
Day 3
I managed to hit 455k Sovereignty today, and my Lord level is 5 currently. Total Power is 209.78K, and Intimacy is 226.
I have placed all of my Intimacy items on Alexis, the starter bride. I do not see any of the usual undressing mechanics in this game.
But those may become available later on.
Day 4
Pretty much uneventful. I did run out of Nectar, though. I had set the Masquerade to auto-refill using Nectar to improve my Luck stat. I forgot that Nectar is used to recruit Bats.
I also noticed that my Spirituality score was higher than my Intelligence, which meant that I was using more Nectar than I could generate.
So I have stopped improving the stats on my Spirit Wardens, and now I am only boosting Strength and Alchemy.
Day 5
I’ve been doing the Fishing and Bat attack minigames in the Dark Temple.
They give me some meager rewards, but it gives me something to do while I wait for more Bats.
My Sovereignty has hit 755k, and I am beginning to rack up undefeated streaks in the Arena as my Wardens get stronger.
Day 6
I’m up to 980k, mostly because I had forgotten to spend my Lovers Affinity points. These points can be used to gain a percentage boost to the primary stat of the Lovers matching Warden.
I received around 20-30% extra points from 7 of my Wardens, which came out to be around 125k points.
I think maybe 2 days ago, I gained access to the Conclave, which hosts the Assembly. This is just a sit-down game where you can bump off players of a lower ranking than you.
In Sultan and Khan, there were never any seats, and you were always getting bumped off when you did find a spot.
But not in Game of Vampires. There is always plenty of seat space, and I have only been bumped off a single time.
The benefit of joining the Assembly is that you can spend your accrued points on a bonus for all of your Wardens. I chose the Alchemy boost and managed to clear the first ten levels of the skill tree.
I managed to get an extra 1.8k Intellect on all of my Wardens and an extra 6% Intellect from consuming Alchemy books. With 22 Wardens, this came out to a total of 39.6k points.
Day 7
I am now up to 1.1M Sovereignty.
I finished the first week of events and received the Lover Inanna, who matches with Gilgamesh, who is an Allure/Intellect Warden. I now have a total of 9 Lovers and 23 Wardens.
I unlocked the Underworld, which is a mining function where you dispatch a crew of Wardens led by one of your Lovers.
The Wardens will earn Talent points, and you can get various small item rewards.
Day 8
I finally hit 1.2M on my Dominance score. My Power is 386.09K, and my Intimacy is 519.
I’ve been putting all of my Intimacy and attraction items on Alexis, and she is now at Tier 3: Heart’s Desire. The higher your Lovers’ rank, the more Attribute points your Children will get when they level up.
The progression of earning Sovereignty/Dominance points has really slowed down at this point.
I am not sure if I can make it to the next goal in the 7 remaining days for this offer.
Unfortunately, so far I have only earned 450 points, which is equal to $3 on MyPoints. So this offer is really not worth doing.
The End
On day 14, I had a total of 1.58M Dominance/Sovereignty.
Not enough to get any of the higher rewards. I think that spending money on this game is the only way I could get any further on the offer.
My total from working on this offer has been $4.82. Definitely not worth the time spent playing every day for two weeks.
Updated Review: based on changes from Update 67 on March 27th, 2024.
With this new Year of the Dragon coinciding with the 50th anniversary of the pen and paper game, we are seeing some wild new dragon-themed offers for the entire year.
The new Dragon Lord archetype can be claimed in the Hall of Heroes on the bottom floor. The archetype uses the Fighter class as its base.
Update 67
Some additional notes are available from the update on March 27th, 2024. Update 67 included a new free adventure pack for level 18 Heroic and 34 Legendary players.
Update 66.1
A recently released update has corrected many of the minor problems that players were encountering with the Ravager enhancement tree for Dragon Lord.
I would say the class works best as a pure build. Your talents lie in how fast you can clear single-target enemies and your ability to stun large groups of foes, with no consideration for type.
Basically, if it is in front of you when you roar, it will be stunned.
I have seen some class combos running around the server. The most common one I have seen is a Paladin/Dragon Lord with Dragonborn as the race. The next most common was a Druid/Dragon Lord with Asimar as the race.
My Build
I decided not to use a true reincarnation to make my Dragon Lord. I created a fresh, first-life character, to try out the new archetype.
I was initially a bit concerned with the lack of healing, but I soon got used to using the crowd-control abilities and choosing my targets to make fights go fast and take the least damage possible.
Dragon Lord is designed to use either your Strength or Charisma score for combat and abilities. Due to this, it does combine very well with Dragonborn, Half-Orc, and the Purple Dragon Knight races.
Abilities
The primary ability you will use throughout your life as a Dragon Lord will be the Roar which becomes available at level three. It is a cone-shaped Tactical attack that extends outward a short distance. Anything caught in the blast must make a save check or be Dazed.
The DC for the roar uses a Base 10 + the higher of your Charisma or Strength ability modifier + Breath DC bonuses + Stunning bonuses. Roar is also listed as a Tactical ability, so it also gets bonuses from anything that boosts Tactical abilities. For example, Combat Mastery and Sundering, or any of the many feats available to fighters.
At level 5, an improvement to this ability becomes available. The upgrade will reduce the cooldown time, turn the Daze into a full Cower, and give you a 20% bonus to damage against Helpless foes.
Reapers cannot escape your roar either and will cower while you dispatch them.
Dragon Lords get an Imbue damage type based on their chosen dragon. I took the Black Dragon as my selected type and I also used a White Dragon as my racial type. This gave me energy resistance to both Cold and Acid which are more useful in the endgame.
Draconic Arms adds a 1d6 bonus to your damage per imbue die you have. You will also get Aura-based bonuses at three stages of your character’s life and these can be freely selected to customize your build as you increase in level. The aura’s is similar to a paladin’s aura, affecting group members that are within range.
There is also a companion ability like what the Halflings get. This will improve an ally’s combat ability for a short while. Later it gets an upgrade that turns it into a mini-heal with a Panacea spell that scales with your Melee Power.
Originally, this ability required you to be right next to your ally, and the animation would root you in place when you used it. However, Update 67 corrected the problems when using the ability and you can now use it on the move.
One of the Tier five enhancements will give you a +2 bonus to your weapon’s critical multiplier with any weapon you use. With my Khopesh this brought me up to an x5 on the multiplier without any other bonuses included. The damage numbers get very big very fast with Dragon Lord.
Survivability
The class includes the potential for high AC and Fortitude scores, especially if you combine it with the Dragonborn racial bonuses to Natural Armor. The Defender enhancement tree can bolster your health enough to cover a lack of self-healing ability.
Second Wind, while useful in a pinch, is hampered by its long cooldown. Your goal with the Dragon Lord archetype will be to crowd-control enemies and then clear the field
Conclusion
I like the Dragon Lord, but I strongly suspect we will see some balancing soon to level the playing field. The damage output is crazily high at the moment and far outstrips what other melee classes can manage.
The Roar will likely be nerfed. I mean why, is an emotionless creature like a skeleton or a golem cowering because someone yelled at it?
Upgrading the Flagship is how you will complete the offer objectives. The Flagship is the equivalent of the Castle or Headquarters in other games.
I think the best strategy is to max out your Flagships’ Cargo space and Sailing speed by building Storage and Oarsmen Quarters (+5% Speed). Then find the most lucrative Auto-Trade route, and keep your ship running 24/7. You can send your Heroes to collect resources for hours at a time.
I installed the game on March 4th and finished two objectives. After completing the 2nd objective, I purchased the $9.99 Artisan pack that includes a 3rd builder queue.
As you can see below, I received reimbursement for my purchase. On MyPoints, the valuation is generally 150 points = 1 USD. So, the 2,125 pts were actually worth $14.17.
Starting with the 3rd objective, I did receive early credit before reaching the goal. The level 14 reward went pending upon reaching level 13.
Note: I only made it to 19. After that, the build times on facilities increased to 3-4 days, and I ran out of time. I received 8,194 points or 54 USD from this offer.
Intro
This one is a bit more involving compared to other Build and Battle titles like State of Survival or West Game. Unlike the other games, your ship is the HQ and it’s mobile, so you can move around the map as needed to gather resources and grind out levels.
The first two objectives are easy to clear on the first day. It starts getting slow to upgrade your facilities after level 8. The upgrade time went from 1 hour to 8 hours, a big jump up.
Probably the first thing you should do is get all of your Storage Rooms built and upgraded to level 3. In the early game, you have very little Cargo space for carrying plunder. This can limit your ability to gather enough Gold to upgrade your ship(s).
I’ll continue to update this post as I progress…
Player
You will have a player avatar and character levels associated with your account. You gain EXP from fighting pirates and completing missions.
Your Hero’s maximum levels are limited by the players’ level. The heroes get EXP from items. Hero skills can be upgraded with items. Land battles, gathering resources, and crewing ships are the different functions in which you will deploy your heroes.
Your ship’s Hit Points are refilled by resupplying the ship with crewmen from the reserves.
Heroes
Using the Echo Conch, you may gacha summon to get new heroes or extra shards of ones you already have. You will get 1 Free summon each day in the United Front option.
Conch Summon
Epic (Guaranteed)
Legendary (Guaranteed)
Hero
United Front (Normal) [Echo]
Every 10 summons
Every 100 Summons
Lester, Sharky, Cordelia, and Ahab (Legendary)
He Who Returned (Limited) [Hymn]
Every 10 Summons
Every 80 Summons
Bullet Storm (Limited) [Hymn]
Every 10 Summons
Every 80 Summons
Bones (Legendary) and Cursed Ed (Epic)
Summon Rates
Your heroes can be equipped on your ships to improve their stats and fighting ability. Importantly, the Constitution value of heroes equipped to your Flagship will increase its Hit Points.
Most guides suggest placing Armstrong in the Gunner position, Ahab as Captain, and Madame Lulu as the First Mate.
The number of heroes you can equip for your ship will depend on its level. You can also place heroes on your support ships.
Upgrading Ship
Note: The Construction Materials Room provides a % discount on upgrade timers. The average time I have listed below does represent my timers having purchased the 3rd builder slot. The total discount I received was 45%.
Ship Level
Gold Cost
Requirements
Average Time
10
500k
–
11
1 million
Galley 10 and Distillery 10
12
1.5 million
Captain’s Quarters 11 and Enlistment Quarters 11
13
2 million
Astrologer’s Chamber 12 and Sick Bay 12
14
2.5 million
Liaison Office 13 and Drill Hall 13
15
3 million
Galley 14 and Mess Hall 14
16
3.5 million
Captain’s Quarters 15 and Enlistment Quarters 15
17
4 million
Astrologer’s Chamber 16 and Sick Bay 16
18
4.5 million
Liaison Office 17 and Drill Hall 17
3 days 7 hours
19
5 million
Distillery 18 and Galley 18
3 days 14 hours
20
5.5 million
Enlistment Quarters 19 (prereq. Mess Hall 18) and Captain’s Quarters 19
3 Days 18 hours
21
6.5 million
Astrologer’s Chamber 20 (prereq. Construction Materials Room 19) and Sick Bay 20
4 days 8 hours
22
7 million
Liaison Office 21 and Drill Hall 21
Ship Upgrades
In addition to your Flagship, your fleet may encompass 4 extra smaller ships. These slots become available as you level up your Flagship. You will receive two extra ships for free, and one can be unlocked by completing the first Pirate Kings Trail event.
When you craft a ship there, you have a chance for it to be critical and get an Epic or Legendary result. All stats are random, and it is possible to get a terrible ship. The same is true of your ship equipment.
Support Ships
Support ships can be separated from the fleet by pressing and holding their icons and then dragging them to an empty spot on the water. This will disengage the ship from your fleet.
This is useful for when you want to place a boat to guard a Sentry Tower or if you want to hunt monsters with your Gang, but still be able to leave your Flagship in Auto-Trading mode.
After my Support ships reached level 13, I stopped upgrading them to save Gold. The Flagship upgrade costs got so high that I didn’t feel comfortable spending the resources on the little Support ships.
Equipment
Your character does not equip gear, but you can equip the ships in your fleet with 4 different items (Cannon, Sail, Helm, and Figurehead). I suggest waiting until you get Lvl 12Legendary gear before you enhance the equipment.
You can exchange tokens for random Legendary Ship Parts in the Cartographer’s Corner.
Each day, you can kill Sea Monsters 5 times to get rewards. The level 12 Krakens can drop Legendary equipment.
The stats on equipment are random, and it is possible to find a Rare/Epic item with better stats than a Legendary of the same type. You want to get stats in Whole Numbers and avoid the ones that give a Percentage (%) bonus.
So hold onto your gear and compare the pieces before deciding which ones to dismantle. When you dismantle the equipment, you will receive Starlight Shards that can be used to enhance your gear.
Sails: You can use dyes, obtained from your Gang, to color your ships’ sails for a little customization. The paint does not provide a bonus on its own and is only cosmetic in nature. However, you can add the logo of one of the Trading Guilds to your sails, and this will provide extra reputation points whenever you battle other ships on the map.
Infamy
Killing Players, looting resources, and plundering Merchant Ships will accrue Infamy. The higher the Infamy Level, the more penalties you will receive. At the maximum level, you will not receive any resources from attacking other ships.
PvE
Attacking Merchant Ships and Smuggler Ships will build up your Infamy rather quickly. They are a good source of cooking and brewing items, but there is some risk of getting too much infamy.
PvP
The game employs Bounties for players with any Infamy points. The player who sinks a bounty will receive a gold reward. You can tap on the Red Skull icon on your hot bar to view your Infamy level and the bounties associated with each level.
Players with a bounty are considered to be fair game for killing, regardless of whether an Alliance or Truce is in effect.
Artifacts (Triggered Abilities)
Eye
This is an instant teleport option that can be used to quickly move to an Ally or a Port. This is good for helping out friends being attacked in PvP or for helping to clear monsters when they are on the other side of the map. There are 5 uses each day.
Horn
The horn will temporarily speed up your ship and allow you to cut down on transit time. This will refill charges every 15 minutes, and the ability has a 15-second cooldown between uses.
Compass
The compass has two functions. First, it can be used to find Treasure from maps. The treasure will be a bunch of trading goods that can be sold for a pretty penny. You get 20 uses of the compass each day (refills over time).
Secondly, the compass can be used to reveal the land at hidden ports. Afterward, you may clear each of the Mist Incidents for the Port by checking all of the Landward Quests and the Maritime Incidents.
You may either use a single compass to clear the fog and then manually clear each incident, or you may spend 3 compasses to automatically clear the island and receive all rewards. The automatic method does allow you to clear distant ports you have not yet visited.
Once all ports on the map are 100% cleared, the entire sea area you are in will be cleared of Fog.
Hourglass
This tool will allow you to skip ahead 2 hours’ worth of game time. It is useful when you have lots of Food or Drinks queued up and for construction projects. It can be used once every 12 hours.
Exploring the Map
When you visit a port for the first time, you may tap on the compass icon on the island to “make acquaintance” with the port. This will reveal a large portion of the mist from the map and will allow you to complete any Mist Incidents on that island.
You can also complete Mist Incidents on the water if you come across them while exploring, as long as they are connected to a port. However, for Incidents that are physically inaccessible but still visible, you cannot clear them.
Clearing Incidents will reward you with resources and other goods. Completing all Incidents available at the port will give additional rewards.
Plunder
Plunder and Search will reward regular items while Worship will provide a permanent stat bonus that can stack the more Temples you visit in the Sea.
Salvage
For the Salvage Incident, there is a simple trick to get all gold barrels for a perfect run. Just make sure to tap the screen as the gold barrel reaches the marked island in the picture.
Worship
You may unlock a permanent bonus to your stats by visiting Worship sites. Each site features a particular pan-Mesoamerican deity that will bestow a % bonus once all torches have been lit.
Fishing, Cooking, Brewing
You can use the Fishing function from anywhere; however, schools of fish will drop specific fish at a higher rate.
Epic (Purple) and Legendary (Orange) fish will only show when a bar appears on the left side of the screen during fishing. You have to time the indicator to land in the blue bar area to catch the fish.
Cooking
A complete list of Food/Drink recipes can be found below. The Distillery works the same as the Galley for cooking food. Just throw in the ingredients to see what you can make. Once you complete a recipe for the first time, you can collect Emeralds from the catalog.
The Quick Cook/Brew function can be used to craft food from known recipes.
Food crafted in the Galley is also used for the Pirate Revel Event, which rewards players with 2.6 million gold for full completion.
Galley Recipes (Food)
There are multiple combinations that all give the same result. To save on space and sanity, this list will only include the most basic of combinations from my own list of recipes. Your list may vary depending on the various combos you make, but it is all relative.
Tier Legend:
Uncommon
Rare
Epic
Legendary
Name
Tier
Ingredients
Supplies
Selling Price (Gold)
Burnt Fish
Common
2 Eggs, 2 Milk
+15
Greasy Cake
Common
1 Egg, 1 Milk
+15
Salted Fish Soup
Common
1 Fresh Water, 1 Rare Fish
+15
Rare-grilled Fish
Common
1 Rare Fish
+8
Slimy Ice Cream
Common
1 Milk
+8
Burnt Egg
Common
1 Egg
+4
Canned Broth
Common
1 Fresh Water
+4
Tough Meatballs
Common
1 Raw Meat
+48
Rotten Fruit Salad
Common
1 Berries
+24
Mushy Tortilla Chips
Common
1 Maize
+24
Raw Fish Taco
Common
1 Maize, 1 Rare Fish
+30
Raw Minced Meat Taco
Common
1 Maize, 1 Raw Meat
+24
Undesirable Food
Common
Wheat
+1
Ordinary Fried Fish
Uncommon
1 Epic Fish, 1 Milk, 1 Egg
+30
Ordinary Fish Soup
Uncommon
1 Fresh Water, 1 Epic Fish
+30
Ordinary Cake
Uncommon
1 Egg, 2 Milk
+24
120
Ordinary Grilled Fish
Uncommon
1 Epic Fish
+20
Ordinary Ice Cream
Uncommon
2 Milk
+20
Ordinary Fried Egg
Uncommon
2 Egg
+10
Ordinary Broth
Uncommon
2 Fresh Water
+10
Ordinary Fish Slices
Uncommon
2 Legendary Fish
+96
Ordinary Meatballs
Uncommon
2 Raw Meat
+210
1.0k
Ordinary Fruit Salad
Uncommon
2 Berries
+105
Ordinary Tortilla Chips
Uncommon
2 Maize
+105
525
Ordinary Fried Fish Taco
Uncommon
1 Maize, 1 Epic Fish
+168
840
Ordinary Minced Meat Taco
Uncommon
1 Maize, 2 Raw Meat
+168
840
Fresh Fish Slices
Rare
3 Legendary Fish
+128
640
Freshly Fried Fish
Rare
1 Legendary Fish, 1 Egg
+56
280
Hot Fish Soup
Rare
1 Fresh Water, 1 Legendary Fish
+56
Nicely Grilled Fish
Rare
1 Legendary Fish
+48
Freshly Baked Cake
Rare
3 Egg, 1 Milk
+40
200
Freshly Made Ice Cream
Rare
3 Milk
+36
180
Freshly Fried Egg
Rare
3 Egg
+18
90
Hot Broth
Rare
3 Fresh Water
+18
90
Fresh Fruit Salad
Rare
3 Raw Meat
+216
Freshly Made Tortilla Chips
Rare
3 Berries
+108
Freshly Made Fried Fish Taco
Rare
3 Maize
+108
1.0k
Freshly Made Meatballs
Rare
1 Legendary Fish, 1 Maize
+216
1.0k
Freshly Made Minced Meat Taco
Rare
3 Maize, 1 Raw Meat
+216
Tasty Fish Soup
Epic
2 Epic Fish, 1 Fresh Water
+72
360
Yummy Grilled Fish
Epic
2 Epic Fish
+64
320
Smooth Ice Cream
Epic
4 Milk
+64
Nice Fried Egg
Epic
4 Egg
+32
160
Delicious Broth
Epic
4 Fresh Water
+32
Fluffy Cake
Epic
2 Egg, 2 Milk
+64
320
Appetizing Fruit Salad
Epic
4 Berries
+192
Delicious Fried Fish Taco
Epic
1 Maize, 2 Epic Fish
+384
1.9k
Delicious Minced Meat Taco
Epic
2 Maize, 2 Raw Meat
+384
Tender Fish Slices
Epic
3 Legendary Fish, 1 Rare/Epic Fish
+192
960
Wonderfully Fried Fish
Epic
2 Epic Fish, 1 Egg
+72
360
Luscious Meatballs
Epic
4 Raw Meat
+384
1.9k
Crispy Tortilla Chips
Epic
4 Maize
+192
Exquisite Fish Slices
Legendary
4 Legendary Fish
+384
1.9k
Crispy Fried Fish
Legendary
2 Legendary Fish, 1 Egg
+104
520
Divine Fish Soup
Legendary
1 Epic Fish, 1 Legendary Fish, 1 Fresh Water
+88
440
Finger Licking Grilled Fish
Legendary
1 Legendary Fish, 1 Epic Fish
+80
400
Sumptuous Cake
Legendary
1 Egg, 3 Milk
+96
480
Heavenly Fried Fish Taco
Legendary
2 Legendary Fish, 1 Maize
+600
Heavenly Minced Meat Taco
Legendary
1 Maize, 3 Raw Meat
+600
Sea of Conquest: Complete Galley Recipe List
Distillery
The interface for the Distillery is the same as the Galley. You can combine fruits and water to craft beverages in different tiers.
I was unable to craft any legendary brews in the first ocean area. I believe you will need special ingredients that either come from other (internal) areas or from Merchant ships.
The Pirate Revel event does include a list of beverages that will be needed to get all the rewards.
Distillery Recipes (Drinks)
There are multiple combinations that all give the same result. The descriptive text of each drink can be seen as tips on which ingredients you should use to craft the drink.
To save on space and sanity, this list will only include the most basic of combinations from my own list of recipes. Your list may vary depending on the various combos you make, but it is all relative.
Tier Legend:
Uncommon
Rare
Epic
Legendary
Name
Tier
Ingredients
Supplies
Selling Price (Gold)
Ordinary Wine
Uncommon
1 Grape
+24
480
Ordinary Tequila
Uncommon
1 Agave
+24
480
Ordinary Rum
Uncommon
1 Sugar Sorghum
+24
480
Ordinary Vodka
Uncommon
1 Potato
+24
480
Ordinary Gin
Uncommon
1 Juniper Berry
+24
480
Ordinary Whiskey
Uncommon
1 Barley
+24
480
Regular Beverage
Uncommon
1 Fresh Water
+2
Premium Wine
Rare
2 Grapes
+32
640
Premium Tequila
Rare
2 Agave
+32
640
Premium Rum
Rare
2 Sugar Sorghum
+32
640
Premium Vodka
Rare
2 Juniper Potato
+32
640
Premium Gin
Rare
2 Juniper Berry
+32
640
Premium Whiskey
Rare
2 Barley
+32
640
Ordinary Gin & Tonic
Rare
2 Barley, 1 Water, 1 Sugar
+64
1.2k
Ordinary The Sailor
Rare
1 Potato, 1 Orange, 1 Juniper Berry
+64
1.2k
Ordinary Hot Toddy
Rare
2 Barley, 1 Sugar
+64
1.2k
Ordinary Gin Fizz
Rare
1 Juniper Berry, 1 Soda
+64
1.2k
Ordinary Homeland
Rare
1 Grape, 1 Juniper Berry
+64
1.2k
Ordinary Gaucus’s Kiss
Rare
1 Barley, 1 Sugar Sorghum,
+64
1.2k
Reserve Wine
Epic
3 Grapes
+40
800
Reserve Tequila
Epic
3 Agave
+40
800
Reserve Rum
Epic
3 Sugar Sorghum
+40
800
Reserve Vodka
Epic
3 Potato
+40
800
Reserve Gin
Epic
3 Juniper Berry
+40
800
Reserve Whiskey
Epic
3 Barley
+40
800
Premium Gaucus’s Kiss
Epic
1 Barley, 2 Sugar Sorghum,
+96
1.9k
Premium Hometown
Epic
1 Grape, 2 Juniper Berry,
+96
1.9k
Premium Gin Fizz
Epic
1 Soda, 1 Juniper Berry, 1 Lemon
+96
1.9k
Premium Gin & Tonic
Epic
1 Juniper Berry, 2 Tonic Water
+96
1.9k
Premium Tequila Sunset
Epic
2 Agave, 1 Orange, 1 Soda
+96
1.9k
Premium Lonely Queen
Epic
1 Agave, 1 Lemon
+96
1.9k
Premium The Sailor
Epic
3 Potato, 1 Orange
+96
1.9k
Premium Hot Toddy
Epic
1 Barley, 1 Sugar, 1 Water
+96
1.9k
Premium Mojito
Epic
1 Sugar Cane, 1 Lemon, 1 Sugar
+96
1.9k
Divine Gin Fizz
Legendary
1 Juniper Berry, 1 Lemon, 1 Sugar, 1 Soda
+192
3840
Divine Gin & Tonic
Legendary
1 Juniper Berry, 3 Tonic Water
+192
3840
Divine Tequila Sunset
Legendary
1 Soda, 2 Orange, 1 Agave
+192
3840
Divine Lonely Queen
Legendary
1 Lemon, 3 Agave
+192
3840
Divine The Sailor
Legendary
2 Orange, 2 Lemon
+192
3840
Heavenly Hot Toddy
Legendary
2 Barley, 1 Water , 1 Sugar
+192
3840
Divine Gaucus’s Kiss
Legendary
2 Sugar Sorghum, 2 Barley
+192
3840
Heavenly Hometown
Legendary
1 Grape, 3 Juniper Berry
+192
3840
Divine Mojito
Legendary
2 Sugar Cane, 1 Lemon, 1 Sugar
+192
3840
Sea of Conquest: Complete Distillery Recipe List
Mess Hall
Any food items that have been crafted may then be sold in the Mess Hall on board your Flagship. Alternatively, you may save the food to supply your ship.
Gold generated in this way doesn’t earn much unless you are selling Legendary Dishes. Also, keep in mind that you cannot sell Food immediately using the Mess Hall.
The cabin can only process sales in a limited number of sales each day. Upgrading the Mess Hall will improve its function. You may collect your current earnings by tapping on the green icon in the Mess Hall cabin. This source of Gold comes in stacks of 50.
Items
Like most mobile games, they all have different names for the same items used in-game.
Grants 10,000 Reputation points with the selected Guild.
Smuggling Warrant
Use it to purchase goods in the Black Market.
Retrofitting Tools
Helps allocate storage space for the Cargo Hold and Supplies Hold even at sea.
Advanced Ship Part Chest
Select a specific type of Ship Part. 100% chance of level 16-20 Legendary tier items.
Item List
Trials
This is the standard AFK rewards campaign. It is mostly played using your Heroes on the Land, but there is a ship battle option. The ship battle cannot be completed while you are auto-trading, but the land battles can be.
The AFK rewards include EXP for your Heroes and Wood/Iron for construction and upgrades. Completing stages will reward Echo Conch and other items.
Earning Gold
Exchange: The Rogues Rumble PvP fights reward tokens that can be swapped for Gold and other items. You can access the challenge by tapping on your Avatar.
A recent update improved the UI and added ship battles as an option. The rewards were significantly boosted, and new items have been added to the exchange.
Trading (Manual): You can purchase a hold full of goods and sail to a different port to sell them. You will get a good price if the goods being sold are different from those available on the island. The further you have to travel, the greater the earnings per trip. Additionally, as you unlock higher Tiers of Relations with the various NPC Guilds, you will get access to higher-quality goods for trading.
Combat: When you pick up loot from pirates or from Treasure stashes, you can sell it at a port.
Auto–Trader: In the trading interface, there is an option to enable automatic trading. This is a good option when you are going to log out. It can take 1-2 hours to complete a 50-stop trading route. The 100-stop option is pay-to-play only.
Smuggler Tickets: When you complete Daily Tasks, you will receive these tickets, which can be used at Black markets to get Goods for free. You can then sail to a distant port and sell them for a big profit.
Remember, the further you travel away from the purchasing port, the larger the profits will be when you sell the Goods.
Other sources of Gold are completing missions on islands, player quests, fighting pirates, attacking merchant ships, and selling unwanted items. Attacking Smuggler ships is a great way to pick up some extra cash. These ships carry the same Goods you find in the Black Markets.
Resources can be gathered by your heroes even if you are not docked at the port. Just select the resource site and send your heroes to liberate the facility. They will stay and mine the resources until it is empty. Resource sites will go on cooldown for a while before being usable again.
Gangs
These are SoCs equivalent to an Alliance. You can make daily Donations, speed up research or construction, and complete tasks to earn tokens that can be exchanged on the market for rewards.
As the game progresses, your Gang will start capturing territory by attacking the low-level ports around the outer edges of the map. After capturing a port, your Gang can get Sentry Towers. You will receive rewards for helping your Gang capture territory.
The goal is to capture Sentry Towers in a line from your starting port, and on to a level 2 port, then a level 3 port, and finally to the Gates into the Inner Ocean area.
There are limits to how many Sentry Towers can be held by the Gang at any given time. Either the Leader or any R4 Gang member may abandon a Sentry Tower to make room for new ones to be captured.
Making alliances with other Gangs is the preferred way to navigate the early game. I suggest joining the biggest Gang in your corner of the sea and helping them to stay in the top ranking. An active Gang will generate a steady flow of resources from regular activities as well as from other players purchasing Premium content.
Treasure of the Tides
This function can be found in the Daily Tasks panel at the top of the screen. Once the window is open, tap on the calendar page marked “7.” The tasks shown here will be completed through normal gameplay, and at the end of the week, you will receive rewards depending on how high your chest is. Level 20 is the maximum and will provide:
40 Emeralds, 1 Hymn Conch, 2 Echo Conch, 25Single Piece Vol. IV, 6x 30min Construction Speedup, and 6x Stargazing Speedup.
Squad Raids
This is a big sea monster battle against a raid boss (Kraken). You can take a team of 4 players into a 20-minute-long fight that comes in 3 different difficulty levels. If you are beaten, you can revive and resupply before heading back to the fight.
I would advise you to not use the automatic matching system. if a player is AFK, this will prevent your group from being able to enter the fight, and in Matching mode, there is no way to remove the AFK player from the party.
You can challenge each difficulty level up to 3 times per day for rewards. After the 3rd fight at a difficulty level, you can continue to raid, but you will only receive Honor points. There is a Leaderboard that tracks how fast your team beats the boss.
Completion Difficulty
Monster Lair Rewards
Easy
20 Emerald, 1 Random Ship Part, 2 Royal Cigar, 5 Starlight Shard
Hard
30 Emerald, 1 Random Ship Part, 3 Royal Cigar, 10 Starlight Shard
This new function can be found by tapping on your Avatar on the top left of the screen.
There will be a set of missions that you can send your heroes out to complete. The missions each have different requirements to dispatch a team.
The rewards can include Speed Up items, so I highly recommend doing these.
Events
Sailboat Racing
Day 1
Day 2
Day 3
Day 4
Day 5
Day 6
Day 7
Upgrade Astrology Chamber to Level 15
Upgrade the Drill Hall to Level 15
Flagship Reach Lvl 17
Upgrade Sick Bay to Level 17
Participate in Squad Raid 1 time.
Upgrade the Liaison Office to Level 15
Upgrade Drill Hall to Level 17
Light up Star Sign – Sea Lion
Upgrade Liaison Office to Level 17
Upgrade the Mess Hall to Level 15
Light up Star Sign – Rusty Anchor
Upgrade the Enlistment Quarters to Level 15
Upgrade Enlistment Quarters to Level 17
Light up Star Sign – Fish Spear
Upgrade the Sick Bay to Level 15
Upgrade Mess Hall to Level 17
Light up Star Sign – Goblet
Complete Trial – Chapter 8, Stage 10 of Season 1
Complete the Trial – Chapter 10, Stage 10 of Season 1
Light up Star Sign – Squid
Complete the Trial – Chapter 10 Stage 10 of Season 1
Sailboat Racing Event
Showdown of Gangs
Showdown of Gangs: This is the big PvP battle among the top Gangs on your server. It is worth watching the battle in real-time as the game will randomly reward lucky viewers with the Echo Conch and Golden Conch.
Also, betting can be quite lucrative. Absolute power doesn’t necessarily guarantee victory. The way the tiered battle is set up, it is possible to waste heavy hitters in the early stages and lose out in further rounds.
In my Gangs’ case, our power level was 1-2 million points lower than our opponents, and the provided odds were quite against us; however, we managed to beat the opposition and won many coins on the bet.
I was able to swap my coins in the Parlor for 2.75 million Gold. I should mention, though, that I had been buying up coins before the event became available. The Parlor exchange panel is available even when the event is not active.
Azure Promise
Azure Promise: This beginner event is available for everyone. Login for 8 consecutive days to claim rewards. Epic hero Will is available on the 2nd day.
Pirate Kings Trail
Week 1Week 2
Pirate King’s Trail: This is a recurring event lasting 7 days that rewards players with the Crimson Sentinel (Epic Ship) and Madame Lulu (Healer) during the first week.
Power Rush
Power Rush: Be the strongest pirate o’ the seas! Raise your Power rating to the set levels to receive a reward.
Undead Revenge
Undead Revenge: Ghost ships will spawn on the world map. Just attack them to get points for the event. Return to the event page to collect your rewards based on how much total damage you managed during the combat phase. The ships will spawn every 2 hours or so, and your cumulative damage will count towards the final reward.
Pirate Revel
Pirate Revel: You can reap handsome rewards if you can serve all the orders they want by the recipes before the countdown ends. If you fail to serve all the orders, the relevant rewards will be delivered, given the orders you’ve fulfilled, and the rewards will be delivered via Mail. This event rewards 2.6 million Gold for a full completion.
Sea Voyage
Sea Voyage: This is a 30-day event that includes multiple tasks that will provide points. There are lots of nice rewards for this event.
Point Tasks
Points Earned
Visit new Ports
+10
Find Treasures marked on the Treasure Maps
+10
Discover new Fish species
+5
Get new recipes for Dishes and Drinks
+5
Recruit new Heroes
+10
Get new Ships
+20
Complete Mist Incidents
+1
Sea Voyage Rewards
Lord of the Seas
Lord of the Seas: This is a weekly event that includes a “killing” period for PvP battles. Each day features a different task: Collecting Gold, upgrading Cabins, recruiting Heroes, completing Star Gazing, and other tasks.
Grand Odyssey (Server Story)
Grand Odyssey: This is the server event, and it is tied to the age of the world you are playing on. You can check the rewards in-game.
After 10 days of gameplay, the Grand Odyssey story advanced to chapter 13, and the gates into the central seas opened. After this occurred, my Gang started getting hit by all the Whales (big spenders). We struggled initially, but did manage to capture some territory.
You can expect to get sunk often in the inner sea. The trade routes will give 2x to 3x the amount of gold, even on short routes, as compared with the starting zones. You will also start getting more Reputation items and other Food items for the Epic and Legendary Drinks from the Distillery.
Misc. Tips
Tapping on the ship icon on the right will center the map on your Flagship.
Maritime Incidents may be completed without unlocking the associated island. This way, you can save your daily compass usage. Just tap on the island Flag.
You may either tap on a location to order your ship to go there, or you may drag a line (path) from the ship to where you want to go.
Sailing into the fog must be done manually by dragging a path.
Your ship’s crew will consume Food to keep up Morale and improve ship function. At zero food, the crew will abandon the ship. You can toggle on/off a function to automatically use food while at sea. At the port, your crew will not consume food, but you can only stay for a limited period.
Staying at a Port will protect you from attack by other players. This is similar to using a Shield in other games.
Combine your passion for adventure & capitalism, get rich, and become a money-mining tycoon!
I finished this offer in 7 days.
Remember to watch the ads to get a cash boost. It will show up every minute or so. You will watch hundreds of ads before the offer is complete. Best to accept this point before you begin.
Terms
Unlock the levels below within 10 days to earn Up to 5,525 Points!* – Unlock Bank Level 3 “Big Town, Bigger Bank” to earn 425 Points – Unlock Bank Level 6 “Making Waves” to earn 5,100 Points
This one is more complex than Gold & Goblins. There is much more micro-management in this game. You have more options available for customizing your team members, and you get more Premium currency (Gems/Gold) from completing objectives. This will help to speed up your completion of the game offer.
Time Frame
We only get 10 days to complete this offer. I was able to reach Bank 3 within the first 24 hours and Bank 4 in a little over 60 hours. There is really no way around watching ads. You’ll need to watch them to get the cash you need to complete upgrades. It took 6 days to reach bank 5, and I finished the offer on the 7th day.
Something important I forgot to mention is that you keep your Cash after each Bank map. A good strategy I found was purchasing extra Cash in the shop before moving to the next map. This way, you have enough funds to max out your early functions from the start.
The rewards from ads far exceed what you earn from bank operations. For example, watching a 30-second ad earns $4.75 billion while operations earn $300 million in that same period.
Gameplay
Clearing Banks
Each map will have a set of Milestones that need to be completed before you can advance to the next bank. The number of objectives in each Milestone shifts. I had started a log but found that the numbers were not consistent.
I would strongly advise you to limit spending your cash on upgrading the facility beyond the requirements of the objectives you are given. It is easy to get yourself in a hole where you cannot afford the cost of mission objectives.
The bank will be fully maxed out by the time you reach the final objective for the map, but this will take time. It will be most efficient to go in the order of objectives as they arise in and out of ordinary business operations.
Bank Area
Each section of the bank includes a core function facility and then an assortment of additions that boost the amount of cash generated by the bank. You can improve cash flow efficiency by maintaining a good balance.
The Vault
Vault: Upgrade to increase the speed of cash depositing.
Cash Carts: Upgrade to increase their carrying capacity.
Security Equipment: Upgrade this item to get extra cash from clients.
Monitors: Upgrade this item to get extra cash from clients.
Statue: Upgrade this item to get extra cash from clients.
Service Desk:
Service Desk: Upgrade to increase the speed of processing clients’ deposits.
Office Equipment: Upgrade this item to get extra cash from clients.
Fish Tank: Upgrade this item to get extra cash from clients.
Marketing Desk:
Marketing Desk: Upgrade to help Marketing Agents call clients faster.
Resting Area: Upgrade this item to get extra cash from clients.
Office Equipment: Upgrade this item to get extra cash from clients.
Kitchenette: Upgrade this item to get extra cash from clients.
Main Hall:
Seats: Upgrade this item to get extra cash from clients. Additionally, empty seats will fill with money bags over time. A great source of extra revenue.
Client Support: Upgrade this item to receive additional compensation from clients.
Decorations: Upgrade this item to get extra cash from clients.
Lounge: Upgrade this item to get extra cash from clients.
Electronics: Upgrade this item to get extra cash from clients.
Cafe: Upgrade this item to get extra cash from clients
Events
There is a mini-game called “Audit Madness” that runs every two days. This event will get you extra Briefcases, which will distribute Manager cards for promoting your bank team members.
Managers
I read some posts on a game forum, and the resounding consensus was that you should only upgrade your Legendary (Gold) Managers. By the end of the 7th day, I was only missing 2 legendary managers. You’ll get plenty of them, so make sure to save your duplicate Blue/Purple managers for upgrading the Yellows.
Leveling
You can raise the level of your Managers by collecting Light Bulbs. They can be acquired in the “Business Mode” mini-game. This is a standard Match3 puzzle that includes an Auto-Mode so that you don’t need to play yourself.
Your Manager’s stat points and Proficiency will determine how effective they are at the mini-game. It is rare to lose a match, as you can watch an ad to restore your health.
Promotions
The upgrade path works the same as Merging games. You will use duplicate manager cards to upgrade others. The level caps are based on the Star ranking of your Manager. See the chart below.
Lootably’s terms for this offer are 30 days to reach level 50 with a payout of $31 for a full completion.
Swagbucks is current offering $59, but you only have 25 days to reach level 50. There are two reimbursed purchases for this offer.
The developer of Gold and Goblins has another title “Goblins Wood” which has a better payout that I would suggest doing instead of this one.
You can find my guide for that game in the Tycoons section of this site.
Strategy
This game uses ads to a high degree, so don’t be surprised. I turned off the sound pretty fast. You can watch ads to get boosts and bigger rewards. The game also disburses chests with extra loot and there is a wheel of fortune you can spin by watching ads.
You can purchase additional Goblins and upgrade your Mineshafts to improve the coin flow. When you are offline the game will accrue Coins from any Mineshafts that you have automated.
Any Mineshafts that have not been upgraded and automated will require you to manually tap on the coins that are disbursed.
Loot ChestPrize WheelUpgrades
The map is divided into sections of two to three mines with two Mineshafts per section. As you advance the level of the rocks will increase which will then require a higher-level Goblin to break.
The game is all about micromanagement and depending on how much time you are willing to devote to it will determine how much you can possibly earn.
Events
Throughout the week there will be active events where you will work to clear a themed mine. I took part in the Card Collector, Candy Frenzy, and Volcanic Eruption events. Usually, there is a long event (3-day) followed by a short event (1-day)
Volcano EventRewards LeaderboardVolcano Mine
Tips
There is not any clear strategy I can suggest for this game offer. I would suggest saving your Green Gems to spend on Events. The Events pay out big rewards that will speed up your task in this offer, so it is good to get as far as possible in them.
I did have some trouble with getting credit. I received the first two rewards, but then it skipped the next two before paying out again. The game is listed on multiple offer walls as well as the main sites of Swagbucks and MyPoints.
You should shop around until you find one with a good valuation. When I did it, I just needed a few points to finish off my BINGO board, so I didn’t get the higher-paying version.
Empires & Puzzles (EP) is a Zynga mobile game similar to the “Puzzles &” series of games I have created guides for. I would say, though, that EP is most likely the archetype for those other games. The most marketable functions of the game are clearly present in the other games. However, EP is a far more challenging game and needs thoughtful consideration.
Upon reaching Castle Level 2, the rewards for 3 and 6 went pending immediately. The level 11 reward also went pending at Castle Level 8, and the level 21 reward was pending after completing the Castle Level 14 upgrade.
The offer allows for 60 days to complete. I purchased the 30-day VIP pack for $4.99 after 9 days of play. The VIP gets you a Second Builder, which is very important once Castle upgrades begin to take days to complete. I reached Castle Level 14 after 29 days.
There are no speedup items; you have to spend Gems, which can get expensive quite fast. You literally have to sit around for days waiting for the upgrade to finish, unless you buy the 2nd Builder.
You will also face Resource bottlenecks where your Storage Capacity cannot handle what you are generating. But the upgrade costs can, at times, exceed your capacity.
The objectives were credited to me early. I received the Level 3+6 rewards after upgrading to Castle 2. The level 11 reward went pending at level 8.
I don’t think the 30 VIP counts as a Gem Purchase. There is a login gift for accessing the Official Website every day for a week. This rewards Universal Trainers (Hero EXP) and Food Crates worth 500k each. If you miss a login day, though, you lose the streak and cannot get the crate. You can easily log in to the website by clicking on any link in the “in-game” mail system.
The offer terms
Strategy
I spent all of my Iron resources and most of my Food attempting to strengthen my troops and upgrade some unnecessary facilities. Unlike the “Puzzles &” series, here your primary source of resources is from the Farm and Mine. Be mindful of your spending.
That said, there are more options to collect resources. The Watchtower will generate resources once built. You get them from fighting on the Map, PvP battles, and purchasing them from the Shop using Gems.
The Stronghold needs to reach level 21 to get the full reward. Your HQ and all other buildings need Iron to be upgraded. The only exceptions are the Mine and the Watchtower, which can only be upgraded using Food. You will also need your Food to level up Heroes and to train new ones.
Buildings
FarmStronghold (HQ)
Food StorageTraining Camp
MineForge
Iron StorageWatchtower
HouseLevel 7 Upgrade
Heroes
There are 5 colors to match each of the tiles. Each color has a large list of corresponding heroes and a mixed selection of Class types. Fighter, Ranger, Monk, Paladin, Barbarian, Wizard, Sorcerer, and Rogue.
The heroes are ranked using a star system, including 1-5 stars. There are limitations on the maximum level of a hero based on its star rank. A single-star hero can reach a maximum of level 20. However, you can still upgrade the otherwise capped hero to improve their Special Skill.
Training Camp
This facility is used to generate both new heroes and Troops, which are attached to heroes instead of equipment, such as in other games. At the first stage, the building will be able to make Common (1-star) heroes. Further upgrades to levels 2 and 3 will unlock Uncommon (1-star and 2-star) heroes, and a faster process to generate Common heroes. At level 20, the building will make Epic and Legendary units.
Ascension
You will see a partially filled chevron on each hero; this is the Ascension rank of the hero. When a hero has maxed out its experience points for a rank, you will be able to upgrade it to the next tier, and the chevron will fill in accordingly.
The tutorial will have you upgrade and ascend Sharan (Red, Ranger), who will be your Healer for most of Season 1. After leveling her up to 10, you will be instructed to ascend her to the second chevron.
Skills
The best way to improve Special Skills is to use duplicate heroes during the leveling process. You will see that you only get a 2-4% chance of Skill improvement when selecting generic heroes as fodder for leveling. If you use a duplicate hero, you will get a 25% chance of Skill improvement. This is increased to 100% if the target hero has been fully Ascended.
Battles
Combat uses the standard Match3 style. There should be little difficulty with this, except perhaps in PvP. Notably, the combat system in EP includes the ability to craft and use Potions and other items during PvE combat to heal, buff, or debuff. You could potentially use items to clear stages if you had the spare goods available. The Forge can be upgraded to craft many useful potions.
Raids (PvP)
A feature unique to EP is the Raid function for PvP battles. The Watchtower building in town will generate resources for you over time. These resources can be collected once every hour, but are susceptible to theft by other players attacking you in Raid battles. Importantly, only the resources generated by the Watchtower can be stolen. Your primary resources are safe from attack.
The “Find Opponent” function does not match players based on their relative ranking. In the early game and beyond, you will encounter extremely powerful players in the Raid function. You can ask for a new opponent by paying Food. Be careful not to spend all of your food attempting to locate a suitable opponent.