Victory Girls: Anime Soccer is a new anime-style soccer manager RPG for Android and PC, released in March 2026.
Type: Sport Theme, 6×6 Auto-Battle, Idle Game.
The game combines tactical match strategy with deep team management, character growth, and card-based RPG elements.
Players build and manage an anime football club, focusing on tactical formations, player skills, and club development to compete against other teams.
- Facebook: https://www.facebook.com/VictoryGirlsCommunity
- Discord: https://discord.gg/4W4sKRrK3Y
- Google Play Store: https://play.google.com/store/apps/details?id=com.gamehollywood.victorygirls&pcampaignid=web_share
Updates / Notices
March 27, 2026: Compensation Notice
[Server Compensation]
Dear Manager, Server performance is restored. Please claim your compensation via in-game mail.
Items:
- Advanced Scout Ticket x30
- Player Exp. x500000
- Diamond x2500
- Orange Player Shard x60
Eligibility:
S1&S2 characters created before Mar 26, 16:00 (UTC-4).
Claim Deadline: Mar 27, 23:59.
March 26, 2026: First Top Off Event
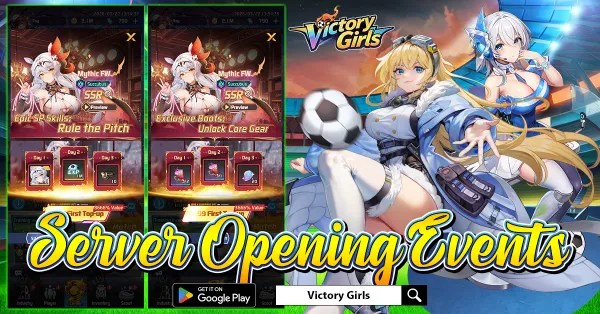
Kick off your journey with the First Top Up event and unlock powerful rewards right from the start!
For just $0.99, recruit the SSR Mythic player Succubus, a standout star ready to elevate your squad. Step up to $3.99 to claim her exclusive equipment, boosting her performance and making her even more dominant on the field.
Go all the way with $13.99 to obtain an additional Succubus and upgrade her to Red Quality, unlocking her full potential.
Don’t miss this limited launch opportunity — power up your dream team and take control of the pitch from day one!
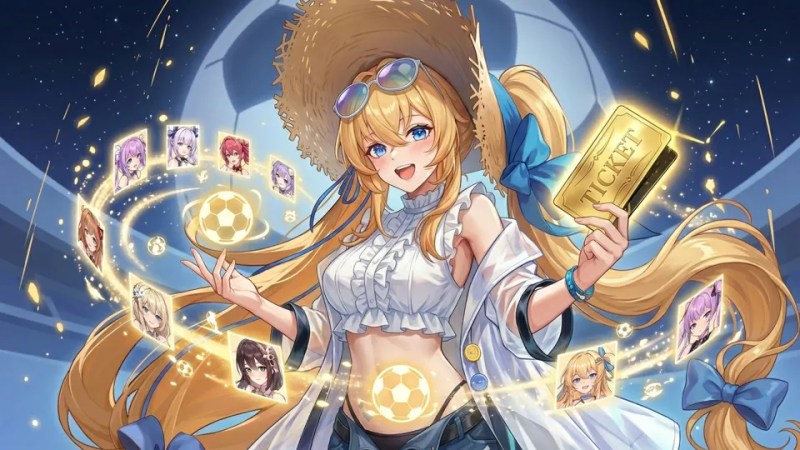
March 27, 2026: 1k Draws Event
Get ready for the 1000 Draws event in Victory Girls!
Every day you log in, you’ll receive 10 Player Recruitment Tickets, giving you the chance to collect up to 1,000 tickets over the event period.
Use these tickets to summon new girl players and strengthen your dream squad with powerful heroes.
From SSR stars to unique talents, every draw brings excitement and new strategies for your team.
Don’t miss this opportunity — log in daily, gather your tickets, and recruit the ultimate lineup!
March 26, 2026: Kickoff Thank You
The kickoff for Victory Girls on Google Play has been incredible!
The overwhelming enthusiasm and massive number of managers joining the field have exceeded our expectations. Because of this surge in players, some users may experience temporary login difficulties.
We truly appreciate your amazing support and patience — your passion is what makes this journey so exciting!
To thank everyone, once the service is fully stabilized, we will send compensation rewards to all players:
- Advanced Scout Ticket ×10
- Player Exp. ×200K
- Diamond ×1000
- Orange Player Shard ×60
Thank you again for the incredible love and support. Stay tuned, and we’ll see you back on the pitch very soon!
Eligibility:
– Server: S1 only.
– Requirement: Characters created before March 26, 2026, 10:00 (UTC-4).
Claim Instructions:
1. Rewards are valid until March 26, 23:59.
2. If you encounter any issues, please contact us via the in-game Support menu.
March 26, 2026: Official Launch
It’s kickoff time!
Victory Girls is now officially live on Google Play! Step onto the field, build your dream squad, and lead your anime soccer stars to glory. Android players can download the game right now and log in to claim your exclusive launch rewards.
The PC and iOS versions are coming later, and our development team is working hard to bring them to you as soon as possible—stay tuned!
Download now and start your journey to victory
Log in today to secure your launch bonuses
Invite your friends and build the ultimate team

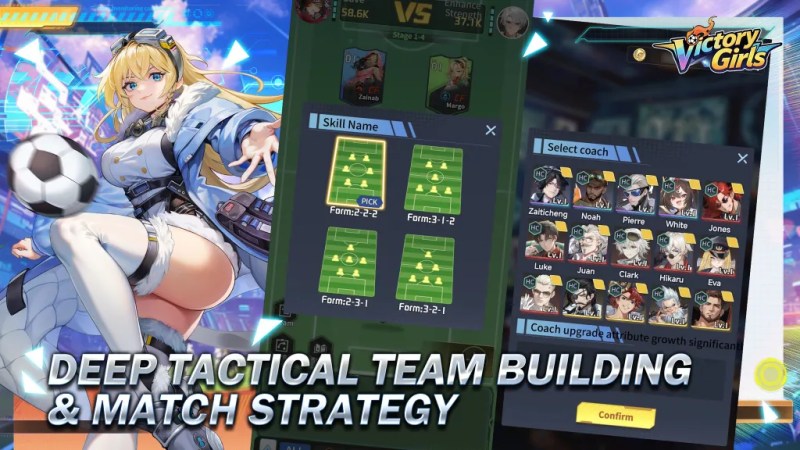
March 25, 2026: Deep Tactical Team Building and Match Strategy
[Deep Tactical Team Building & Match Strategy]
Not just a casual soccer game — craft balanced formations, counter your opponent’s setup, and adapt tactics like fast breaks or solid defense to secure victory.
March 25, 2026: Pre-Registration Last Call
1 Day to Go
Just 1 day left! The whistle is about to blow, and Victory Girls is ready to hit the pitch. Tomorrow, you’ll step into the role of manager, recruit talented heroines, and lead your team toward victory. The excitement is building, and we can’t wait to see your strategies in action.
This is your final chance to secure launch rewards!
Pre-register now and make sure you’re ready to jump in the moment the game launches. Your dream soccer squad awaits!

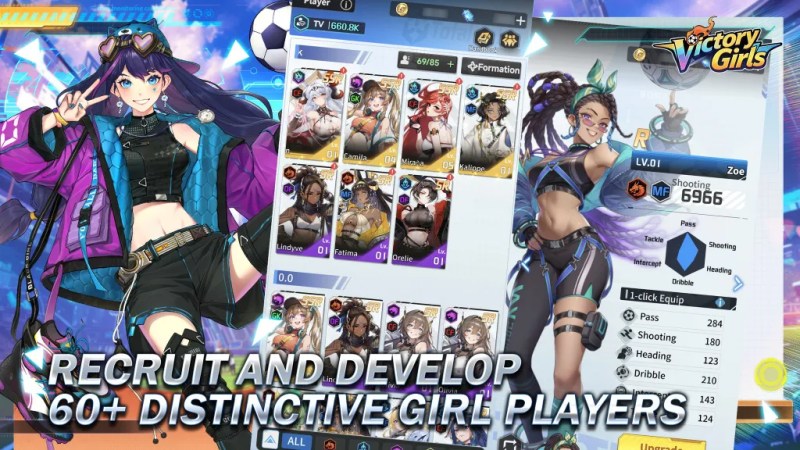
March 24, 2026: Recruit and Develop
[Recruit and Develop 60+ Distinctive Girl Players]
Build your dream squad by recruiting over 60+ unique girl players, each with personalized skills, attributes, and growth paths. Experiment with lineups to unlock powerful team synergies.
Navigation
Table of Contents
Main Screen Etymology
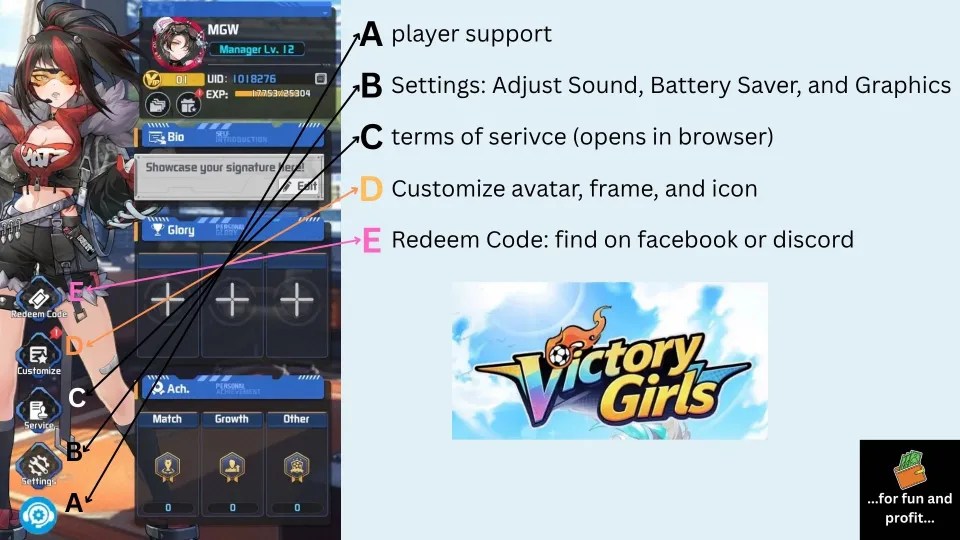
The primary screen is called Career and includes the main functions. Access to sales, shops, events, and the Matches (story campaign), can be found on the Career panel.

- User Name
- Resource Bar: Gold and Diamonds
- Navigation Panel: Industry, Player, Career, Inventory, and Scouting.
- Events
- Shops
- Matches
- Daily Quests
- Missions
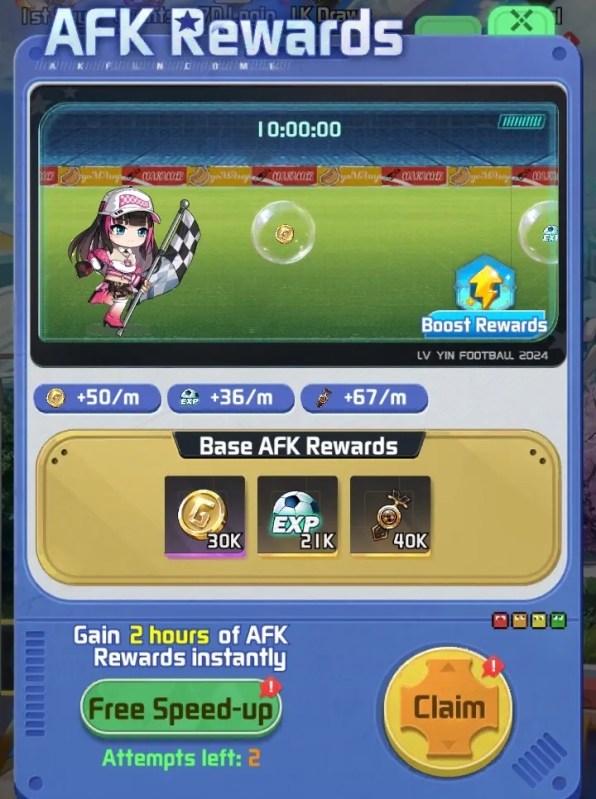
An AFK Rewards system generates resources and other items, including player XP while offline for up to 12 hours.
Each day, two free 2 hour instant claims may be taken.
Feature Preview
Different game functions unlock at Chapter stages as you progress through the game, for example, the Friends List opens after Chapter 2-18.
The following open up after the Tutorial has been completed.
Chapter 2
| Function | Chapter |
|---|---|
| Card Exchange (Transfer Market) | 2-1 |
| Card Reset (Transfer Market) | 2-5 |
| Commercial Street | 2-8 |
| Arena (Training Pitch) | 2-12 |
| Friends List | 2-18 |
| Penalties | 2-20 |
Chapter 3
| Function | Chapter |
|---|---|
| Guild | 3-2 |
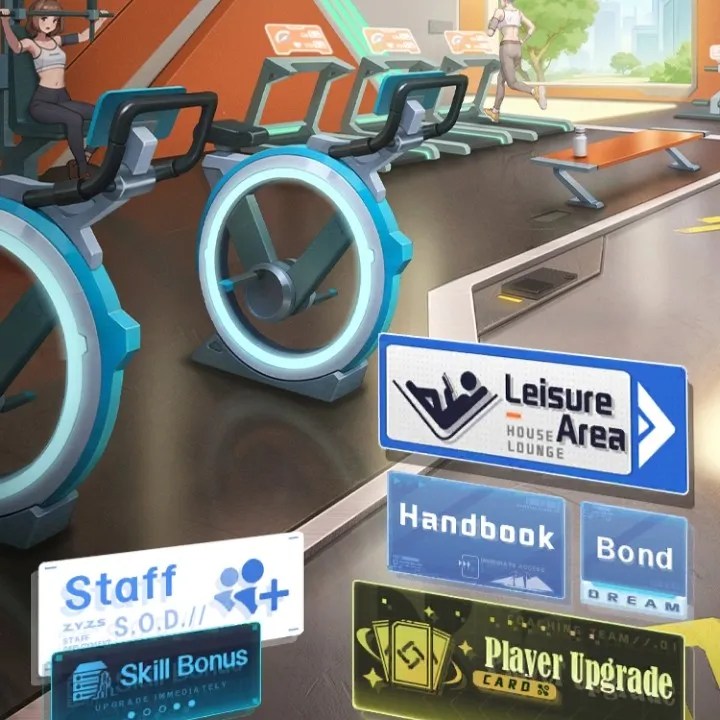
| Leisure Area | 3-5 |
| Gold Ball (Training Pitch) | 3-30 |
| Superstar Scout (Scouting HQ) | 3-40 |
Chapter 4
| Function | Chapter |
|---|---|
| Staff (All Industries) | 4-2 |
| HQ | 4-2 |
| Points Match | 4-8 (Day 3) |
| Player Resonance | 4-10 |
| Sponsorship | 4-20 |
| Crazy Football | 4-40 |
Chapter 5
| Function | Chapter |
|---|---|
| FB Tech (Coach Center) | 5-5 |
| Matrix 3v3 | 5-10 (Day 4) |
| Vehicle (Bus or Yacht) | 5-16 |
| Coach Bond | 5-20 |
Industry
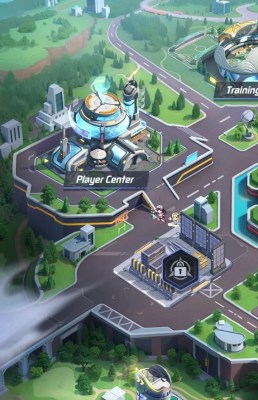
The base or city map is called Industry and initially will be empty. As you progress through the tutorial, new buildings will be added.
Player Center
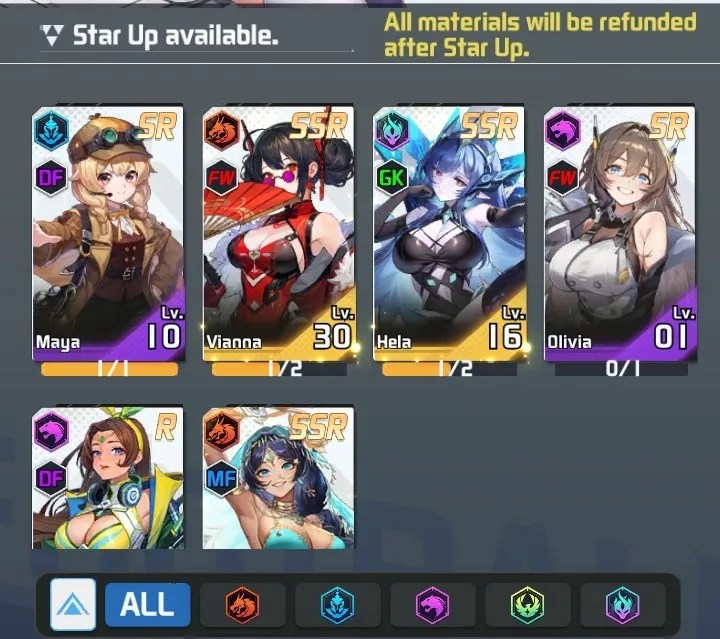
- Promote players here to increase their quality tier.
- Promotion consumes specific required players.
- Consumed players vanish, but their gear and 100% of the Gold and Player XP spent on them will be refunded.

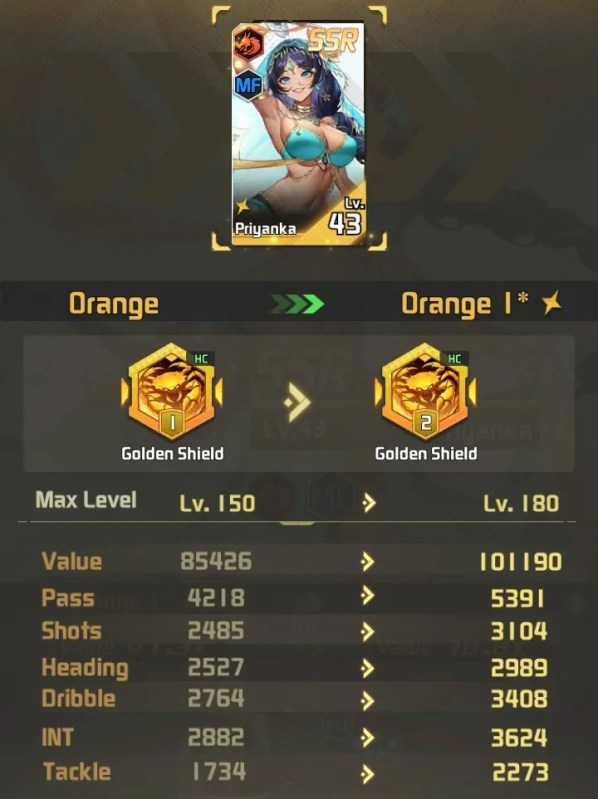
Player Ascension
To Ascend a player, you will need a copy of that player and one or more fodder players of the same color or Faction.
For example, here Priyanka has been upgraded to Orange+1 by spending a an extra Priyanka card.
The next upgrade from Orange+1 to Red will cost 2 additional copies of Priyanka and any two other Orange Cards from any Faction or Grade.
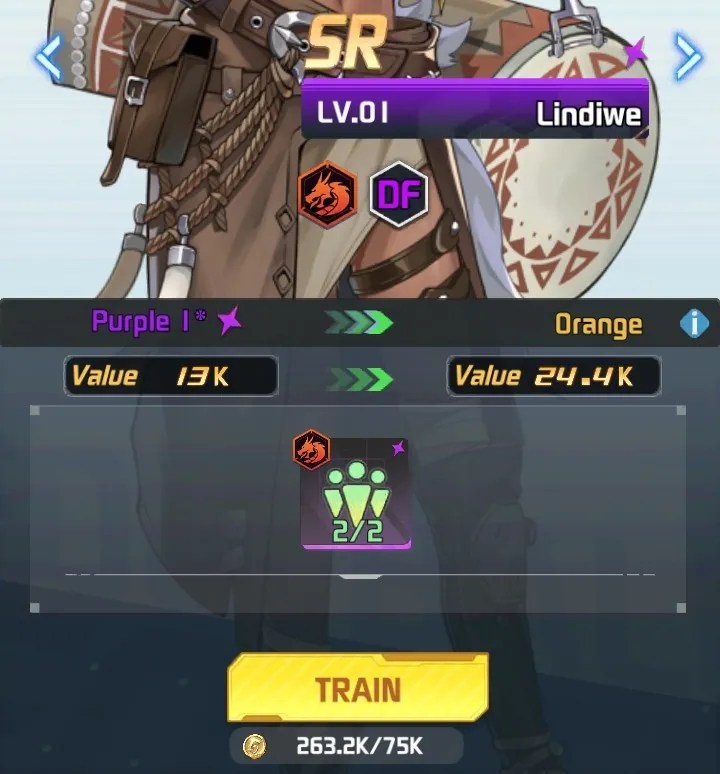
Some upgrades require Cards from the same Faction.
In the next example, we have Lindiwe at Purple+1 being upgraded to Orange. This upgrade requires any two players from her Faction (AS/AFR).
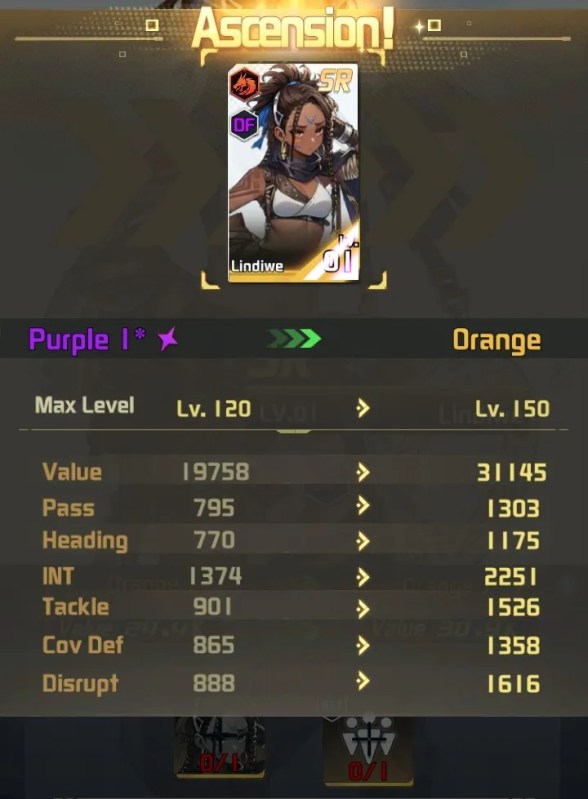
Now, Lindiwe can possibly be used as upgrade fodder for Priyanka’s next stage. In this way we can save our SSR Players and instead use the SR Players as upgrade materials.
Training Pitch
Explore unique modes like the Golden Ball, Arena, and Challenge Match. Join now to experience the ultimate football fun!

- XP Drill: 2 free attempts per stage daily. Raise VIP level for extra attempts.
- Golden Ball:
- Arena: 5 Free attempts per day, with 5 extra purchasable for 30, 80, 130, 210, and 290 Diamonds for each subsequent purchase. 740 Diamonds total.
- Challenge Match: 3 Daily Free Attempts to earn a prize.
Hall of Fame
The Hall of Fame is a place to track your Trophies and accomplishments in the game.
These may be displayed on your profile for other players to see.
Achievements
- View all achievements here.
- Complete them to earn rewards.
- Earn EXP to increase your Achievement Rank.
Wall of Fame (Unlocks at 3-12)
- Stores certificates and medals earned from matches.
- Activating them grants attribute bonuses.
- Bonuses from duplicate items stack.
- Showcase them on your profile.
Trophies (Unlocks at 4-25)
- Earn trophies through various competitions.
- Activating them grants attribute bonuses.
- Bonuses from duplicate trophies stack.
- Showcase them on your profile.
Transfer Market
Release, Reset, or Revert players here.
The Market includes 3 primary functions.
- Card Exchange
- Card Reset (Diamond cost not listed)
- Card Rollback
Resetting a player will refund: Base Player, Gold, equipped gear, XP, and Skill Books.
Coach Center
The center allows you to view your current roster of coaches, recruit new coaches, and upgrade your current coaches.
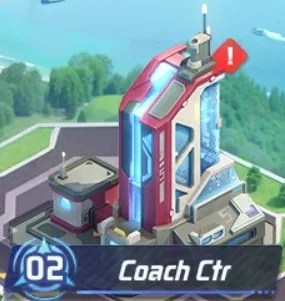
- Use items to level up coaches and boost attributes.
- Upgrading skills provides extra attribute bonuses for coaches and players.
- Consume duplicates to promote coaches and increase stats.
- Use match wins to increase Badge star levels.
- Head Coaches provide tactical counters that grant bonus attributes during matches.
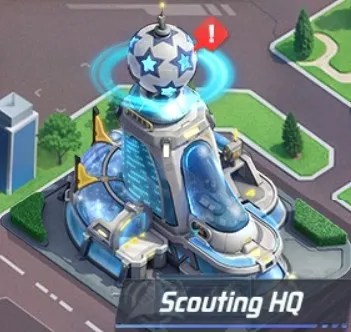
Scouting HQ
Access to recruiting new Players including Advanced, Faction, and Special Scouting.
Guild Hall
You can create or join a Guild here.
- Daily funding increases your Contribution and earns you Guild Coins.
- Spend Guild Coins in the shop to buy items and gear.
- See which Guilds rank among the top in the server.
- The Leader can appoint Rank 4 Members, Officers, Elders, Managers, Co-Leaders, or transfer Leadership.
Guild Challenge becomes available after 3-20. The Training Boost unlocks at Main Story 4-6.
Guild Shop
The shop includes Gear, Coaching Chests, Skill Books, Tech Research Speedups, Building Permits, Hourglasses (Reduce Building Time), and Club Gold Cards (Coach Promotion).
Several items include Weekly purchase limits, including M. Skill Book, Coaches, and the Premium Coach Box.
| Item | Cost | Limit |
|---|---|---|
| Coach | 2k | 10 |
| Premium Coach Box | 24k | 3 |
| Head Coach XP Chest | 300 | |
| Assistant Coach XP Chest | 150 | |
| B. Skill Book | 1,200 | |
| E. Skill Book | 1,200 | |
| M. Skill Book | 6k | 6 |
| Tech Speed-up | 200 | |
| Club Gold Card | 6k | |
| Expand Permit | 6k | |
| Hourglass 1 | 200 | |
| Hourglass 2 | 3k | |
| Hourglass 3 | 10k |
Players
Players are graded by Tier with 7 possible levels of rarity. The ranks are Normal, Rare, SSR, PR, UR, HR.
Victory Girls Player List – Google Sheets
Factions include:
- Mythic: Chaotic whispers bound by the system.
- AS/AFR: A rising land of talent and speed.
- EU: The central hub of tactics and intelligence.
- AMR: The cradle of skill and passion.
- Legendary
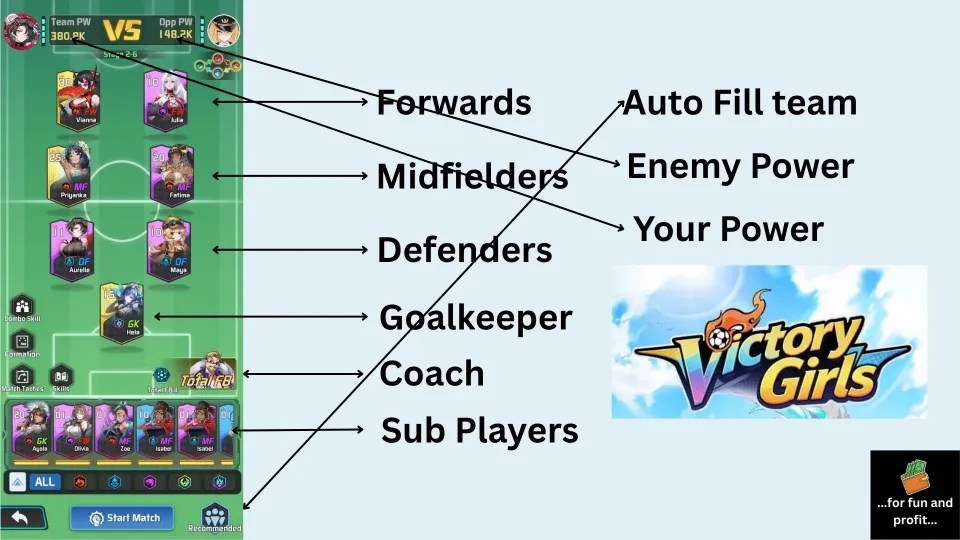
Just like in real football matches, players have different positions on the pitch including:
- Forwards: Goal machine, the frontline spearhead.
- Midfielders: Tactical mastermind, the engine of play.
- Defenders: Iron wall, the defensive core.
- Goalkeepers: Final fortress, the game-deciding hands.
Players may be Reset starting at Chapter 2-16. This is completed at the Transfer Market on the Industry screen.
Player Skills
Skills can be swapped or upgraded using new skills you receive from Skill Pack (Basic) and higher grades. Initially, your player may only learn a single skill. Applying a new skill will overwrite the currently slotted skill.
To set two or three skills on a player, you need to use either a Purple or Red Memory card.
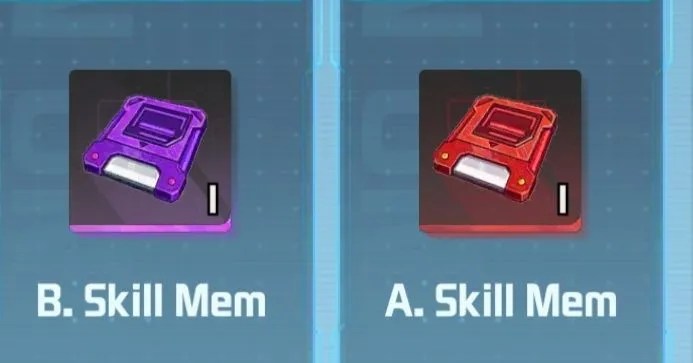
The Skill Memory can be exchanged for in the Golden Ball Shop (Training Pitch), or received from Chests. There is a Weekly limit of 5 each from the Golden ball Shop.
| Memory | Price |
|---|---|
| B. Skill Memory (Purple) | 60k |
| A. Skill Memory (Red) | 150k |
Scout
This functionality includes recruiting new players to join your roster. Your main team is made up of 7 players including two defenders, forwards, midfielders, and one goalkeeper.
A sub unit of players on the bench are gained through Scouting. These duplicates can be used to upgrade your primary team.
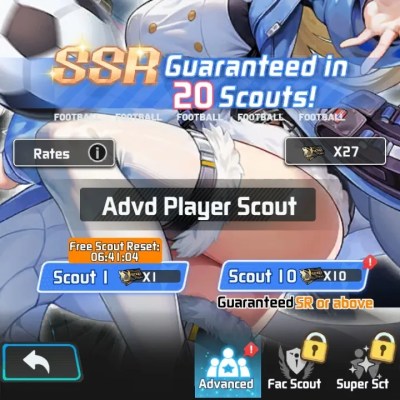
Advanced Scout
An SSR is guaranteed every 20 attempts.
- One free scout is available every 24 hours.
- An SR player is guaranteed in every 10-scout attempts.
- Reach scout milestones to earn progress rewards.
- Earn a special reward every 100 scouts.
Faction Scout (Unlocks at 3-8)
Super Scout (Unlocks at 3-40)
Matches
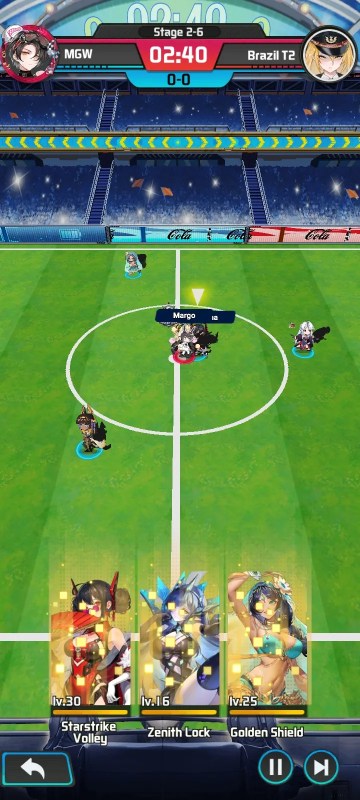
Matches are played automatically, but users may still manually trigger special abilities. An option to skip the battle visual is available in the lower-right of screen.
Chapter Matches:
- Chapter 1: 40
- Chapter 2: 40
- Chapter’s 3 to 12: 60 each
- Chapter 13: 100
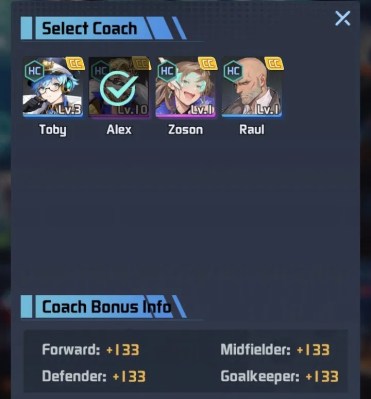
Total FB
Select a Coach to govern the match. This will improve stats via the coaches bonuses. In the example below, Alex SSR, is providing +231 to Forwards, Defenders, Midfielders, and Goalkeepers.
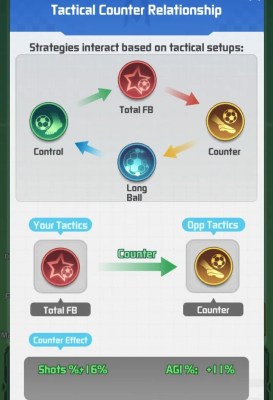
Tactical Counter Relationship
Strategies interact based on tactical setups:
Control > Total FB > Counter > Long Ball > Control.
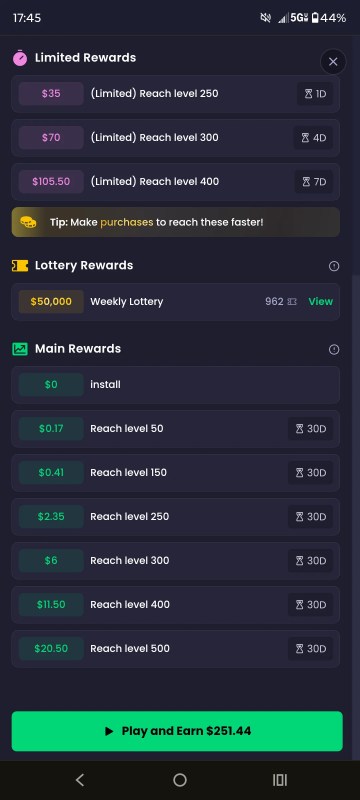
Events
Daily Sign-In: rewards can be claimed every day and if you spend at least a dollar, you can claim the login prize a second time.
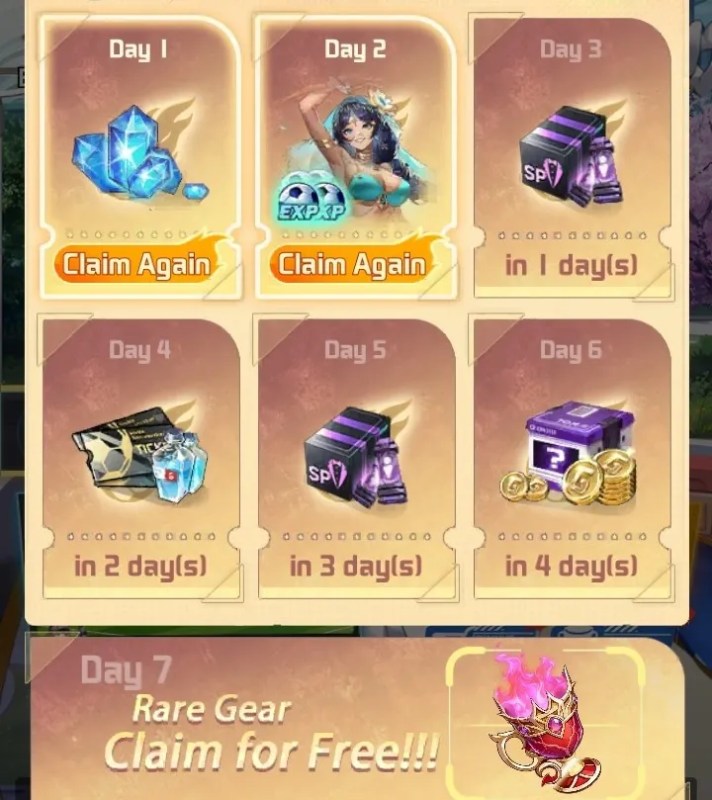
7-Days Login: includes an SSR Priyanka on day two. This reward can be doubled for $1.99.
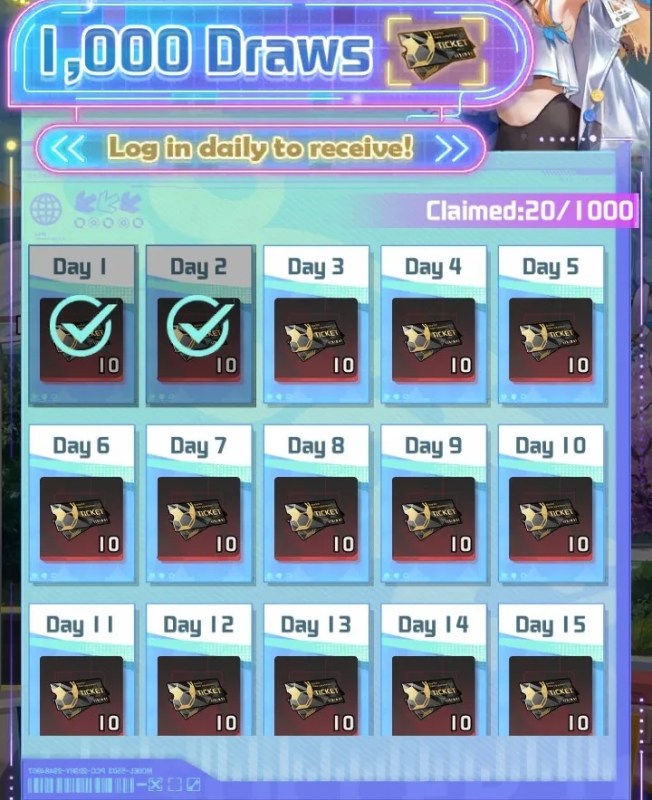
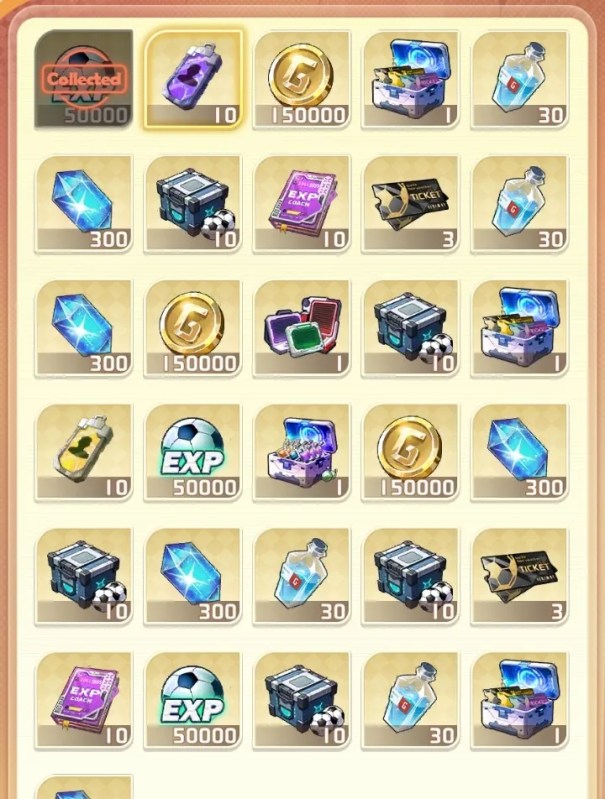
1k Draws: During the first 100 days of gameplay, 10 free Scout tickets are provided for a total of 1,000 draws.
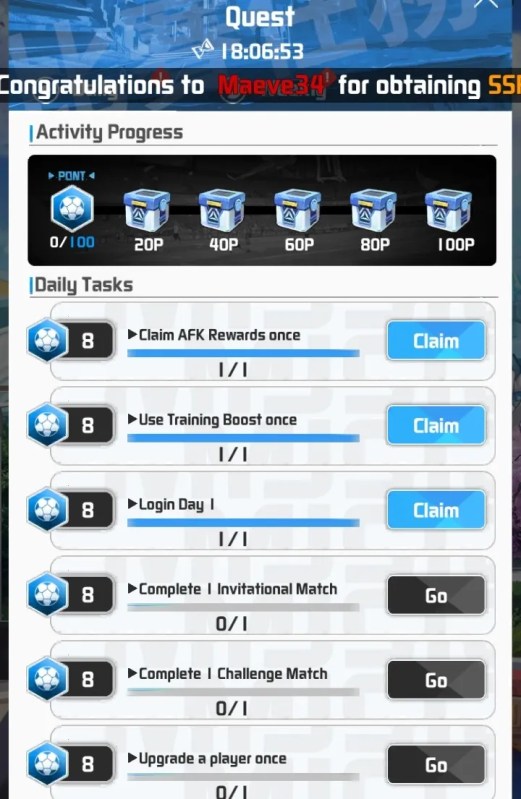
Daily Quests can be completed each day, by earning points from actions.
Rewards are earned at 20p, 40p, 60p, 80p, and 100 points.
Inventory
The Backpack allows you to view all your items and gear. Gear can be cleared instantly using Quick Dismantle. Enable Auto-Dismantle to process gear automatically upon acquisition.
Item Lists
Resources
Acquired from: Main Stage, Challenge Match, AFK Training, Chests, and Events. Comes in Different sizes including 2h, 4h, 8h, and 24h.
| Item | Effect |
|---|---|
| Gold | Used in conjunction with XP to upgrade Players. |
| Diamonds | Premium currency used to purchase items in shops and unlock functions. |
| XP | Used in conjunction with Gold to upgrade Players. |
| Vitamin Water | Liquid Energy Core refined by tech. Used for Player Promotion. |
Star-up Material
| Memory | Effect |
|---|---|
| AS/AFR Purple | Substitutes Purple AS/AFR Faction materials during Player Training |
| EUR Purple | Substitutes Purple EUR Faction materials during Player Training |
| AMR Purple | Substitutes Purple AMR Faction materials during Player Training |
Coach Items
These can mostly be acquired from the following avenues: Guild Shop, Penalties, 7-Day Gala, AFK Training, or Crazy Football
| Item | Effect |
|---|---|
| Basic Tactics | Deep-seated pitch instinct. Used for Assistant Coach upgrades; grants 300 XP. |
| Advanced Tactics | Tactical grammar woven from grit. Used for Assistant Coach upgrades; grants 1k XP. |
| Elite Tactics | A club housing space-time paradoxes. Used for Assistant Coach upgrades; grants 5k XP. |
| Rookie Guide | A growth contract forged in pain. Used for Head Coach upgrades; grants 300 XP. |
| Core Guide | A liquid forge used to temper the spirit. Used for Head Coach upgrades; grants 1k XP. |
| Master Guide | A gravity lens capturing the rise and fall of civilizations. Used for Head Coach upgrades; grants 5k XP. |
| B. Skill Book | Training Reflex Guide: Used to upgrade Coach Skill 1. |
| E. Skill Book | Overload Mastery Guide: Used to upgrade Coach Skill 2. |
Skill Books
| Book Type | Effect |
|---|---|
| Inspire 1 | Successful save slightly boosts teammates’ All Attributes based on own Save stat. |
| Long Ball 1 | Slightly boosts Forwards’ Shooting at kick-off. |
| Basic Save | Slightly increases Save Success Rate when facing a shot. |
| Basic Tap-in | Slightly increases Shooting after every missed shot. Lasts until the match ends. |
| B. Intercept | Successful interception slightly boosts team Passing Success Rate and Speed until the round ends. |
| Basic Passing | Slightly boost own Passing when receiving. After passing, slightly boosts the receiver’s All Attributes. |
| B. Pace Chg | Chance to slightly increase Speed when receiving the ball. |
| Red Devil 1 | Gains 1 stack periodically during the match. Each stack slightly increases Shooting. |
| Solo Break 1 | Chance to boost Dribbling while in possession. Successfully dribbling past an opponent slightly boosts speed until the round ends. |
| Physicality | Chance to slightly reduce opponent’s All Attributes during a duel. |
| Man Marking | Slightly enhances Defense when entering defensive state. |
| Dribbling Spec | Slightly boosts Dribbling when receiving the ball. |
| Aerial Tactics | Slightly boosts Shooting stats when heading. Lasts until the end of the round. |
| Playmaker | Slightly boosts all players’ Passing during short or long passes in an attack. Lasts until the attack ends. |
| B. Disrupt | Disrupts opponent shots, slightly reducing their success rate. |
| B. Form. 5 | Slightly boosts Goalkeeping during lineup adjustments. |
| B. Form. 3 | Slightly enhances Interception during lineup adjustments. |
| B. Form. 2 | Slightly improves Passing accuracy during lineup adjustments. |
| B. Form. 1 | Slightly increases Shot Power during lineup adjustments. |
| B. Cover Def | Slightly enhances Cover Defense for a short duration. |
| Basic Control | Slightly boosts Passing and Control for a short duration. |
| B. Crisis Sav. | Slightly increases scoring chance for a short duration. |
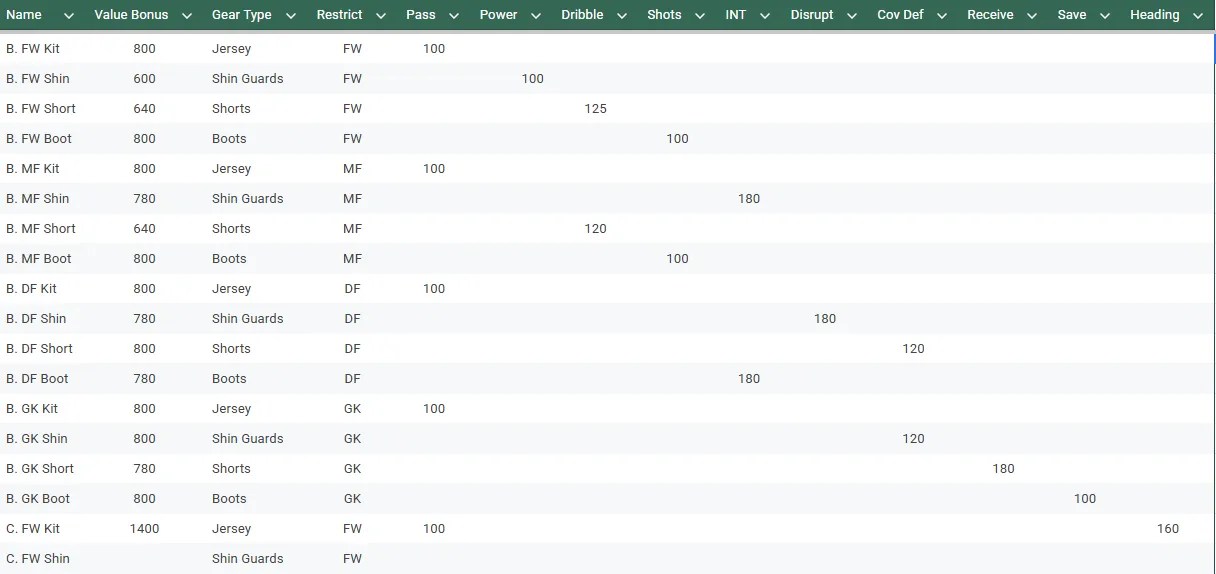
Gear
Gear is divided into sets for each position: GK, FW, DF, and MF. Gear has tiers or rarity, the same as Players.
Gear is generally restricted to the position it is listed for. So, for example some very nice Goalkeeper boots cannot be used with your favorite Forward player.
Special Gear can be equipped to any position. It has a rainbow appearance and provides bonuses for Factions.
Player Gear includes 4 pieces including: Boots, Shorts, Shin Guards, and a Jersey.
Gear List
Editable Community Google Sheet
Shard
| Item | Effect |
|---|---|
| Purple Player Fragments | Collect 60 Purple Player Shards to scout a random Purple Player. |
| Collection Shards | Fragments |
| Blue Player Fragments | Collect 60 Blue Player Shards to scout a random Blue Player. |
Chest
These items may be acquired through: New Players, Check-in, Total Buy, VIP, Challenge Matches, or Goals.
| Name | Contains |
|---|---|
| Diamond Gift | Open to get 188, 288, or 588 Diamonds. Small chance for 1688 Diamonds! |
| CCH Skill Selector | Select 1: Basic Skill Book or Elite Skill Book (Coach Items) |
| Collection Chest | Open to get a random amount of Collection Shards. |
| Adv. XP Chest* | Open to get random Player, Coach, or Staff XP. |
| Resource Selector (Intermediate) | Select 1: 4h Gold, 4h Player XP, or Vitamin Water x4 |
| Basic XP Chest | Open to get random Player or Coach XP. |
| Pure Memory Selector | Select 1: AS/AFR, EUR, or AMR Memory. |
| Resource Selector (Basic) | Select 1: 2h Gold, 2h Player XP, or Vitamin Water x2. |
| Gear Box (Blue) | Open to get a random piece of Blue Player Gear |
| Skill Pack (Basic) | Open to get a random Basic Player Skill Books |
*Advanced XP Chest Contents:
- 24h Player XP
- Elite Tactics
- Master Guide
- Staff XP
- 8h Player XP
- Adv. Tactics
- Core Guide
- Basic Tactics
- Rookie Guide
Collection Shards
Acquired through: Total Buy, VIP, Challenge Matches, Goals, and Collection Chests.
Gold Tier Collections
| Trophy Stand | 2018 Global Cup Ticket | Football Keychain | Global Cup Lanyard |
| Searchlight Hat | Supply Crate | Stamp Album | Tech Cap |
| Championship Trophy | Blue Warrior | Spanish Tango | Glove |
Purple Tier Collections
| No. 16 Hoodie | Player Standee | Federation Wristband | Button Hat |
| Two-Tone Cap | Star Scarf | Event Lanyard | Football Scarf |
| Football | Prairie Eagles | Tango | Poster |
Blue Tier Collections
| Golden Football Cup | Golden Cup Mug | GK Gloves | Tech Wide-Brim Hat |
| Football Badge | Commemorative Coin Set | Mini Stadium | Signed Card |
| Trophy Keychain | The Blues | Chile | Ticket |
Green Tier Collections
| Headset Cap | Global Cup Sweater | Football Socks | Trophy Art Print |
| Football Backpack | Star Pattern Tie | Signed Wristband | Trophy Brooch |
| Tech Patrol Cap | Goggled Beanie | Federation Pendant | Headset Helmet |
| Silver Football Cup | Global Cup Album | Football Polo | Iron Chariot |
| Classic Star Ball | Badge |
Shops and Spending
Several purchase options are available including special limited packs for the grand opening of the game.
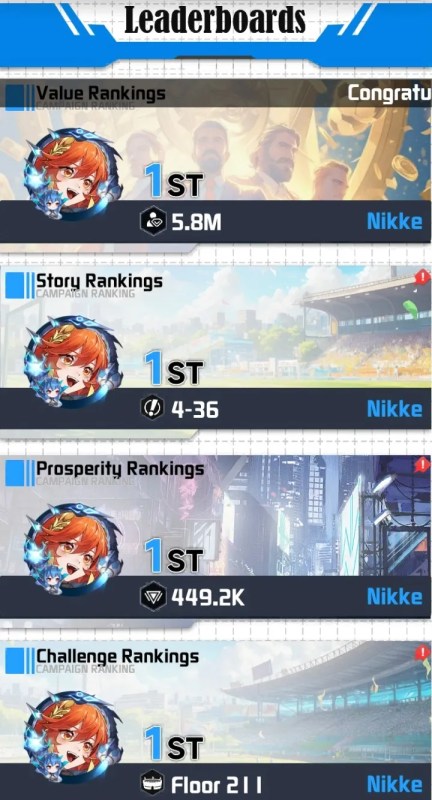
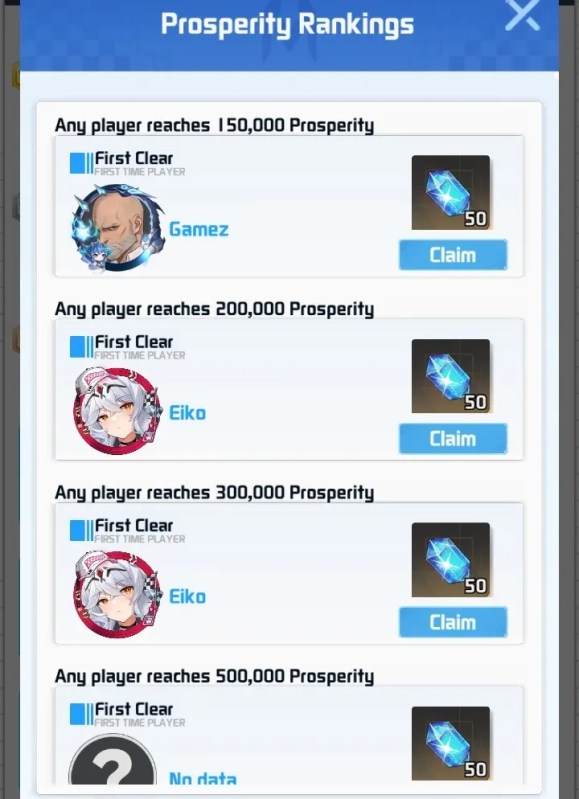
Leaderboard
Rewards may be claimed after users successfully clear game milestones and reach the highest ranks.