This offer is a bit of a blast from the past. It was originally available back in 2021 for very little before being removed from the rolls.
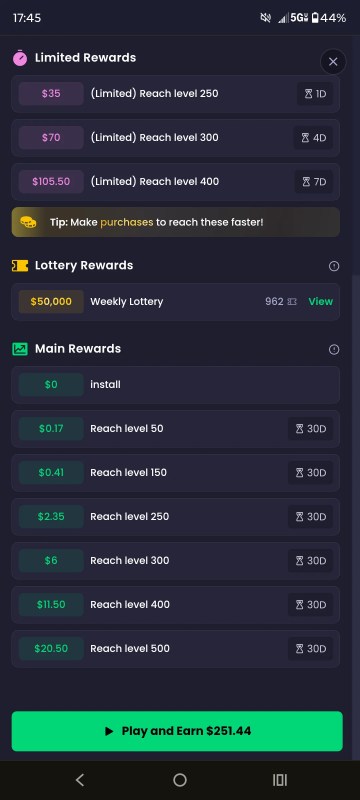
It came back in Nov 2025 at $322.50, then in Jan 2026 it dropped to $251.44. FreeCash has recently upped the offer value to $307.13.
I haven’t seen it on Swagbucks or any of the partner offer walls, but if it becomes available I will add those details here.
Note: Several months ago, a user on the FreeCash and Swagbucks subreddits was scamming players. The account has since been suspended. It was DM scam to get game login credentials.
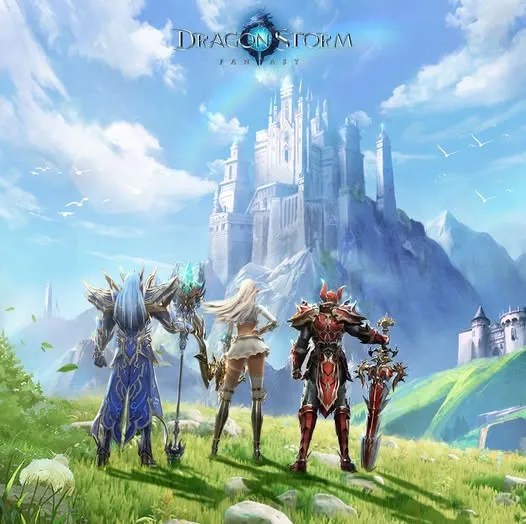
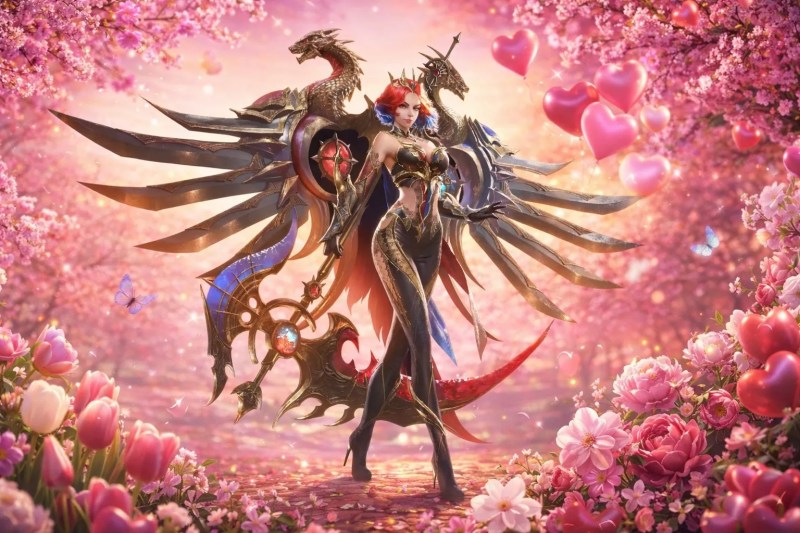
Dragon Storm Fantasy is a mobile MMORPG (iOS/Android) where players become a “Dragonsoul Envoy,” capable of transforming into divine dragons to combat demons and other players in massive cross-server battles.
The title is from GOAT GAMES. Several of their games have been offered for cash rewards including Dungeon Hunter 6, War and Magic, and Kings Throne.
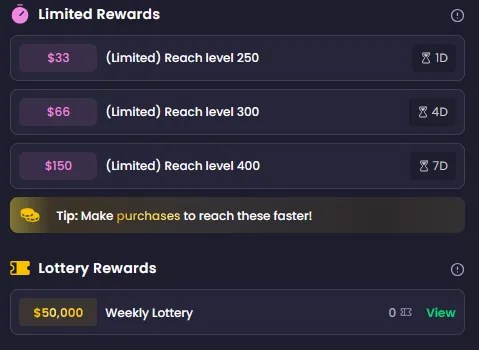
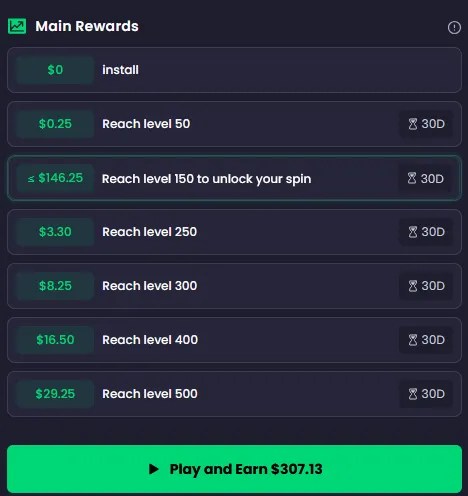
As of March 2026, the game offer is available through FreeCash for $307.13, with set rewards at goal points and some limited time bonus goals.
The time limit is set to 30 days to reach level 500. Bonus goals at day 1 (level 250), day 4 (level 300), day 7 (level 400).
Getting to 100 on the first day is easily achievable, but hitting 250 will take more effort.
back side of a freecash signup card featuring a QR code
Dragon Storm Fantasy Codes
Codes can be redeemed in your settings panel.
Last Checked: Mar 25,2026.
Codes are time sensitive (30 days or less) and are usually released through the official Facebook page.
Code
Event/Date
4v5d44
Valid until April 8, 2026
4ucekt
International Women’s Day – Valid until March 31, 2026
4V5DF9
Valentines Day 2026
4uce6w
New Years 2026
mr4uceen
Christmas 2025
Gameplay
Dragon Storm Fantasy (DSF) is almost entirely automatic. Hands off gameplay means you can set your phone down and walk away for a half hour and do something else.
The tutorial will take you through your gear, leveling, and combat using the auto battle system. The game dialog and NPC interactions are also auto play. It’s less of a game and more like an interactive video.
In DSF, the server or world age provides a percentage boost to EXP gain. Selecting or moving to an older world will speed up progression in the game.
After the tutorial, you should be around level 25. In the first day, around 100 levels can be cleared. EXP is earned mostly from completing your daily challenges (tasks) and dungeons.
Once you reach level 250, you can expect the progression to drop to around 12 levels per day.
Workflow for Playing DSF
Do your Daily Challenges
Play the Devils Crossing mini-game
Complete all your Upgrades
Fight in the Arena
Escort a couple of Convoys
Spend all your Stamina in the Campaign
Raid the highest level unlocked a bunch
Tips
Note: The server reset time is 00:00 UTC, so if you start your offer after that time, you can get close to a full 24 hours of in-game time for leveling to try and hit the first Bonus goal (reach level 250 on Day 1).
Time zone Conversions from 00:00 UTC:
Time Zone
Abbr.
During Summer (DST)
During Winter (Standard)
Eastern
EST/EDT
8:00 PM EDT (UTC-4)
7:00 PM EST (UTC-5)
Central
CST/CDT
7:00 PM CDT (UTC-5)
6:00 PM CST (UTC-6)
Pacific
PST/PDT
5:00 PM PDT (UTC-7)
4:00 PM PST (UTC-8)
British
BST/GMT
1:00 AM BST (UTC+1)
12:00 AM GMT (UTC+0)
After the tutorial, focus on clearing the Divine Dragon Trials. This will provide a 30% EXP boost when killing Monsters.
AFK Mode is the Idle RPG function in the game. It will generate exp for up to 12 hours of idle/offline time.
Fill your friend list, you get Stamina from your friends, which can be used to clear the story and get more exp.
Transmutation: After killing the butcher, you will unlock the ability to recycle all of your excess gear. You can get permanent stat increases from these recycled items.
Guilds: at the offerings, you can contribute Gems to upgrade guild buildings and get guild currency in exchange. This can be used at the Technology building to get more permanent stat bonuses.
At level 60, you get access to the Devil’s Crossing wave survival mini-game. The number of times per day this can be done depends on your VIP level (2, 3, or 5 attempts daily). Remember to use your EXP potions.
If you miss a day, you can navigate to the Daily Objectives and spend Gems to get all the missed bonuses.
Classes
Once you reach level 100, you can activate Awakening and advance to the next class. Unlocking higher tiers of gear and adding more passive and active skills. There are 3 stages for each class.
Mage: The recommended class to complete the offer.
Dragons
Start with the Ice Dragon for extra damage and then later select the Life Dragon to boost your health.
Arena Fights
You can 10 attempts to fight each day and this will earn you Arena currency that can be exchanged for Stamina in the Arena Shop.
The fights are based on power level, so just target those players who are weaker than yourself. You will also receive EXP from participating in the Arena fights.
Convoys
These escort missions are easy to complete and can be rerolled to get better offers, up to 3 times per day. After rerolling, you can spend 30 Gems to raise the Convoy to Orange.
Clearing all Convoys daily can get you a level.
Convoys can be sped up by tapping a button. Four taps should be enough to clear it in 20 seconds.
Spending
In the Welfare tab, you can bind your account in two ways to earn 300 and 500 gems. Gems can be used to auto-complete missions later in the game.
Buying the Mount and Wings pack is suggested.
Under the premium section in Privileges, you can find a 30% EXP boost for $5.
Divine Prayer: found in the Welfare tab, you can spend Diamonds to get EXP. The amount gained is proportionate to your level, so make sure to only do this at the end of the day to benefit from all your leveling. Every 10 times you do this, you will receive a 2% permanent boost to your EXP gain.
Previous Offer Terms
Patches and Updates
Patches are released on the official Facebook page for the game.
Patch Note – Mar 23, 2026
New Contents:
1. Added SSR Mount: Fire-Kissed Throne
2. Added SSR Wings: Wings of Judgment
3. Added SSS Relics: Pulsating Sea Heart, Sun God Bird
4. Added Guardian: Little Stag (evolves into Great Stag and Sacred Stag)
International Women’s Day 2026Maintenance Note Mar 04, 2026
Dear Chosen Heroes ,
To accommodate the upcoming transition to Daylight Saving Time in North America and Europe, server maintenance will be conducted as follows:
[North America]
March 8, 2026 07:00 – March 8, 2026 10:00 UTC-0 Note: At 02:00 local time (UTC-6) on March 8, 2026, clocks will be set forward by 1 hour to UTC-5, marking the start of Daylight Saving Time.
[Europe]
March 29, 2026 00:00 – March 29, 2026 03:00 UTC-0 Note: At 01:00 local time (UTC+0) on March 29, 2026, clocks will be set forward by 1 hour to UTC+1, marking the start of Daylight Saving Time.
We kindly ask all players to spread the word and plan your gameplay accordingly. We apologize for any inconvenience caused during the maintenance and appreciate your understanding and support.
Server Merge Note
❗Server Merge Note❗
In order to provide a better gaming experience, we will be closing some servers for maintenance on March 4 2026, 07:00 UTC-0 ⏰. The maintenance is expected to last approximately 3 hours.
Notice: 🔸 Other servers won’t be affected, and you can log in as usual. 🔸 For those affected servers, you will not be able to log in during this period. If your account is not bound yet, you might lose it during the update. Please bind your account as soon as possible to avoid unnecessary loss. 🔸 If there are more suggestions about merging, please let us know in the comment section or in our Discord community~ 🔸 When the maintenance ends, we will send compensation via in-game mail. It might take a while as they will be sent server-wide. Remember to check your mailbox.
New year, new start. May all your dreams come true in 2026! 🥰 🎁𝗚𝗶𝗳𝘁 𝗖𝗼𝗱𝗲: 4uce6w
Xmas 2025 Gift Code
Santa’s already on his way—but we’re sneaking in first! 🎅✨
Thank you for an amazing year of unforgettable moments that you’ve shared with our community. Wishing you a joyful holiday season and endless gaming fun!
🎁 𝑮𝒊𝒇𝒕 𝑪𝒐𝒅𝒆: mr4uceen
6th Anniversary Gift Code
𝐇𝐚𝐩𝐩𝐲 𝟔𝐭𝐡 𝐀𝐧𝐧𝐢𝐯𝐞𝐫𝐬𝐚𝐫𝐲, 𝐃𝐫𝐚𝐠𝐨𝐧 𝐒𝐭𝐨𝐫𝐦 𝐅𝐚𝐧𝐭𝐚𝐬𝐲!
For six years, we have shared the peace of Sky City, met warriors from countless realms in the Dragon City of Storm, and fought side by side to bring harmony to Arcus, from the depths of Demon’s Lair to the shadows of the World Bosses. We grew together, battled together, laughed together… and became a true community.
Thank you for standing with us, for protecting Arcus, and for giving meaning to this journey. ❤️
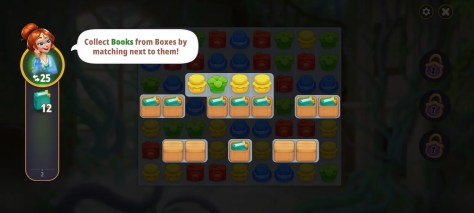
I’m doing this one through FreeCash. It is a Merging game with Match3 puzzles for advancement through the game.
Update (Day 10): I gave up. Uninstalled it yesterday. I was struggling to progress through the puzzles and I hated playing the game.
I usually enjoy Merge games. Not this one.
I could have made it to 30, but the amount of time needed felt like a waste for only $1.88.
I checked the offer terms for Swagbucks and didn’t like the time limits on completing stages. They also had too many purchase requirements. The offer through FreeCash doesn’t include any purchases and has set time limits.
I’m not pleased with the game.
The only thing you really need to do is clear the puzzles, but all the micromanagement stuff is drawing my attention and wasting time that could be spent on puzzles.
It’s addictive.
But honestly, neither site has a good deal. I wouldn’t suggest this offer. A third of the reward is relegated to bonus goals that are unachievable.
Terms
It’s 60 days to complete the offer with the first regular goal at level 30 for $1.88. The next goals are level 40, 50, and 60 by day 45 for $3.08, $6.15, and $12, respectively. Only getting 15 days to clear 30 levels is really not enough.
The final leg of the offer is levels 70 through 100 with only another 15 days to finish. This last bit is worth $258.75. If you add the lost rewards from the bonus goals, it becomes $437.50 out of total offer of $469.88.
So, realistically, I will only be able to earn $32.38 from Merge Gardens on FreeCash. As I said before, I wouldn’t recommend this offer.
Game Strategy & Support Tips
Guide credit goes to Swagbucks community on Reddit.
Lets get started with some efficient merging and resource management by always waiting to merge five items at a time, especially for those mysterious veins and gems to the max.
You should never buy baskets or hampers since its better to save your gems for missions or continuing puzzles.
After you hit level 50, keep a cache of 5-7 daily supplies so you aren’t stuck waiting for days.
For puzzles and wildlife, only do match-3 puzzles if they are necessary for leveling up or events, and focus on merging stars up to level 5 before tapping to get swan nests for your wildlife score.
Honey trees are going to be your basic source for money and eggs too.
If you can, the 30-day gem pack is worth it for a steady supply, but just spend what you need to reach goals since the game can become a grind.
You’ll want to grind your birds throughout the day whenever they have full energy. For levels 1-50, focus on merging basics and using events for infinite lives or boosts.
Once you’re in the level 50-70 range, start saving your daily boxes and trade bags until a quest actually requires them, and prioritize honey bees for your wildlife score.
For the high levels up to 99, keep grinding high-value items, but keep in mind that many think level 99 is basically impossible without a massive time investment.
If you run into issues with getting credited, make sure to provide timestamped screenshots to support and ask for an escalation to a senior specialist if they push back.
Lastly, remember that the game eventually gives you “pity rounds” after enough fails, and you can always use 25 gems for extra moves on the tough puzzles.
Player’s report varying reward values depending on platform. Other options include FreeCash ($3,392) and Mobius ($4,000).
The FreeCash terms are worse. The prizes pay out less for early goals and there are time limits on the realistic goals at level 200 and 300. Additionally, purchases are not fully reimbursed on FreeCash.
Some user’s report tracking issues starting at level 110.
Join a Union and ask for Tokens or Wands as often as possible.
Complete Events as they become available.
Tap and collect floating gifts.
Speed up the hourly gifts using Gems.
Complete quests to earn Tokens.
Earn Tokens and Prestige by Mining.
User Interface
Functions
Levels
For the offer, your account level is what is counted for goal completions. You can raise your level by collecting Prestige.
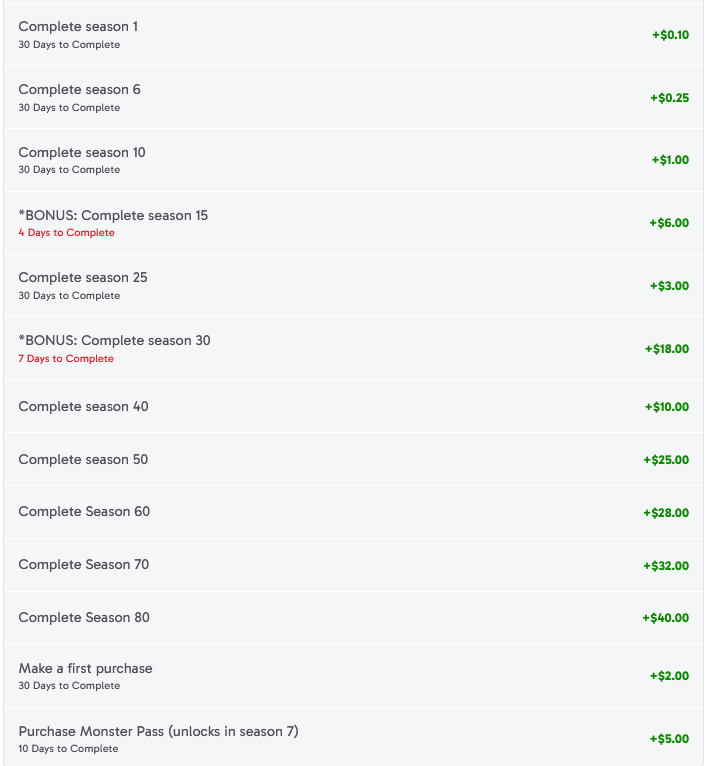
Limited time offers: Complete Season 15 (4 days) $6.00 and Complete Season 30 (7 days) $18.00.
Episode 15 can be cleared within the 4 day limit if you purchase the Monster Pass. However, Episode 30 cannot be cleared in just 7 days without more spending.
All shops may be temporarily increased by watching an ad to activate a boost. This can be done 3 times for a 12 hour boost.
You can watch an ad to double your accrued offline idle income.
Tapping on the bird flying across the screen can earn Cash, and occasionally you can watch an ad for double rewards.
Trading cards counts towards “Get Cards” task.
To get Building Cards you need to achieve Customer Bonuses. This occurs when you reach a customer milestone by filling up the purple/pink bar on shop.
Customer Cards are available by Trading, purchase in the Shop using NanoSpider coins, or from Coffins and stage advances.
Surveys through Revenue Universe can be completed to earn extra Dream Crystals.
Spending
The Monster Pass is $14.99, but we only get $5.00 back from the offer. The Monster Starter Kit is $2.99 and is only available during the first 3 days of play. The first Purchase credit is $2.00.
Gnome Constable Pack $4.99
Gnome Constable, 666 Nanospiders, and 100 Dream Crystals.
Deadly Deals $4.99
650 Nanospiders, Rory Thompson (10), and 150 Dream Crystals.
Monster Pass
The pass includes special characters that boost the high tier shops. Lots of NanoSpiders, Skip Tickets, and some Dream Crystals.
Items must be claimed individually. This is helpful if you want to save some rewards for later, such as the ad skip tickets.
The game maps are called Episodes and proceed in stages of business development. Each level includes several objectives that must be completed before the player can advance to the next Episode.
Warning: Completed goals DO NOT carry over to the next episode. Make sure to collect all completed goals before advancing.
Shops will generate cash which can be tapped on to collect income after the timer bar has filled. Upgrading shops will boost the amount of cash they generate. Assigning a Monster to a shop will enable automation and passive cash generation.
Monsters (managers) assigned to select shops will improve the income generation speed/amount. Monsters must be upgraded to continue using automation as the game progresses.
Focusing your upgrades on the higher tier shops will provide a much greater return on investment in the end game. Especially enabling automation for the periods when you go to bed.
As you advance through the Episodes, the amount of cash generated by low tier shops will become inconsequential. However, missions will likely require ineffective upgrades to progress the storyline.
Events
Throughout gameplay Event maps will become available and will run concurrently with the main map. Additional resources can be acquired on the Event maps.
However, be mindful of spending premium currency trying to clear the Events or rank high on the leaderboard. This can detract from the efforts spent clearing the goals on the main map.
Even small rewards from the Event maps can be useful in clearing the primary objectives. You can also expect regular players to spend cash to rank high on the leaderboards.
Event Strategy and Tips
These event maps use a simplified format for upgrading shops.
There are several versions of the Event maps and some use different rules. Some versions will use a single Card for Cash or Time upgrades that will allow automation, while each individual shop will still have the regular managers.
This means you only need to focus on upgrading a single Card if you just want the passive returns.
In other versions there are separate cards for all functions. And in others still a very simple 1-2 day timeframe with limited rewards.
In all events, the following benefits should apply.
At Event completion, we receive 25% of our leftover event currency as NanoSpider coins, up to a max of 500 coins. This means we want to end the event map with 2,000 event currency.
Completing tasks on the Event map will contribute to the Monster Pass tasks.
There are 162 cards in total (as of Feb 2026). Cards come in rarity ranks of Common, Rare, Epic, Legendary, and Event. Most maps will only use 52 cards actively.
Some cards will increase the cashflow of a shop while others improve the speed cycle.
The cost to purchase cards in the shop depends on their rarity, with Common costing just 5 coins to start. The cost to purchase a card increases by 1 coin for each one you buy until either the shop refreshes or you reach a new Episode.
Rare cards have a base cost of 15 Coins. Epic cards start at 50 Coins each. Some special cards are only available from the Monster Pass.
Episode Clear Multiplier
A unique card, the spider “Lady” will boost the multiplier by a fraction when clearing episodes. I strongly suggest NOT spending any coins on the spider. A better option would be the Epic card Janice, who doubles the multiplier.
Statue Cards
Statue cards are earned from the Events and will place idle reward statues on your map area below the shops. The Owl and Eyeball statues will provide Coins every day. The Eyeball has a faster cycle period.
Ranking high in Events is the only way to get cards to upgrade the statues. Expect Whales (big spenders) to take the top spots in all events. So mostly these statues will remain level 1 during the offer period.
The difficulty doesn’t seem to increase much outside of level gimmicks and the occasional super hard level.
There seems to be a bug with a handful of levels being functionally impossible without a powerup but the team seemed grateful last time I reported one.
Other than that, I’ve mapped out harder levels by hand to know which block comes next in generators etc and it’s made things a breeze outside of occasional levels I simply can’t manage on my own.
The game has some very dismal reviews by users. Sentiment is pretty dour. There is some hope from Reddit though where several players report reaching Area 13 ($10).
Areas
Sort Joy is broken into Areas which are compromised of blocks of levels, starting with 15 levels for Area 1.
This chart shows the level progression for subsequent each area in Sort Joy.
1: 15
2: 25
3: 50
4-11: 75
12-19: 100
20: 150
Timers
You are initially given no limits on completing levels. However at level 14 of Area 1, a timer limit will become active.
In further stages of play, levels will include 2 or more stages that must be completed to advance. If a timer is active on a multi stage level, it will not reset between stages.
Boosters
Players start with a few booster items to clear the game board faster. Ads may be watched to gain additional Boosts.
Occasionally, on the Home Screen you can watch a series of ads spaced 2 minutes apart for Coins and Boosts. Seems to pop up every few days.
The game is reliant on advertising and micro transactions for revenue so you will see many ads and offers to spend money.
The frequency of boosters earned through ad views will decrease over time. Around Area 17, the availability of Boosts from ads seems to disappear.
Similarly, the ads that increase Coins after clearing a level also go away.
Upgrade buildings and technologies, train troops, gather resources, expand your territory. Command your dragon and lead your allies to victory in massive fantasy warfare.
Reaching the T4 Troops and 3M Power goals is achievable, so a possible $196 in rewards, before expenses.
I made it! Tier 4 Troops are unlocked. When I submit my ticket, I will claim credit for the T3 and T4 ($112) goals. I will wait a day, to give time for it to credit normally before sending a ticket.
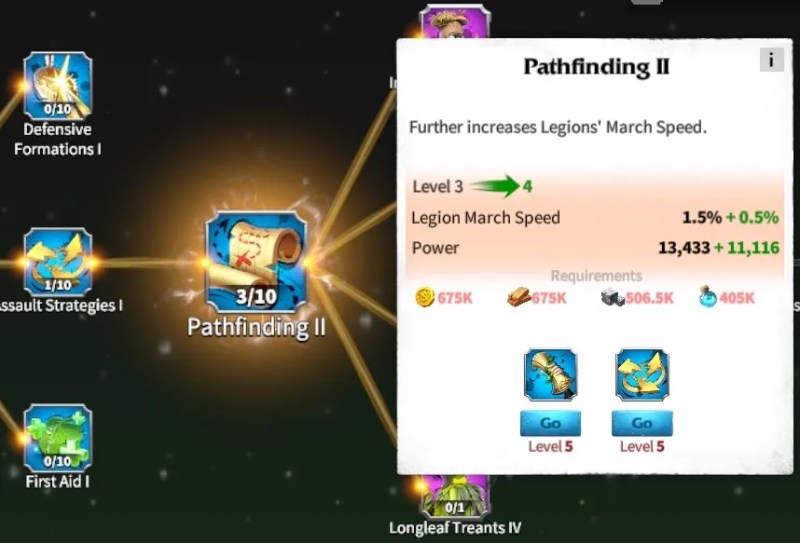
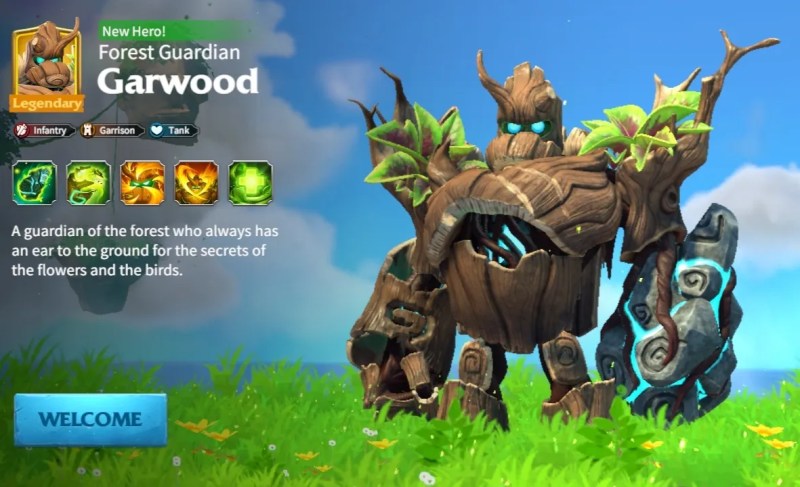
Tier 4 Mage Unit for the Elves
I ran out of speedups and had to keep chasing all the weekly events to get small boosts and Gems to spend on speed ups in the Goblin Merchant, Alliance Store, and the VIP store.
I maxed out the Titans Legacy pack at level 80, which unlocked a perpetual reward that cycles between speed boosts and Gold Keys.
Titan’s Legacy
Titan’s Legacy is a season long growth pack not included in the required purchases for this offer. It has a free tier and a premium tier for $4.99.
I decided to spend the extra money because it included many speed up items and would be active for 60 days, more than covering the time I would need to finish the offer.
Day 23: I managed to upgrade the citadel to a metropolis (level 21), this unlocked several rewards from the Growth pack, Titan’s Legacy, the Great Halls event, and construction goal rewards. Over 10k gems were included and also several days worth of upgrade speedups.
HQ Upgrade from 20 to 21 (8 days 11 hours)
I forgot to check which researches would be needed to get the Tier 4 troops and so I am behind on the research. There is maybe a months worth of upgrades I still need to finish, so I won’t likely get to T4. In hindsight I should have been researching those items up to this point weeks ago.
Around a months worth of speedups were needed to clear the research for T4 troops.
Day 16: I’ve reach 2M Power and have started the Citadel 19 upgrade (5d 8hrs). I quit CS alliance and joined Gaia after a lot of toxic behavior by leadership. I’m not the first it seems; I’ve found a bunch of comrades with similar experiences. I got to join and complete an Elite ROC raid. Nice prizes and bounties.
Day 10: I messed up. I misunderstood the VIP levels and I was already at 7 when i spent an additional 17.5k Gems to upgrade it.
The Honor chest was $19.99. I had read it was good to get to VIP 8, but I think I would have preferred to use those Gems on resources or speed ups.
Reimbursement on the Honor chest was $25, so a $6 profit. I hit the 1.5M Power goal. Level 3 Troops still hasn’t credited.
Day 6: Power is 1.2M currently, I should have T3 Troops ($12) in the next 2 days. That should put me above 1.5M ($5) for the goal, I need 4k more Gems to reach VIP 7 to get the Honor chest ($25).
Day 4: Closing in on 1M power now. It looks like the VIP 7 honor exclusive will be around $25, considering the increase in cost from ranks 4-6. My Alliance mates have posted several good guides that I have included here. Best Pet, Commander Pairings, and HQ Requirements.
Day 3: I went ahead and made two additional purchases. I bought a 99 cent pop up deal and the 9.99 Insight Rune for Titans Legacy. Unfortunately, these purchases did not count towards the Purchase Payback, so I did not get more Velyn tokens. I am up to VIP 6 now.
Day 2: I am on day 2, with 380k Power. The 1M power objective is unlikely. I’ve spent $20 and received $19 in reimbursement. I still need to buy the VIP7 chest, but that provides $25 in reimbursement. My goal will be 3M power and Tier 3 Troops.
Must be installing Call of Dragons for the first time to receive SB.
In-app purchases and upgrades are available.
Award will pend for 10 days
Objective
Reward
Upgrade your city to level 8
0.70
Reach Power 300k
2.00
Reach Power 500k
2.50
Purchase Efficiency in Market’s Worker Support (5 Days to complete)
6.00
Bonus: Reach Power 1M (3 Days to complete)
10.00
Reach Power 1.5M
5.00
Purchase Growth Fund (10 Days to complete)
10.00
Reach Power 3M
30.00
Make First Purchase
3.00
Purchase Honor Exclusive after reaching VIP 7
25.00
Reach Power 10M*
300.00
Reach Power 20M* (30 Days to complete)
900.00
Reach Tier 3 Troops (30 Days to complete)
12.00
Reach Tier 4 Troops (30 Days to complete)
100.00
*It is likely impossible to complete the 10M/20M goals in the timeframe given. Engage at your own peril.
Strategy
Some players, on Reddit, report being only able to reach 5M power after 30 days of game play and heavy spending, while others have said they reached 1M+ in 3-4 days.
Reaching 20 Million Power in Call of Dragons involves massive troop training (especially T5), completing all research at the College of Order, upgrading buildings to high rank (Level 25), leveling heroes, acquiring War Pets, and maximizing speed-ups and resources.
This was my status sheet on day 26 of play, having managed to unlock T4 troops in research, but not having converted all my units.
With full conversion, my power level would have been 4,012,136.
Tip: New players are encouraged to build out Magic Heroes and Units or Marksmen for ranged DPS. They can be used to support melee armies in your alliance, while also being easier to maneuver away from combat if you are targeted. The Fire/Frost legendary heroes are easily acquired.
Just focus on a primary unit type for combat and use the Arms Exchange feature in Events to swap other units types for your primary. This way you can produce all unit types and then convert them into your primary.
I had 100k mage units on Day 10, and 37k Work Elks. I later swapped 15k Mages to Infantry to help the Alliance for some challenges.
The only exception to this are the Work Elks. Keep them for gathering.
Armies are limited to a single unit type and will typically synergize with the abilities of the hero and deputy hero. Multiple armies can be deployed in unison covering each type (infantry, archer, tank, cavalry).
Cavalry units don’t become become available until Sanctuary level 10. They can however be gained earlier by trading with Camps (Work Elk). These initial cavalry units are meant for gathering and have a high load capacity.
In the event panel, you may swap units of the same tier. I swapped my infantry/tank units for the Tier 1 Cavalry to increase my gathering efficiency.
Key Strategies for High Power Growth
Troop Training: Train high-tier troops (T4 & T5) for massive power gains; T5 troops give 100 points in events like Strongest Lord.
Research: Finish all research in your College of Order as quickly as possible, as this adds significant power.
Building Upgrades: Upgrade every building in your city to level 25 for substantial power boosts.
Heroes & Pets: Level up your heroes and acquire powerful War Pets.
Resource Management: Use speed-ups and resources efficiently to accelerate all these processes.
This video goes over all of the methods for increasing your power rating.
Offer Spending
Some of the goals require a purchase, which may be a good choice given the limited 30 day offer terms.
The Honor Exclusive may be a bit costly. Typically, high VIP levels in mobile games is one of the most lucrative avenues for monetization.
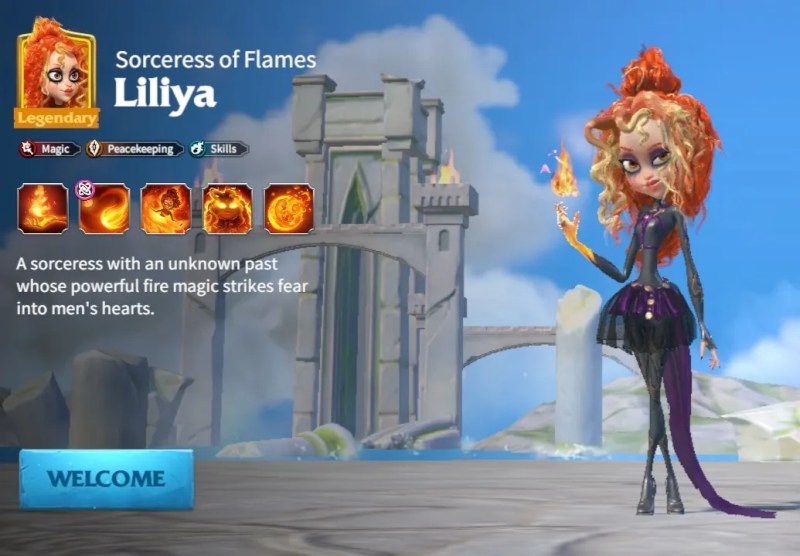
At each rank of Honor, you are prompted to purchase an exclusive pack that includes Liliya’s Tokens. This is the method to upgrade the Legendary starter hero from the First Purchase.
Objective
Reward
Cost (USD)
Efficiency in Market’s Worker Support
6.00
4.99
Growth Fund
10.00
9.99
Reaching VIP 7
Daily Prize
Spend Gems
Honor Exclusive at VIP 7
25.00
19.99
I spent $54.36 in total on Call of Dragons
A workaround will be logging in daily to receive a small amount of Honor points, and by swapping your Gems for Honor experience points.
Any remaining levels may be acquired through the extra worker and growth fund purchases.
Purchasing the extra worker will fulfill the requirements of “Purchase Payback” which provides an additional legendary hero (Velyn), and 20 Keys to summon more heroes.
Rank
Honor (Cumulative)
Exclusive Cost (USD)
0
0
Free
1
200
0.99
2
400
1.99
3
1,300
1.99
4
3,500
4.99
5
6,000
4.99
6
11,500
9.99
7
17,500
19.99
8
35,000
49.99
9
75,000
?
10
?
?
Power Levels
Power comes from Buildings, Heroes, Pets, Artifacts, and Research. Your basic recruited hero and their equipped pet and artifact will provide a moderate amount of power.
The Citadel provides 91,451 Power at level 16.
Resource Buildings are worth 10,181 at level 16 (4 each = 162,256).
Tier 5 troops are worth 10 Power each (2M Tier 5 = 20M Power).
At high ranks (4 Stars), a legendary hero may provide a power score around 100k. It will would likely be difficult to gain such powerful heroes in just 30-days. Blue heroes were around 30-40k power at level 30s and 4 stars.
While a building at max level can provide around 725k power, we will not be reaching those levels in the course of this offers timeframe.
Our first mission will be to complete the level 8 town upgrade on the first day. This can be achieved by using some of the free resources and speed up items new players receive.
On the first day we can also buy the extra worker and the growth pack to clear both of those objectives.
Strategy 1 (Long-term): Save your gems for purchasing VIP points. At VIP level 8, we get a permanent 2nd research slot which will speed up our power gain.
Strategy 2 (Short-term): Gems should be used to exchange for Gold Keys. In the early game the fastest way to reach 1M power by day 3 is to summon heroes.
Upgrading the castle from 8 (town) to 16 (citadel) takes 385 hours or 16 days. You will need 6,072,100 Gold and Wood, and 2,507,790 Stone to complete the upgrades to the main building alone.
There will be additional resource requirements to upgrade pre-requisite structures. Expect to have all other buildings upgraded to level 15.
Buildings do not provide much power until they reach level 21. At levels 20+ buildings provide 30-50k power each when fully upgraded.
Using Gems
Farming Gems
Farming gems can be easy or hard, based on how many players are on your server.
After you learn Gem Prospecting in Internal Affairs, you can send heroes to gather gems. But with many players, competition can be tough.
New players should focus on permanent technologies and other resources first, and start gathering gems once they reach max technology and city hall levels.
Events and Quests
Many events and quests provide gems as rewards. To gather gems over time, it’s important to complete as many of these as possible.
Examples include special events, NPC battles, and daily quests. Joining a whale alliance, where spenders buy bundles and give out free chests with opportunities to win gems, can also help.
Buying Packs
Spending real money on packs usually includes gems. Bundles like Growth Fund, Monthly Pack, and first purchases in the Gem Market can give you many gems. Growth Fund is especially good as it offers a large number of gems, but you need to reach upgrade milestones to receive the rewards.
HQ 12: 2x Gold Keys, 12x 10-Minute Building Speedup, 12x 10-Minute Training Speedup, 2x Basic CP Recovery (100), 100k Gold, 100k Wood, and Emoji.
HQ 13: 13x 10-Minute Building Speedup, 13x 10-Minute Training Speedup, 2x Basic CP Recovery (100), 100k Gold, 100k Wood, and Emoji.
HQ 14: 1x 7-Day Speedup, 14x 10-Minute Training Speedup, 2x Basic CP Recovery (100), 100k Ore, 20k Mana, and Emoji.
HQ 15: 15x 10-Minute Building Speedup, 15x 10-Minute Training Speedup, 2x Basic CP Recovery (100), 100k Gold, 100k Wood, and Emoji.
HQ 16: 16x 10-Minute Building Speedup, 16x 10-Minute Training Speedup, 3x Basic CP Recovery (100), 100k Ore, and 20k Mana.
HQ 17:
HQ 18:
HQ 19:
HQ 20: 1x 7-Day Speedup, 20x 10-Minute Training Speedup, 3x Basic CP Recovery (100), 100k Ore, and 20k Mana.
HQ 21: 21x 10-Minute Building Speedup, 21x 10-Minute Training Speedup, 4x Basic CP Recovery (100), 100k Gold, and 100k Wood.
Guide to Creating a Farm Account
by (GAIA) Atenea.
What is a farm account?
A farm account is a secondary account whose main purpose is to produce resources (wood, gold, mana, and food) to directly support your main account.
1️⃣ Creating the farm account Create a new account from the Settings → Character management. Choose the same kingdom where your main account is located. Try to join a nearby alliance, preferably one located in your same region.
2️⃣ Faction choice The best faction for a farm account is: 🏹 League of Order (Humans) Balanced development. Efficient buildings. Ideal for accounts focused exclusively on economy and gathering.
3️⃣ City development (priority) Upgrade only what is strictly necessary to produce resources. Key buildings 🏛️ City Hall 🌲 Lumber Mills 🌾 Farms 🪙 Gold Mines 🔮 Mana buildings Research Prioritize only Economy and Gathering research. Avoid military or defensive research.
4️⃣ Recommended commanders Use gathering commanders only: 🔹 Invest only in Gathering and Economy talents. 🔹 Do not spend experience on combat commanders.
5️⃣ Proper troop usage Train only the troops needed for gathering. Keep low-tier troops. Do not develop advanced military structures.
6️⃣ Efficient gathering Keep your marches always gathering. Take advantage of resource nodes within alliance territory. Use gathering boosts only if they are free.
7️⃣ Protecting the farm account Place the city inside alliance territory. In case of conflict: Withdraw troops from nodes. Avoid confrontations. Prioritize not losing troops.
8️⃣ Resource transfer To transfer resources to your main account: Both accounts must be in the same alliance. Use the Alliance Bazaar to transfer resources safely.
Community
The Facebook and Discord pages will often feature contests and game trivia. It is easy to get small rewards for participating in these activities.
This was my entry for Ruby’s Christmas Outfit.
CoD Redemption Codes
Codes expire 7-30 days after being released. Check the official Facebook page for new codes.
TIP: The codes are not case sensitive.
Code
Expires
Contents
CODTHX1127
12-31-25
1x Universal Artifact Key, 2x 60-Minute Training Speedup, and Level 2 Choice Resource Chest
SSSVIP8888
2x Silver Key, 150k Gold, 150k Wood, and 112.5k Stone.
SSSVIP7777
60-minute speedup, 60-minute building speedup, 150k Gold, 150k Wood, and 112.5k Stone.
SSSVIP6666
1x Silver Key, 60-minute training speedup, 8-hour enhanced gathering, and 1 Epic Medal.
PLAYCODPC
30-minute training speedup and 8-hour enhanced gathering.
SVIPDRAGON
2x Silver Key, 150k Gold, 150k Wood, and 112.5k Stone.
Heroes
Call of Dragons was developed by the same company as Rise of Kingdoms and the heroes in both games are essentially the same. The combat system is also the same.
You will have a primary hero that leads the army and a deputy hero that provides Skill (attack) based bonuses. The deputy hero does not lend their talents to the fight, only their skill effects.
Make sure you save the Blue Tokens to improve the skills of your lower tier heroes. New skills unlock every 10 levels.
Upgrade Legendary heroes first to improve your battle efficiency, but afterwards upgrade the blue heroes. They can provide around 70k Power each with maxed out skills and artifacts equipped.
Hero Specialties
Each hero has 3 specialties which may include:
Gather
Support
Overall
Marksman
Peacekeeping
Precision
Magic
Skills
Fighters
Combat Heroes excel at PvE and PvP combat. Their skills deal direct damage to foes and include a finisher in most cases.
Gatherers
These economic heroes get a bonus to gathering specific resources and these bonuses can be improved upon in the Talent Tree.
Heroes with the Gather specialty, will have a skill that improves gathering speed in general and also boosts a specific resource gathering speed.
For example, Pan’s Tier 2 Skill, “Secret of the Trees,” provides the following bonuses when upgraded.
Gather Speed (%)
Wood Gather Speed (%)
1
4
2
6
3
8
4
10
5
12
7 (awaken to unlock)
15 (awaken to unlock)
Campaigns
Expeditions
This is the idle reward portion of the game. It includes a mini auto grid-battler system with room for 6×6 fights.
Each squad can have two heroes, a pet, and a single unit type. The units should complement the heroes being deployed.
At mission 11, players can activate the double speed option. At mission 30, the multi-battle option can be toggled, which automates the expedition. It will keep fighting until you lose a battle.
The chest on the main screen can be tapped to claim current accumulated rewards which include gold, wood, stone, exp tomes, and hero tokens.
Expeditions are independent of world map battles and can be completed while heroes are out gathering or fighting.
Behemoth Trials
This is a mini battle campaign trail with manually controlled battles. Some trails use tactics and will require some thought on how to advance.
After clearing a Main Stage, you will receive 1-3 star rating, along with corresponding Loot bonuses. You will receive rewards for clearing a Main Stage for the first time.
In Main Stages, you will use your own Heroes, combat units and buff effects. In the Side Stages you are only able to use preset Heroes, combat units and buff effects.
The higher your Loot bonus and the longer you wait, the more Loot you will receive (idle rewards). Loot will accumulate for up to 24 hours, so remember to claim it in time.
The first time you beat Main Stage 5, you will unlock the Auto-Battle feature. Auto-Battle cannot be used in Escort, Tower Defense, Boss, or Side Stages.
The first time you beat Main Stage 10, you will unlock the Multi-Battle feature. Multi-Battle cannot be used in Escort, Tower Defense, Boss, or Side Stages.
During Behemoth Trials, feel free to allocate your Legions as you please, as they will not die or have their numbers reduced. Trial Store items will be refreshed at midnight each day.
Trial Coins can be used at the Trials Store to buy various Hero Tokens and items.
Tournament of Champions
This is an Arena for PvP. You can create a team of up to 5 legions (HQ dependent) and battle other players lineups.
First start by setting a defense team to handle opposing attacks and then create an offense team. You get 3 attempts each day to battle other players and can spend Gems for extra attempts.
Reaching higher tiers will provide rewards.
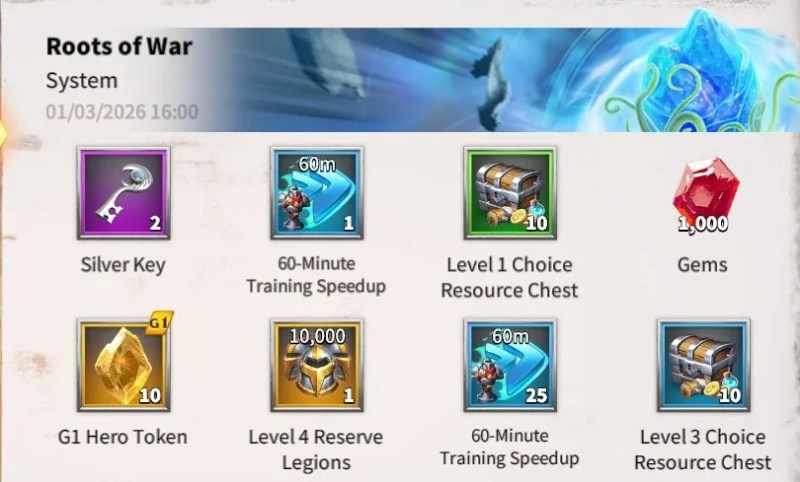
Roots of War
Roots of War Guide
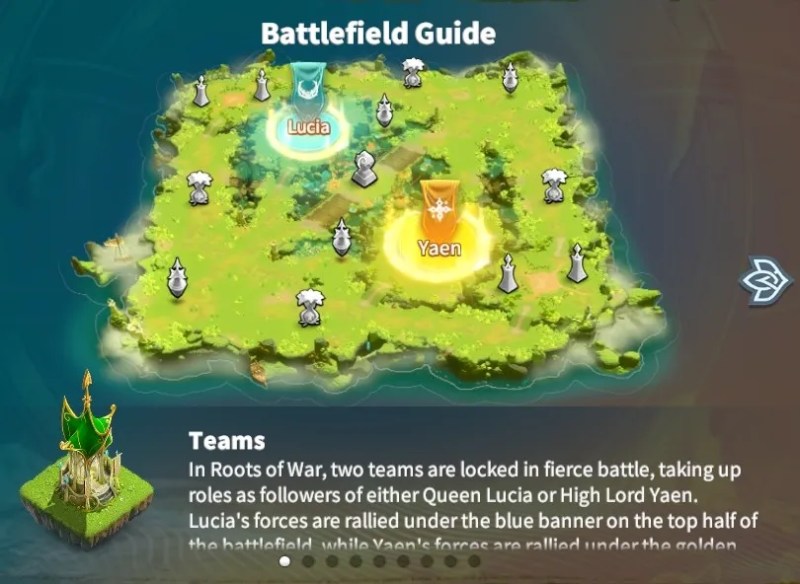
This is a mini map battle with set regions to fight over. The goal is to collect energy from the map by gathering resources.
Special mana stones will spawn at set intervals. A team member will pick it up and then walk slowly to a central drop off location. Team members will need to escort the caravan to the location to prevent attacks by the opposing team.
If your team does not have a sufficient number of players present, you can get blocked in by a strong enemy and prevented from accessing the map for the duration of the event.
25x 60-Minute Training Speedup, and 10x Level 3 Choice Resource Chest.
Wall Map
The floating compass above the city wall takes you to the storyline game. This works similar to the expedition but requires you to navigate the heroes on a mini-map and battle enemies in real-time.
You can use any of the heroes you have unlocked and raising their levels will improve the success rate for these missions.
Missions are gated by the level of your Sanctuary (Citadel).
The Best Pet for your Hero
Since War Pets unlocking, wanted to share this guide to help you choose the best pet for each legion.
Mages
Recommended pet: Sapphire Faedrake
Reasoning: The Sapphire Faedrake’s spell fires a large beam that hits the target and nearby legions. Its secondary skill (available in the shop) can increase damage output by up to 40% with one star. Overall, this is the most efficient pet for mages.
Stat priorities: Intelligence and Luck
Infantry
Recommended pet: ice bear & orange bear
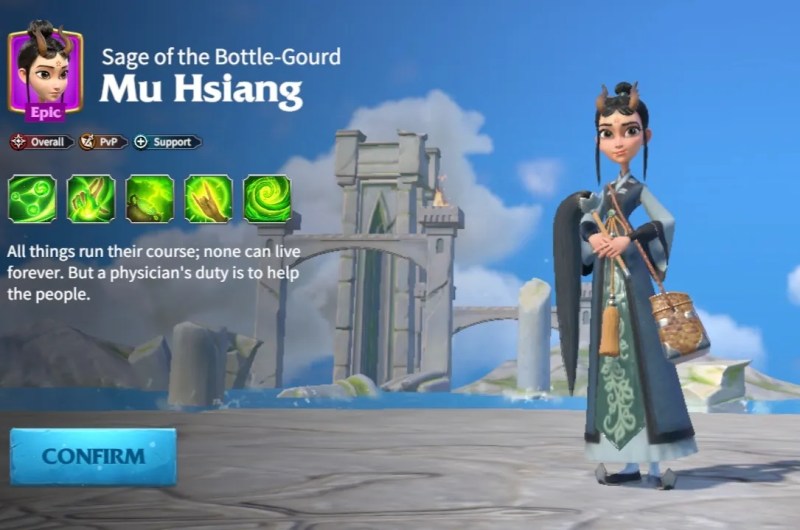
Reasoning: The Ice Bear is good because it offers a shield and damage when it breaks, which can be combined with Eliana or Madeline. The orange bear is good because it offers healing and sustainability, making it good with Garwood and mu hsiang . Sand Lizards might be better for mages because they heal per second, which is good for continuous DPS and not for tanks.
Marksmen
Recommended pets: Shadow Manticore, Snowpeak Roc, Berserk Faedrake, or Golden Roc
Reasoning: The Snowpeak Roc’s talent skill works with marksmen but only when paired with Nico or an awakened Kinnara.
Stat priorities: Strength, Agility, and Luck
Cavalry
Recommended pet: Golden Roc
Reasoning: The Golden Roc’s passive skill provides rage accumulation and additional damage once rage is active. It synergizes perfectly with Emrys and Bakshi, both of whom benefit from rage gain, amplifying overall damage. Combined with defense ignore, physical damage, and HP ignore effects, this setup becomes extremely powerful.
Stat priorities: Strength, Agility, and Luck
Commander Pairings
In this decree, the best hero pairings are listed. Feel free to do your own research as well on google.
Note: An “x” in the number of the skill means it doesn’t matter since the skill is not relevant to the open field.
Tip: Pressing the Lock button when viewing skills will allow you to select which skills to allow to be leveled up. Otherwise, point distribution will be random.
Magic Legions
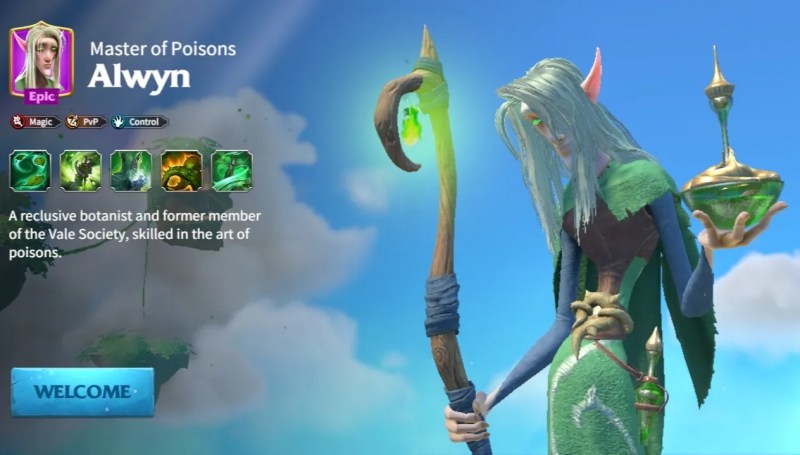
✿ 5×51 Liliya + 5111 Velyn ✿ 5×51 Liliya + 5111 Waldyr ✿ 5511 Waldyr + 5111 Velyn ✿ 5511 Waldyr + 5111 Alwyn ✿ 5511 Waldyr + 5111 Theia ✿ 5111 Hosk + 5555 Liliya (for the whales) ✿ 5511 Atheus + 5111 Theia (flying units) ✿ 5511 Atheus + 515x Kregg (flying units) ✿ 5111 Theia + 515x Kregg (flying units) ✿ To make any magic march a bit more tanky, you can add a 5×22 Eliana as a secondary.
Infantry Legions
✿ 5×11 Garwood + 5×22 Eliana
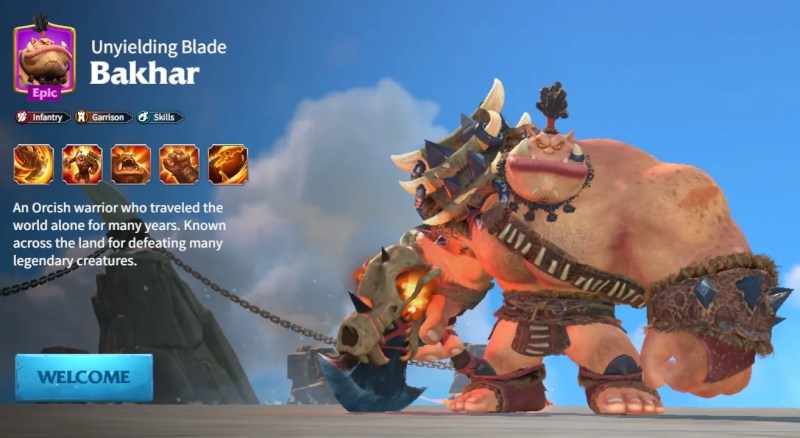
✿ 5×11 Garwood + 551x Bakhar
✿ 551x Bakhar + 5111 Nika
✿ 551x Bakhar + 5×22 Eliana
✿ 5111 Kregg + 55×1 Ordo (only for engineering purposes! And make sure to have Kregg with engineering talent tree)
✿ I don’t add Madeline here because we haven’t had her Fortune Wheel, but she is OP, if you do get her at a later stage, use her as primary with any commander above or Hosk.
Cavalry Legions
✿ 5×11 Emrys + 5×11 Bakshi
✿ 5×11 Emrys + 51×1 Alistair
✿ 5×11 Bakshi + 51×1 Alistair
✿ 5×11 Bakshi + 5×11 Emrys
✿ 5×11 Alistair +5×22 Eliana
✿ Sorry cavalry mains, there are not many options for you to use.
Marksmen Legions
✿ 5111 Kinnara + 5×11 Gwanwyn
✿ 5111 Kinnara + 5111 Nico
✿ 5111 Nico + 5×22 Eliana
✿ 5111 Nico + 5511 Kregg (good for pvp and engineering!)
✿ 5111 Nico + 5111 Hosk (for the whales)
✿ 5×11 Gwanwyn + 5511 Kregg
✿ 5×11 Gwanwyn + 5111 Nico
Beast Battles
I missed the bear fight, but I did take part in the Thunder Roc normal battle. I died in the water during the first fight, but survived during the second normal battle. I did not have time to join the Elite Roc fight.
Different time zones were a difficulty in this game. Most players were 5-9 hours away.
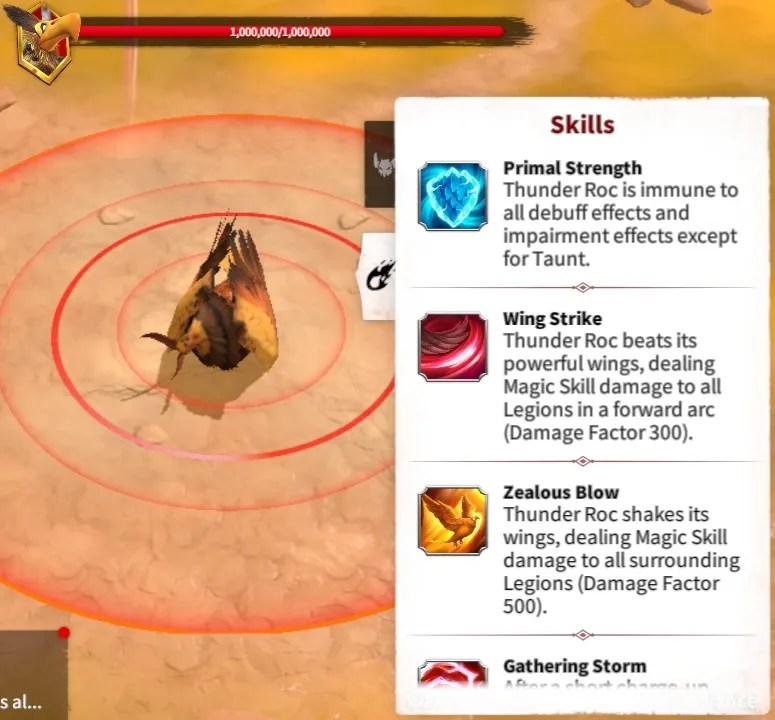
Thunder Roc
Thunder Roc StatsThunder Roc Skills
The strategy uses two teams Sun and Moon. Use Discord for voice chat and party management (alliance chat if you can’t use Discord).
Members will send their best legion to participate in the battle. For Normal Roc, T2 and T3 units are fine. But for Elite Roc, only T3’s should be used and you want a minimum of 45k units.
Teams are divided evenly between Sun and Moon with designated Tanks and DPS members. The Roc battle area is a circle divided by land paths in a quadrant.
The Roc will target different quadrants during the fight.
During the fight, if your legion gets targeted by the Red ball (Roc’s attack), your screen will flash red. When this happens, walk your legion to the middle. When the Red ball touches the water, it will become electrified and do heavy damage to any legions present in the targeted quadrant.
Multiple legions may be wiped out if players are not properly coordinated.
During the fight, Dispel stones will appear that will remove the shock from the water, heal members legions, and stun the bird. For the Normal Roc, 8 players are needed to activate the stone. In Elite Roc, 13 members must activate the stone.
After the Roc has been stunned, players can safely attack it.
Tank role during the raid: Tanks will need to keep the Roc in the center of the field. Don’t let it get into the puddles of water. It the Roc does its charge in the water, it will kill half of the people in that puddle.
Multiple rounds of avoiding the Red ball, running from shock water, activating dispel stones, and attacking the Roc will occur. After the Roc has been defeated, players will purify it by targeting the body.
Alliance-wide rewards for Thunder Roc
Individual rewards are issued for the top 5 members who deal the most damage during the fight. Alliance-wide rewards are issued regardless of member participation in the event.
I got the credit after submitting a ticket and proofs. My total earnings from this game offer was $13.19.
Offer Completed: Day 30
Last night with about 14 hours left on the offer, I was still in Una’s area. I realized I had miscounted the number of merges I would need to complete the Limestone and that got me thinking I could finish the offer in time.
I went all in and spent an additional $27.17 to purchase, two hero chests and 2,300 Gems.
I spent Gems to fast mine and build the remaining Limestone blocks.
I managed to reach Chapter 5 and Install the Drum, but I did not receive credit for the objective. I will submit a ticket in a couple of days.
The final objective is still not clear. I completed 5 quests and still haven’t encountered the last quest to, Clear the Trash. If I can get credit for the Drum, I will have a $10 profit for this offer.
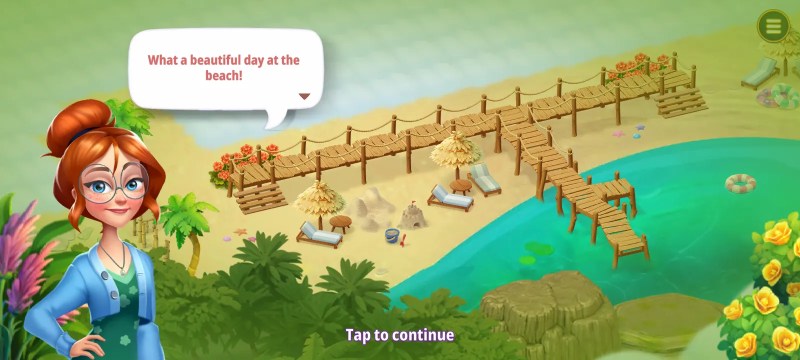
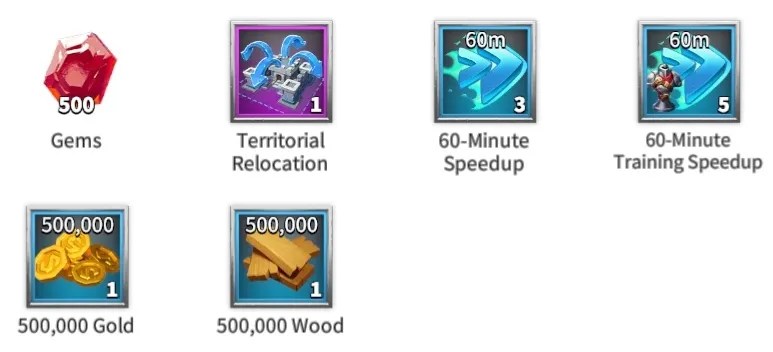
Welcome to Fable Town! Merge, renovate, and discover the magic of Witch’s Garden!
In this engaging merge puzzle adventure, explore the wise witch’s grand mansion filled with secrets. Combine magical artifacts and enchanting plants to restore her beautiful garden.
Face majestic dragons and solve puzzles to reveal the wonders of this offline game. Use your merging skills to build a vibrant sanctuary and let your creativity flourish in a garden of surprises!
Join Ginny, Merlin’s talented granddaughter, as she returns to Fable Town to uncover the truth behind the enchanted fog and find true love.
Important Things to Know
Must be installing Fable Town for the first time to receive SB.
In-app purchases and upgrades are available.
Award will pend for 10 days
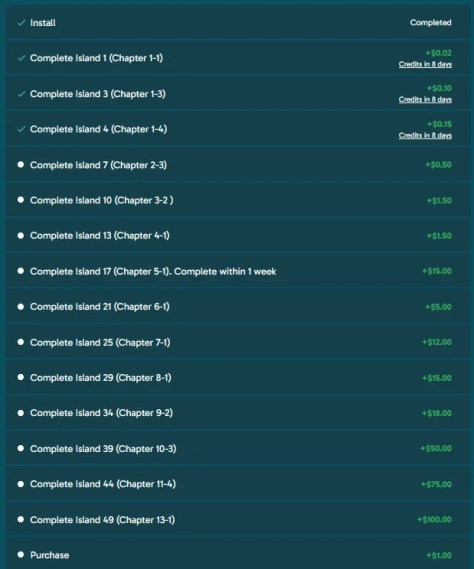
You must complete goals within 30 days of installing to receive Up to 9,909 SB
The following objectives are optional and may require purchases:
Bonus Event: Claim the final reward from Daily Tasks +$1.88
Bonus Event: Collect 10 Bronze Trophies +$1.88
Bonus Event: Collect 20 Bronze Trophies +$1.88
Unlock a Premium Island – ($9.99) +$1.88
Make your first Purchase +$1.00
Total: $8.52
Buying Land
For the Premium Island, this just means unlocking a section of tiles on the main map. You need to spend at least $9.99 to clear the objective. I got the 10.99 Enchanted Treasures section. It had around 400 Gems and 600 Coins in it.
I strongly advise against spending 500 Gems on Lost Treasures. The items in there were barely worth 100 Gems.
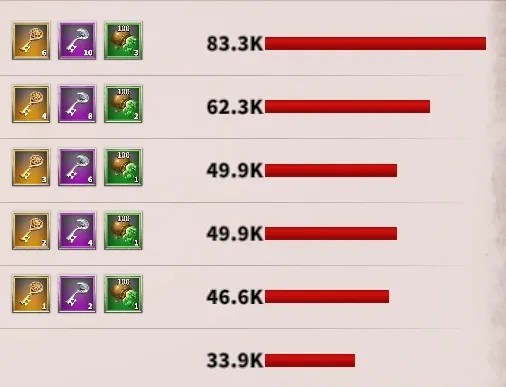
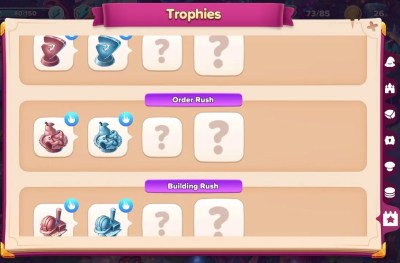
Trophies
Bronze Trophies are earned by completing the Rush challenges. You’ll get 6-7 of them. They fill up tiles but don’t give you much reward. There are 4 Tiers for each Trophy, but for this offer we won’t get the benefits of the upgraded versions.
TIP: It may not be necessary to do any side islands. The 3-day Rush events provide 15-18 Trophies, nearly enough to meet all offer terms.
These include the 3 day merge, build, energy, and crop events in the Main area and the 3 day recurring mini event running with separate event energy.
For the main area events, it’s usually rewarded on the 15th task, the last one. For the 3 day limited time event area, it’s either the 11th or the 15th reward
Warning!
If you use a Samsung device with Game Center support, the game ads can trigger “Instant Install,” (without consent) if you mistakenly tap the ad when trying to hit the close button.
How to Play
Fable Town is very similar to Mergeland: Alice’s Adventure, if you’ve played that before you will do fine with Fable Town.
– Сombine 3+ identical objects to get an upgraded one as a result of this fusion. It is better to merge items in groups of 5.
– Merge artifacts to disenchant wizards. – Grow plants and trade fruits and vegetables for magic wands. – Use magic wands to restore Fable Town.
Optional Ads can be watched to gain additional rewards. They can be skipped if you don’t like ads, or you can pay to remove ads (I advise against this).
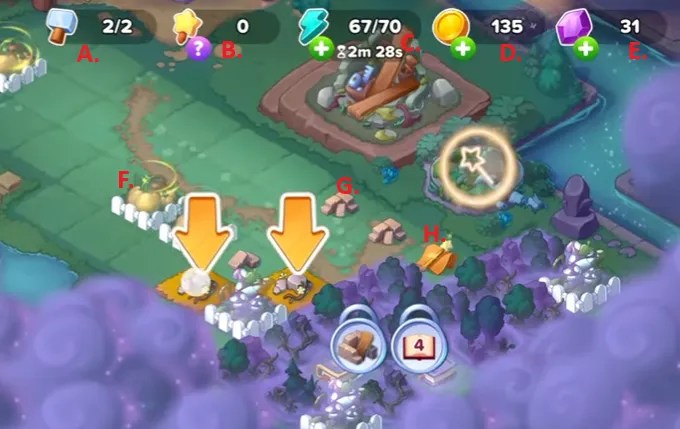
Main Screen Overview and Legend
A. Worker Elves
B. Wands in Inventory
C. Energy
D. Coins
E. Gems
F. Pumpkin Patch (Produce): used to create wands.
G. Stone: used to construct facilities (castle, library, etc.) on the map.
H. Wand: are used to unlock new areas and land pieces, renovate the Elves House.
The Greenhouse generates some food and seed items for only 5 energy.
The Mine can also generate a smaller amount of seeds, it also make the Artifact and Construction Materials, so it is the preferred way to clear the missions..
Your character profile is shown at the top-left of the screen, below it is the current task list. Further down the left side of the screen you will find your Inventory and Daily Quests.
Produce, including Pumpkins and Mushrooms, takes 3 hours to produce goods. This can be sped up using 36 Gems. Produce field may be moved around the map. Produce can be exchanged for Magic Wands by the Elves.
Basic Stones have 8 tiers. Starting at the third tier, they will require construction using an Elf. They come in different colors depending on the Chapter you are in and have higher Tier levels.
Elf Tasks
Once a task reaches 30 seconds, you may skip the remaining time for free in the Task interface.
The task list from the Elves will often ask for foods you don’t have.
You can tap the Trash button to ask for a new task, this will start a two minute cooldown. There is no penalty for throwing out a task.
Some tasks will offer the same reward but accept different amounts of items.
Try to limit spending gems and coins for daily quests (spend 5 gems get 7 in return). They are best saved for buying Energy and popup offers.
The Daily Reward objective requires you unlock Daily Quests and complete them 5 days in a row. It is advised that you start the game in the morning so you have time to clear the beginner quests and unlock daily quests. Daily Tasks become available after completing the Boot Camp.
Claiming the Free Chest is a Daily Task. If you accept the chest before completing the Boot Camp, you will not be able to complete the Daily Task on the first day of play.
In the Shop, there is a green button for “Free Gems,” this leads to TapJoy offers that may be completed to get Gems.
In the Shop you will find free items available every 6 hours.
This game does not use Codes, instead they offer Daily Freebies through MY.GAMES Market. Your Player ID is found in settings.
Tips: Event Islands
For the Event area (Peacat/Mammoth), DO NOT merge the chests. Spam the 2 hit obstacles + 15 energy mine. Because you get points from merging objects, so 5 of low level objects would yield more points than getting 3 of the next tier.
For the Event Islands, only the primary creature provides a reward, other objectives are optional. The Bronze Trophy is earned early, but if you clear all 32 stages, you get a giant Gem and Coin Chest.
Tips: Chests and Energy
The contents of a Chest will be converted as you advance to new areas and will include items for those new areas. Leftover items will also convert, however, if you have not opened the next area, then the old items will turn into Coins.
Energy may be purchased in the Shop for 350 Coins (90 Energy) or 90 Gems (100 Energy). You may also watch two Ads to get 30 Energy.
The Energy Lotto is only available during set periods of the day, however, you can skip the timer for 45 Gems or 175 Coins during Rush. Completing the lotto is required for the Daily Reward objective. I saw (12pm-3pm) and (12pm-11am).
Tips: Miscellaneous
Keep an eye out for glowing lights floating above the map. This can be tapped to get random items.
Occasionally, after merging items, a hot air balloon will appear. Most balloons will cost 20-100 Gems (depending on rarity), but lower value items may allow you to Watch an Ad to get it for free.
On rare occasions, you will see a balloon with a timer and an Energy gauge. By spending 90 Energy, you will get to keep the present’s the balloon is carrying. The balloon timer and the presents timer are separate. You can wait until 1 minute is left on the balloon and still get the full 30 minutes from the presents after claiming the balloon.
You do not need a Facebook account to get the 30 free Gems. When the popup appears, simply tap the button and then close the window that opens.
TapJoy Rewards
Fable Town includes access to the TapJoy Rewards platform. This is an offer wall like what we have on Swagbucks. The offers all award Gems.
I wouldn’t suggest doing any offers that you haven’t already completed on Swagbucks, as these offers will log your Google ID and could potentially prevent you from completing the same offer though #GetPaidTo sites like Swagbucks.
I was able to easily clear several objectives from just doing surveys through TapJoy Rewards. This also makes buying Energy much easier.
The quiz games worked, the visit site and click through offers were hit or miss for me, video watches worked, all auto insurance offers worked the first time but many had different pictures but were all the same company (tons of SPAM in Email and Text/Calls).
The 5-day trial of Background Checker for $1 worked, but make sure you cancel the next day. Also, only do it when the Double points are active. The recurring charges are $50 per month. I used a virtual card but will still cancel. Here is the number (833) 714-0641, you can also do it in the account settings of the website.
Upgrade Timers
Artifacts will merge instantly, while building resources have timers.
Stone
Tier 3: 30 Seconds
Tier 4: 40 Seconds
Tier 5: 1 Min
Tier 6: 2 Min
Tier 7: 4 Min
Tier 8: 15 Min
Slate
Tier 1-2: Instant
Tier 3: 40 sec
Tier 4: 1 min
Tier 5: 5 min
Tier 6: 15 min
Tier 7: 1 hour
Tier 8: 8 hours
Tent (Canvas)
Tier 1-2: Instant
Tier 3: 40 sec
Tier 4: 1 min
Tier 5: 5 min
Tier 6: 15 min (Skip for 12 Gems)
Tier 7: 1 hour
Tier 8: 4 hours
Tier 9: 6 hours (Skip for 107 Gems)
Limestone (11 Tiers)
Tier
Time
Skip Cost
1-2
Instant
–
3
40 sec
1 Gem
4
1 min
2 Gem
5
5 min
3 Gem
6
15 min
4 Gem
7
1 hour
12 Gem
8
4 hours
20 Gem
9
8 hours
127 Gem
10
16 hours
175 Gem
11
1 Day
200 Gem
Cryolite (11 Tiers)
Uses the same timing as Limestone.
Fairy Lantern Timers
Tier 1-2: Instant
Tier 3: 45 sec
Tier 4: 1 min 30 sec
Fairy Lantern 1: 1 Crown
Fairy Lantern 2: 3 Crowns
Fairy Lantern 3: 10 Crowns
Fairy Lantern 4: 35 Crowns
The game will have you run out of Energy during the Tutorial, so as to introduce the Shop function and the option to purchase Energy. You will get 70 Energy for free as an introduction.
At level 6, your Energy capacity will start to increase. Initially by +5 points.
Gem and Coin Conversion Rates
Tier 1
Merge to Use
Tier 2
1 Gem/Coin
Tier 3
3 Gem/Coin
Tier 4
10 Gem/Coin
Tier 5
30 Gem/Coin
Tier 6
90 Gem/Coin
Houses
The fully constructed homes of the Wizards will produce items daily. The Lantern resources can be claimed for Crowns which are points used to upgrade the various home’s.
The upgrades go in order starting with Merlin’s home and then on to Morgana’s home. There are three stages to each upgrade. Having all three upgrades will result in extra daily production of items.
You may tap on any home to see which items may be produced and the current upgraded level. The pillar of Crowns rising from a home is a visual indicator of the current progress on Crown collection for a given home.
Game Progression
A short intro titled Magic Bootcamp, which includes basic game functions, will play out with dialog between Ginny and the Elves.
The satchel from the first Daily Rewards will include an Advanced Wand that can clear the Mermaid Fountain and should bring your level to 4.
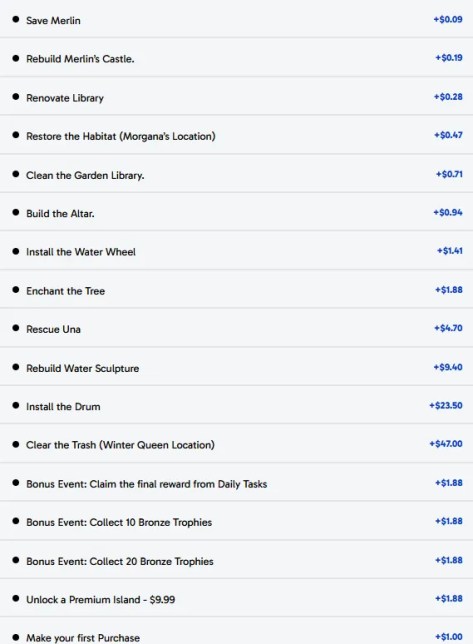
The game storyline is not entirely linear. Some objectives can be completed concurrently.
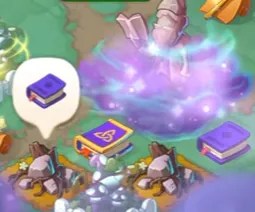
Save Merlin (Chapter 1: Return to Fable Town)
Merlin turned into a statue. You will need a Tier 4 Tome of Magic to unseal Merlin and save him.
These books can be found at the base of the statue.
You will need to merge them to get the correct Tier of tome.
The nearby rocks can be mined to gain further tomes for merging.
The large rock takes 20 Energy to clear, the medium rock is 15 Energy.
Once you save Merlin, the tutorial ends and the second map area is opened up.
Rebuild Merlin’s Castle (Day 1)
In the second map area after the Tutorial ends we begin the task of rebuilding Merlin’s House.
Restore Merlin’s House
7 Wands
Repair the Bridge
8 Wands
Open the area South
Merge Tier 5 Stone
Save the Wizard
Merge a Tier 7 Crystal Ball (50 Coins and 10 Gems)
The first restoration will raise you to level 5 and reveal more of the map. This also reveals the next Wizard trapped in a statue.
After accessing the second map section, you will be offered the Enchanted Treasures area. It adds 14 tiles and a bunch of Chests for $10.99. Check the Shop List for other purchases.
You do get a dollar back on the first purchase, I’m not sure if it is worth it. This offer shows up on most new map areas. It might be good if you find you run out of space quickly.
New items in the area of the map include Rocks and Crystal Balls.
Orange Rock (Coins): Can be claimed at tier 2 onwards. More coins the higher you merge.
Crystal Ball (7). Reach Tier 5 to earn 35 Lotto Tokens and 10 Energy.
Stone (8). Reach Tier 6 to earn 10 Coins and 5 Gems.
You will continue to merge Wands and Stones. The stone becomes a little cottage. The highest Tier Wands can be collected.
The area south of the bridge includes rocks that contain Crystal Balls, Rocks, Stone, and Pumpkin Patch pieces.
Renovate the Library (Day 1)
The library is just up the stairs from Merlin’s House. The Castle is the structure to the left of the house.
For this stage you will need 49 Wands.
Renovate the Library (1/3)
9 Wands (25 EXP, and 5 Gems)
Restore the Tower 2/3
15 Wands (10 Energy, 10 Coins, and 1 Gem)
Restore Merlin’s Castle 3/3
Merge Tier 8 Stone (25 EXP, and 5 Gems)
Heal the Oak
10 Wands (25 EXP and 1 Gem)
Tidy up the Area
15 Wands (25 EXP and 1 Gem)
Fairy Island is the first limited time island map you can access. The Ginger Cat creature is available after playing on the fairy map for the first time.
The side islands are a good option if you run out of Energy on the main island or if you want to gain extra chests or Creatures.
The only objective you need to clear on these optional islands is the main creature shown by tapping on a nearby pedestal.
The Shop on each island is independent of the others. You can watch ads for energy on multiple islands if concurrent events are active.
Restore the Habitat (Chapter 2: Crystal of Secrets)
The Habitat is the area to the east where you will see a picture of the Polar Owl. I unlocked this at level 10.
After completing the Castle, any remaining Stones will automatically convert to Fairy Lanterns of the same Tier.
Magic Orbs are converted to Scissors. Resources in the Mine will switch to the new items.
For this stage you will need 15 Wands.
Reveal the Habitat
Collect Polar Owl
Restore the Habitat
15 Wands
This last objective should begin Chapter 2: Crystal of Secrets. The reward includes 50 Coins and Energy and a Wizard Card Chest (Energy and a random card).
For this stage you will need 105 Wands.
Build the Extension 1/3
Requires: 15 Wands Rewards: 50 EXP and 1 Gem
Unlock more of the Habitat
Requires: Tier 3 Slate, Level 11
Save the Wizard
Requires: Tier 8 Scissors Rewards: 15 Coins and 3 Gems
Install the Fountain 2/3
Requires: 15 Wands Rewards: 50 EXP and 1 Gem
Build the Terrace
Requires: 15 Wands Rewards: 50 EXP and 1 Gem
Unlock more of the Habitat
Requires: Tier 4 Slate, Level 12
Repair the Dock
Requires: 15 Wands Rewards: 50 EXP and 1 Gem
Finish the Meditation Center 3/3
Requires: Tier 9 Slate Rewards: 50 EXP and 1 Gem
Fix the Decor Area
Requires: Free Rewards: 1 Gem
Restore the Habitat
Requires: 15 Wands Rewards: 50 EXP and 1 Gem
Clear Debris
Requires: 15 Wands Rewards: 50 EXP and 1 Gem
Build the Cottage
Requires: 15 Wands Rewards: 50 EXP and 1 Gem
New Resources: Fairy Lanterns, Scissors, and Slate.
The Slate has 9 Tiers and is used to construct Morgana’s House. Completing the Extension brought me to level 11, a requirement to unlock more of the Habitat.
The Fountain and Meditation Center are both part of Morgana’s home area.
Clean the Garden Library (Day 2)
The Garden is in Morgana’s area of the map. If it is taking you a while to clear her objectives, you may advance to this stage early.
We start to see a jump in the Wand cost to clear missions starting with the Garden cleanup.
For this stage you will need 110 Wands.
Clean the Garden
Requires: 15 Wands Rewards: 50 EXP and 1 Gem
Beautify the Pond
Requires: 25 Wands Rewards: 50 EXP and 1 Gem
Return the Magic Lotus
Requires: 15 Wands Rewards: 50 EXP and 1 Gem
Restore the Habitat
Requires: 25 Wands Rewards: 50 EXP and 1 Gem
Clear the Debris
Requires: 15 Wands Rewards: 50 EXP and 1 Gem
Heal the Tree
Requires: 15 Wands Rewards: 50 EXP and 1 Gem
The Resources in Una’s area may produce Guardian Stones on occasion.
Guardian Stones are broken down by your unlocked Creatures. Each one can be once per day, unless you spend Gems to wake them up.
Guardian Chests contain blue flames that can be merged to form Guardian Animals: Owl, Cat, Fox, Wolf, Boar, etc. There are 17 different animal forms. This will take up a large portion of your map.
The Pondside Cottage and Tea Treehouse within Morgana’s area will produce small Guardian Chests daily.
Build the Altar (Day 3-4)
The altar is a spot to place a Decoration item like the Stone Dias or the Peacat decoration. The steps lead up to an old tree which gets renovated into a tea party space.
Clearing these objectives should bring you to level 20 and open the next area with the third Wizard, Prince.
For this stage you will need 130 Wands.
Build the Altar
Requires: 25 Wands Rewards: 50 EXP and 1 Gem
Build the Steps
Requires: 25 Wands Rewards: 50 EXP and 1 Gem
Build the Terrace
Requires: 15 Wands Rewards: 50 EXP and 1 Gem
Set Up a Tea Party
Requires: 25 Wands Rewards: 50 EXP and 1 Gem
Fix the Decor Area
Requires: 15 Wands Rewards: 50 EXP and 1 Gem
Fix the Stairs
Requires: 25 Wands Rewards: 50 EXP and 1 Gem
Around this time, I finished the Fairy Island with 1 hour and 23 minutes left on the clock. I cleared the entire map of objectives, but there was no additional reward for the other items. So, only the Peacat will provide a reward.
Chapter 3: Tailor with a Twist
Rescue Una (Day 5)
I reached this area on the 5th day of play. But by the 8th day I had not rescued the wizard.
Una is the 5th wizard (area at the top of them map). She is a guitar player and her item you need to save her is a guitar. She is physically located in Princes’ area of the map, but her area comes after you finish the Sewing Workshop.
The guitars can begin spawning during the previous section if you have cleared Morgana’s home. New items in this area include Tents (Canvas).
During chapter 3, I failed the Mammoth island event by not focusing on the primary objective. Immediately afterward, two new event islands opened up: Chasing Jackalopes and Fauxhall Station. I aced both of these, but then failed the Wizard of Oz island that came next.
I have been spending Coins and Gems to clear the optional island maps. I have found the time spent on the other maps helps to pass the time on the main map and it gives me some extra chests to use.
For this stage you will need 430 Wands, plus the Tier 9 Canvas and Guitar.
Save the Wizard (Una)
Requires: Tier 9 Guitar Rewards: 25 Coins and 5 Gems
Clear the Bushes
Requires: 25 Wands Rewards: 50 EXP and 3 Gems
Fix the Stairs
Requires: 35 Wands Rewards: 50 EXP and 3 Gems
Build the Stables
Requires: 45 Wands Rewards: 50 EXP and 3 Gems
Set a Sewing Machine
Requires: 55 Wands Rewards: 50 EXP and 3 Gems
Restore the Workshop
Requires: Tier 9 Tent Rewards: 50 EXP and 3 Gems
Repair the Swing
Requires: 25 Wands Rewards: 50 EXP and 3 Gems
Restore the Gazebo
Requires: 35 Wands Rewards: 50 EXP and 3 Gems
Decorate the Gazebo
Requires: 45 Wands Rewards: 50 EXP and 3 Gems
Restore the Habitat
Requires: 25 Wands Rewards: 50 EXP and 3 Gems
Restore the Habitat
Requires: 35 Wands Rewards: 50 EXP and 3 Gems
Clear the Debris
Requires: 25 Wands Rewards: 50 EXP and 3 Gems
Build the Workshop (Day 7)
Requires: 35 Wands Rewards: 50 EXP and 3 Gems
Tidy Up the Area
Requires: 45 Wands Rewards: 50 EXP and 3 Gems
Install Water Wheel (Day 8)
For this stage you will need 365 Wands.
Install the Water Wheel
Requires: 45 Wands Rewards: 50 EXP and 3 Gems
Start Production (Day 9)
Requires: 55 Wands Rewards: 50 EXP and 3 Gems
Clear the Area
Requires: 25 Wands Rewards: 50 EXP and 3 Gems
Build the Atelier
Requires: 35 Wands Rewards: 50 EXP and 3 Gems
Set Up the Podium
Requires: 45 Wands Rewards: 50 EXP and 3 Gems
Renovate the Stage
Requires: 35 Wands Rewards: 50 EXP and 3 Gems
Install the Canopy
Requires: 55 Wands Rewards: 50 EXP and 3 Gems
Host the Fashion Show
Requires: 35 Wands Rewards: 50 EXP and 3 Gems
Fix the Stairs*
Requires: 35 Wands Rewards: 50 EXP and 3 Gems
*Fix the Stairs, is the final task for Una’s area of the map.
You should be close to restoring the workshop by this point if you haven’t done so already.
That will bring you to level 30 and open up the next section of map, Una’s area. The Ice Queen’s Palace must be in the level 40 area after Una.
Chapter 4: Diva in Distress
New resources for this are include Limestone (Building) and Ice Cream (Artifact). Both go to Tier 10. I had ice cream start spawning before I hit level 30.
I saved up 125 Wands before I finally finished the Sewing Workshop and moved into Una’s area of the map.
Enchant the Tree (Day 12)
The tree is the third part of Una’s house and will trigger the goal “Enchant the Tree.”
Requires: Tier 10 Limestone Rewards: 50 EXP and 3 Gems
Clear the Trash (not the finish)
Requires: 35 Wands Rewards: 50 EXP and 3 Gems
Rebuild Water Sculpture (Day 17)
The Water Sculpture has four parts: Place the Sculpture, Starts the Light, Arrange the Lanterns, and Plant the Flowers.
Total: 905 Wands to Clear this section.
Place the Sculpture
Requires: 45 Wands Rewards: 50 EXP and 3 Gems
Start the Light
Requires: 55 Wands Rewards: 50 EXP and 3 Gems
Arrange the Lanterns
Requires: 55 Wands Rewards: 50 EXP and 3 Gems
Plant the Flowers
Requires: 85 Wands Rewards: 100 EXP and 3 Gems
Restore the Habitat
Requires: 35 Wands Rewards: 50 EXP and 3 Gems
Restore the Habitat
Requires: 45 Wands Rewards: 50 EXP and 3 Gems
Clear the Bushes
Requires: 35 Wands Rewards: 50 EXP and 3 Gems
Repair the Stage
Requires: 45 Wands Rewards: 50 EXP and 3 Gems
Install the Canopy (Day 18)
Requires: 55 Wands Rewards: 50 EXP and 3 Gems
Install the Speakers
Requires: 55 Wands Rewards: 50 EXP and 3 Gems
Decorate the Stage (Day 19)
Requires: 85 Wands Rewards: 100 EXP and 3 Gems
Restore the Habitat
Requires: 35 Wands Rewards: 50 EXP and 3 Gems
Restore the Habitat
Requires: 45 Wands Rewards: 50 EXP and 3 Gems
Remove the Old Organ (Day 20)
Requires: 35 Wands Rewards: 50 EXP and 3 Gems
Install the Keys
Requires: 45 Wands Rewards: 50 EXP and 3 Gems
Add the Small Pipes
Requires: 55 Wands Rewards: 50 EXP and 3 Gems
Add the Main Pipes
Requires: 55 Wands Rewards: 50 EXP and 3 Gems
Open the Organ (Day 22)
Requires: 85 Wands Rewards: 100 EXP and 3 Gems
Clear the Debris
Requires: 35 Wands Rewards: 50 EXP and 3 Gems
Install the Drum (Day 30)
At the end of Una’s Area, 240 Wands needed.
Install the Drum
Requires: 45 Wands Rewards: 50 EXP and 3 Gems
Paint the Drum
Requires: 55 Wands Rewards: 50 EXP and 3 Gems
Expand the Drum
Requires: 65 Wands Rewards: 50 EXP and 3 Gems
Decorate the Drum
Requires: 75 Wands Rewards: 50 EXP and 3 Gems
You need to finish the Limestone and Ice Cream to reach level 40 and open up the Ice Queen area.
Hero Chests will provide Artifacts (Ice Cream). If you have more than 100 Wands or 90 Gems, a pop-up offer will offer the Hero chest and 50 Energy in exchange for the Wands or Gems.
Similar offers for Wand Tree and Construction Rocks may show. These cannot be recalled once dismissed, so be careful.
Chapter 5: Sweet Magic (level 40)
Finishing the drum is the last objective before chapter 5 opens up.
You will notice after finishing the Ice Cream, chests will start spawning Cauldrons for the next trapped wizard. The mine will stop generating seeds and only provide Cauldrons and obsolete Limestone, until you begin the Cryolite construction stage.
Artifacts turn into Lanterns and Construction Materials become Coins.
Clear the Trash
Save the Wizard
Requires: Tier 11 Cauldron Rewards: 25 Coins and 5 Gems
Clear the Ruins
Requires: 25 Wands Rewards: 50 EXP and 3 Gems
Place the Worker Huts
Requires: 35 Wands Rewards: 50 EXP and 3 Gems
Cool Down the Factory
Requires: 45 Wands Rewards: 50 EXP and 3 Gems
Add the Caramel Shop
Requires: 55 Wands Rewards: 50 EXP and 3 Gems
Place the Candy Shop
Requires: 75 Wands Rewards: 50 EXP and 3 Gems
Repair the Foundation
Requires: 25 Wands Rewards: 50 EXP and 3 Gems
Prepare the Materials
Requires: 35 Wands Rewards: 50 EXP and 3 Gems
Place the Sled
Requires: 45 Wands Rewards: 50 EXP and 3 Gems
Install the Cover
Requires: 75 Wands Rewards: 50 EXP and 3 Gems
Clear the Trash (You Win!)
Requires: 25 Wands Rewards: 50 EXP and 3 Gems
Total Wands Used
440w
After reaching chapter 5, you only need to collect 440 wands to reach the last goal. It is not necessary to merge the artifacts or the construction materials. Only collect wands. So, focus on using the Green House and buying up all of the Foods in the Shop.
Total Wands: 3,020 for the entire game offer.
Other Functions
Side Islands & Order Rush (3-Day Event)
The optional islands are one of the ways to receive Bronze Trophies. Its not necessary to clear the entire island to get the Trophy, it is available at stage 24 of the event.
However, if you clear all 32 stages, you get a Tier 3 Treasure Chest (Tier 3: Coins and Gems)
You will also get them from the Order Rush event, but the majority come from these islands. The Rush events occur on your main island and include 5 potential Trophies.
If you want to conserve space on the your main board, then don’t clear the entire side island. You will forfeit the Bronze Trophy reward, but it will save up to 14 tiles.
Trophies use the same merging mechanic to upgrade to Silver and Gold which provide greater rewards. If you collect them and save the full 5 to merge, then your looking at potentially 50-70 tiles covered at any given time.
I believe the islands are on a set loop starting with the Peacat and ending with the Polar Bear. On the second loop, new locations are added.
The Wizard Card Case includes a single wizard card and 60 Energy. Wizards can be used on event island to remove special objects which in turn generate small energy orbs.
The more Wizard you have of a particular color, the faster you can clear the object. Wizards can be used once every 24 hours across all maps.
Wizards
Creatures
Green glowing stuff in bucket (don’t know name) can be Crushed by your creatures. Doing so places the creature on 15 hour cooldown timer. You can spend 50 Gems to wake them up sooner.
Clearing the glowy stuff produces a Guardian Chest which provides those florescent blue Animal tokens that are used to unlock sections of the Habitat.
Raising the level of a creature provides a set reward at each stage, with the final prize being a Wand Tree. The number of Creature cards needed to level up depends on the Tier of the creature and how many levels have already been achieved.
This are just aesthetic and don’t provide any benefits.
Item List
Game Item List
Artifacts
Spellbooks (Merlin)
Crystal Balls (Morgana)
Tailor’s Scissors (Prince Charming)
Musical Instruments (Una)
Ice Cream (Ice Queen)
Cauldrons (Wizard 6?)
Lucky Horseshoes
Stone Snakes
Free Weights
Magic Artifacts
Hammers
Buildings
Stone (Merlin’s House)
Slate (Morgana’s House)
Canvas (Prince Charming’s House)
Limestone (Una’s House)
Cryolite (Ice Queen’s House)
Peatstone
Cloverwood Objects
Marble
Granite
Blocks
Resources
Guardian Stone
Slate
Canvas
Limestone
Cryolite
Peatstone
Cloverwood
Marble
Granite
Blocks
Miscellaneous
Orange Rocks > Coins
Crystal Ball
Wands
Magic Tomes
Coins
Magic Chests
Treasure Chest (3 Tiers) > Gems and Coins
Fancy Chest
Nautical Chest
Gems
Common Fauna Ball > Creature Tokens
Fairy Lantern
Energy Orb
Slate (Purple Stone in a Bucket/Wheelbarrow)
Fairy Chest
Mystic Chest
Shatter Stones > Remove Obstacles
Animal Guardians > Animal Tokens
Produce
Pumpkin Patch > Pumpkins
Pumpkins
Mushroom Patch > Mushrooms
Mushrooms
Pears
Burst Berries
Fable Town Shop List
The wizard flying overhead makes it difficult to see each chest type. I guessed on some.
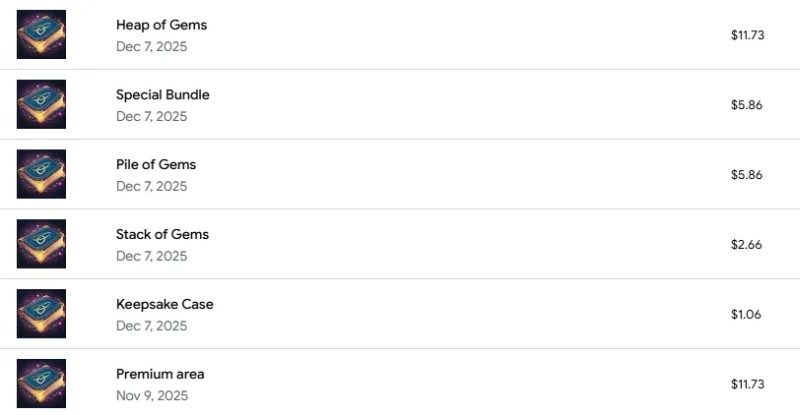
Gem Packs
When buying a $5 or higher pack, the game will offer a bonus if you use their market payment portal instead of Google. You cannot use Google Play credit in the Market.
Stack of Gems $2.49 (300 Gems)
Pile of Gems $5.49 (800 Gems)
Heap of gems $10.99 (1,200 Gems)
Special Offers
Begin Well-equipped: $2.99 (200 Gems, 700 Coins, and 300 Energy)
Enchanted Treasures: $10.99 (14 Tiles and Chests)
Lost Treasures 500 Gems (12 Tiles)
Ancient Treasures: $5.49 (13 Tiles and Chests)
Fairy Treasures $22.99 (16 Tiles)
Keepsake Chest $0.99 (2 Hero Chests)
Special Bundle $5.49 (250 Energy, 3x Construction Chests T3, and 3x Seed Bags T3)
Currency
Large Coin Chest
999 Gems
5,500 Coins
Medium Coin Purse
499 Gems
2,500 Coins
Small Coin Purse
199 Gems
900 Coins
Pile of Coins
35 Gems
150 Coins
Few Coins
Free
Energy Tab
Name
Cost | Daily Limit
Contents
Watch An Ad
Free (Limit 1)
25 Energy
Energy
350 Coins (Limit 3)
90 Energy
Energy
100 Gems
100 Energy
Medium Chest
$0.99 (One Time Offer)
200 Energy
Large Chest
990 Coins (Limit 1)
300 Energy
Produce
Name
Cost | Daily Limit
Contents
Seed Bag (1)
Free (Every 6 Hours)
1x item
Seed Bag (2)
150 Coins (Limit 3)
1x item
Seed Bag (3)
90 Gems (No Limit) Cost Increases
1x item
Seed Bag (3)
$0.99 (One Time Offer)
2x items
Pumpkin
75 Coins (Limit 6)
5x Pumpkins
Buildings
Name
Cost | Daily Limit
Contents
Pile of Coins
35 Gems (Limit 2)
150 Coins
Purse of Coins
199 Gems
1k Coins
Large Purse of Coins
499 Gems
2.5k Coins
Chest of Coins
999 Gems
5k Coins
Few Coins
Free (Every 6 Hours)
10 Coins
Special
The items listed here are specific to the section of map you are on. In area 2, it is crystal balls.
Offer Complete: I used the full 45 days to reach Chapter 9-2 (Island 34). I had only 3 hours left on the offer and made a final purchase on the last day, which secured a payout of $ 54.77 – $ 14.91 = $39.86 for my time spent. I think I would have needed either another week of game time or more spending to reach the $50 reward at Chapter 10-3.
Step into the Panthia merging world, where magical dreams find endless possibilities! Guided by magical fairies and cute pets, embark on a journey to discover a hidden and enchanting island of magic. Unleash magical powers.
Reward: 294.77 USD
Time Limit: 30 Days (1st Week Goal worth 15 USD)
Purchase: Optional
Ads: No Interstitial ads. Ads on for long timers, and free items.
The award will pend for 10 days
Must be installing Panthia for the first time to receive SB.
There is a 1st-week goal to reach Island 17 and earn $15.
This offer may be completed with a guest account; however, game data will not be saved. If you encounter a bug and reinstall, all progress will be lost.
30 Free Community Coins are available on Facebook weekly. You don’t need a Facebook account to get the coins.
Free items will float over the island intermittently. Keep an eye out for yellow sparkles!
Warning: Be careful on Facebook, over 20 bot accounts are masquerading as the official Panthia page. They also follow the official page and impersonate the developer in comments. The scam appears to be getting players to complete affiliate offers (like Swagbucks, ironically) in exchange for rewards.
You can exchange Community Coins from the link on Facebook to purchase Energy up to 3 times each week.
Completing tasks in active Events will reward Energy. Leveling up and moving to new islands will also reward Energy.
Energy regenerates at a rate of 1 point every 2.5 minutes (24 points per hour). So, you can be offline for 4 hours and 9.6 minutes. Beyond 4ish hours, you’ll be wasting Energy. Time your breaks (sleep) accordingly.
Purchasing Energy costs 15 gems for 100; this cost increases to 30 and 60. I never went past 2 refills per day on any map.
Gems
Gem Fragment = Merge 3 or more
Gem = 1
Several Gems = 3
A Few Gems = 9
= 27
Coins
Coins
Coin Pieces = Merge 3 or more
Copper Fairy Coin = 3
Silver Fairy Coin = 9
Gold Fairy Coin = 27
Super Fairy Coin = 81
Shiny Fairy Coin = 243
Magic Fairy Coin = 729
Fairy Coin = 2187
When you clear a map, all remaining unused items will be converted into coins. Coins left on the map will be converted at the above valuations. Gems will be added to your total at the above valuations as well.
So you don’t lose anything by not collecting before finishing a map stage. However, I would consider combining all possible items if there is an ongoing event that rewards repeated combinations.
Coin Shop
Coins can be spent on items from the shop or used to purchase upgrades to the Garden. On the panel where you use Stars, tap on COIN. Each upgrade will provide 50 EXP. This is a convenient way to earn level-up rewards as you approach a milestone.
You may watch an ad to receive a free item from the Specials and Object tabs each day.
Premium Purchases
I made a purchase to fulfil one of the offer goals. I spent 4.99 USD on a discounted pack. It included 200 Energy, 110 Gems, and a Magnet.
The next month, I bought a 2.99 (150 Energy + 100 Energy Bonus, 30 Gems, and a Timer) pack to clear a map before heading to bed.
Lastly, with 3 hours left on the clock, I bought a $6.99 pack that included several freebies in a chain. I not only used the 350 Energy the pack offered, but I also spent 150 Gems on 200 Energy in refills just to clear the last section of a map.
In hindsight, if I had only bought the 4.99 pack, I would have run out of Energy and been forced to buy another pack. The 6.99 chained pack (170 Energy and 150 Gems) with freebies is worth more than the 4.99 pack (200 Energy, 110 Gems, 1 Magnet).
Gift Codes
On July 31st, 2025, the publisher released the code MERGE4FUN.
No expiration time was mentioned in the post.
Game Progression
We play the merging game to collect Stars, which can be used to upgrade the house and adjoining property. Using Stars will generate EXP points, which will increase your player level.
Each level up includes some extra Coins, Energy, and Gems.
It took me 2 days to reach Island 3. I don’t think it will be possible to get to island 17 within a week without spending money, and even then, it would be expensive. (I reached Island 13 on my 7th day of play).
On day 12, I managed to finish Chapter 4 (Island 16). This is the stage you have to beat in 7 days to get the bonus SB.
Starting on the 15th day of play, I stopped receiving the option to watch an ad to get energy. I don’t know what caused it, but the option just isn’t appearing when I tap on energy now.
Chapter 5, Island 4, was really long. One of the items you need to merge is a red panda. Starting at stage 3, the red panda requires Sun Magic Staves to rank up, and there are 7 stages in total. I needed 37 staves altogether. It was grueling and took 3 days to finish.
Merging Blocks
If you merge 3, you will only get 1 resulting item, and merging six gives 2. But if you merge in multiples of 5, you get a bonus item. So, when combining items, it is best to do it in multiples of 5 (10, 15, 20, etc.).
Combining enough Wands will generate a fairy, which can be used to quickly build any structure on the map. The fairy and other premium items have capacity limits. Excess items will be placed directly on the field.
Fairy = 10
Magnet = 15
Axe = Never had more than 3
Magic Stone = Only available through purchases
Game Ads
You can watch an ad to reduce the timer by 15 minutes. There is a limit to how often it presents you with the skip option.
Server reset was at Noon PST. All ad watch opportunities reset, and the publisher posted a new Community Coin link on their FB page.
NSFW Ads
There were also some adult dating and hook-up apps, as well as localized ads for feminine hygiene products and dental services. These ads referenced businesses in a neighboring county.
There were also ads featuring children’s cartoon characters that had been “aged up” using AI to make them alluring. Each included a disclaimer saying the characters were all in their “adult form.”
There were also some adult dating and hook-up apps, and some localized ads, including feminine hygiene products and dental services. These ads referenced businesses in a neighboring county.
One ad in particular was especially cringe (DopaAI). It encouraged users to upload photos of two people, with the AI generating a video of the two individuals kissing. The ad showed a clip of a couple kissing.
The app is rated Teen, and there is no disclaimer about the content of the app, which is mostly user-generated.
However, the splash screen upon installation is entirely explicit. A fully naked woman engaged in sexual intercourse, including penetration. Both male and female gentilia are distinctly visible.
Several more images and videos are displayed down the page. There are functions for uploading pictures of girls and women for the AI to “undress,” with examples being provided. Another function will generate a bukkake of any image uploaded.
Timers
You can also use a fairy to skip timers. The fairy is the final stage for those pink wands.
In the shop, you can watch an ad for two freebies. An object and some currency, typically.
Sometimes, a free item will fly overhead that looks like a movie director’s slate. This is also an ad.
TIP: Timers may continue to count down while you are watching an ad. If there are countdown timers on multiple items, it is possible that after viewing an ad, you will lose the other items.
Events
In addition to weekly events, there are separate islands that last 24 hours. These can be a source of additional Coins and Gems, and they use their own set of Energy, so you don’t waste the home map (blue) Energy by playing on them.
Some events will feature a leaderboard and prizes, depending on the finishing rank.
TIP: When merging, the game will prioritize normal blocks over event-flagged blocks. If you have 4 items (3 normal and 1 with an event marker) and you merge them together, the game will only merge the normal items and omit the event item.
Card Collecting
Neon Lights, the card-collecting game, ran for 60 days and included an exchange shop with premium Special items (fairy, magnets, wands, etc.). I saved 500 points to get a card pack, but I didn’t get anything good.
I would suggest using your points on fairies or water drops. Big prizes are paid out for reaching 30, 72, and 108 unique cards collected.
After the season ends, a new 60-day event begins. Summer Sports is the next seasonal event.
July 4th
When I started playing, the 4th of July (American Independence Day) event was active. The events each have different themes, but the rewards are mostly the same. Garden decor included red, white, and blue-themed ornaments. These were purely cosmetic additions.
Bunny Rally
This is a short 8-hour event. Look for little carrot icons on the objects in your field. If you merge these blocks, you will earn points for the event.
The carrot sizes differ, and bigger carrots will provide more points. You can see your position and possible prize on the leaderboard. The higher the level of the item, the more carrots it can potentially have.
Fairy’s Cup
The Fairy’s Cup is a 36-hour event where you earn points for spending Energy and Gems. The point breakdown is 1 for each Energy and 5 for every Gem.
Master Digger
Pretty straightforward game, you get pickaxes and clear tiles of the board to find fossils. Clearing the map rewards static prizes. I tried screenshotting the piece locations, but they change between games. There are 6 stages to the event, and I only ever made it to the 5th stage prize, which was a piñata of Energy.
Pikoko’s Leisure Time
There is a puzzle piece hunting game with 3 puzzles to complete. The final reward, though, came days after the offer was completed, so I didn’t get much out of it. There was some Energy for clearing each individual puzzle.
Fruit Fusion
This is a mini version of the main map. The controls are simplified, we only merge blocks of 3 items. When you merge, the blocks morph into a single higher tier block.
This was a good map to gain Gems, Energy, and Coins. The stages are easy to clear and don’t take much thinking.
Wonderful Flower
The first flower requires 20 Wonderful Pieces (water drops) to complete the first stage. There are 3 stages before the flower blooms completely. Between stages, there is a 20-minute break for building. The second and third stages cost 30 and 40 drops, respectively.
After the first intro, flowers come, mushrooms, and other flowers, which need many more water drops to complete. The rewards do increase, but not by much.
Tip: Starting construction of the flower just before placing the final structures for a map will cause the flower to be instantly completed when you start the next map. You can skip the 20-minute construction.
You will receive rewards for completing each stage. They are not great; however, there is no way to throw away the water drops, so they will clog up your board if you don’t use the flower.
You can temporarily move the flower bubble to the side of the screen (over the water) when starting a new map.
There are multiple flower spots in the garden. After you complete a bloom, a new flower bud will be provided. Water drops can be bought in the Coin Shop (Specials) near the end of the list.
Flower
Reward
Mini (20 Water)
Small (30 Water)
Growing (40 Water)
Mushroom
Reward
Mini Mushroom
15 Energy
Small Mushroom
100 Coins
Growing Mushroom
1 Fairy
Great Mushroom
200 Coins
Enchanted Mushroom
300 Coins
Wonderful Mushroom (70 Water)
2k Coins, 5 Gems, 1 Magnet
Tulip
Reward
Tulip Sprout (30 Water)
20 Energy
Tulip Bud
150 Coins
Mini Tulip
1 Fairy
Great Tulip (50 Water)
300 Coins
Enchanted Tulip (70 Water)
400 Coins
Wonderful Tulip
3k Coins, 5 Gems, 1 Magnet
After completing the Tulip, we get a garden set starting with the Cala Lily. A new item is needed to complete the flower. Now we are collecting Sunshine and Waterdrops.
You will get lots of unused Water before you get all of the Sunshine needed to make the upgrade. You can swap for Suneshines in the card trading exchange.
Garden
Reward
Calla Lily Sprout (15 Water, 10 Sunshine)
25 Energy
Calla Lily Bud (25 Water, 15 Sunshine)
200 Coins
Mini Calla Lily (35 Water, 25 Sunshine)
1 Fairy
Great Calla Lily (45 Water, 30 Sunshine)
400 Coins
Enchanted Calla Lily (55 Water, 35 Sunshine)
Unknown
Achievements
55 possible Achievements can be completed, and each will provide a reward to players. Rewards generally include Gems and Coins, but may also include special avatars and frames.
Tapping on the 3 bars in the top-right of the screen will open a sub-menu which includes the list of achievements. There are too many to list here if you include the stages.