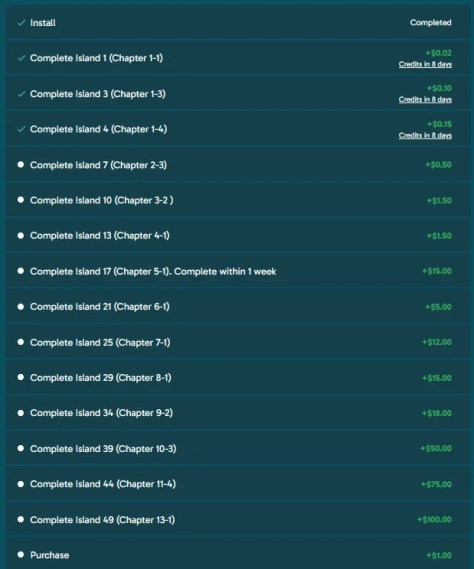
Offer Complete: I used the full 45 days to reach Chapter 9-2 (Island 34). I had only 3 hours left on the offer and made a final purchase on the last day, which secured a payout of $ 54.77 – $ 14.91 = $39.86 for my time spent. I think I would have needed either another week of game time or more spending to reach the $50 reward at Chapter 10-3.
Step into the Panthia merging world, where magical dreams find endless possibilities! Guided by magical fairies and cute pets, embark on a journey to discover a hidden and enchanting island of magic. Unleash magical powers.
| Reward: 294.77 USD |
| Time Limit: 30 Days (1st Week Goal worth 15 USD) |
| Purchase: Optional |
| Ads: No Interstitial ads. Ads on for long timers, and free items. |
| The award will pend for 10 days |
| Must be installing Panthia for the first time to receive SB. |
Start the Offer: https://www.swagbucks.com/games/apps/1667536/panthia?rb=69384823
Important Points
- There is a 1st-week goal to reach Island 17 and earn $15.
- This offer may be completed with a guest account; however, game data will not be saved. If you encounter a bug and reinstall, all progress will be lost.
Tip
| 30 Free Community Coins are available on Facebook weekly. You don’t need a Facebook account to get the coins. |
| Free items will float over the island intermittently. Keep an eye out for yellow sparkles! |
Warning: Be careful on Facebook, over 20 bot accounts are masquerading as the official Panthia page. They also follow the official page and impersonate the developer in comments. The scam appears to be getting players to complete affiliate offers (like Swagbucks, ironically) in exchange for rewards.
Energy
You can exchange Community Coins from the link on Facebook to purchase Energy up to 3 times each week.
Completing tasks in active Events will reward Energy. Leveling up and moving to new islands will also reward Energy.
Energy regenerates at a rate of 1 point every 2.5 minutes (24 points per hour). So, you can be offline for 4 hours and 9.6 minutes. Beyond 4ish hours, you’ll be wasting Energy. Time your breaks (sleep) accordingly.
Purchasing Energy costs 15 gems for 100; this cost increases to 30 and 60. I never went past 2 refills per day on any map.

| Gems |
|---|
| Gem Fragment = Merge 3 or more |
| Gem = 1 |
| Several Gems = 3 |
| A Few Gems = 9 |
| = 27 |
Coins

| Coins |
|---|
| Coin Pieces = Merge 3 or more |
| Copper Fairy Coin = 3 |
| Silver Fairy Coin = 9 |
| Gold Fairy Coin = 27 |
| Super Fairy Coin = 81 |
| Shiny Fairy Coin = 243 |
| Magic Fairy Coin = 729 |
| Fairy Coin = 2187 |
When you clear a map, all remaining unused items will be converted into coins. Coins left on the map will be converted at the above valuations. Gems will be added to your total at the above valuations as well.
So you don’t lose anything by not collecting before finishing a map stage. However, I would consider combining all possible items if there is an ongoing event that rewards repeated combinations.
Coin Shop
Coins can be spent on items from the shop or used to purchase upgrades to the Garden. On the panel where you use Stars, tap on COIN. Each upgrade will provide 50 EXP. This is a convenient way to earn level-up rewards as you approach a milestone.
You may watch an ad to receive a free item from the Specials and Object tabs each day.
Premium Purchases
I made a purchase to fulfil one of the offer goals. I spent 4.99 USD on a discounted pack. It included 200 Energy, 110 Gems, and a Magnet.
The next month, I bought a 2.99 (150 Energy + 100 Energy Bonus, 30 Gems, and a Timer) pack to clear a map before heading to bed.

Lastly, with 3 hours left on the clock, I bought a $6.99 pack that included several freebies in a chain. I not only used the 350 Energy the pack offered, but I also spent 150 Gems on 200 Energy in refills just to clear the last section of a map.

In hindsight, if I had only bought the 4.99 pack, I would have run out of Energy and been forced to buy another pack. The 6.99 chained pack (170 Energy and 150 Gems) with freebies is worth more than the 4.99 pack (200 Energy, 110 Gems, 1 Magnet).
Gift Codes

On July 31st, 2025, the publisher released the code MERGE4FUN.
No expiration time was mentioned in the post.
Game Progression
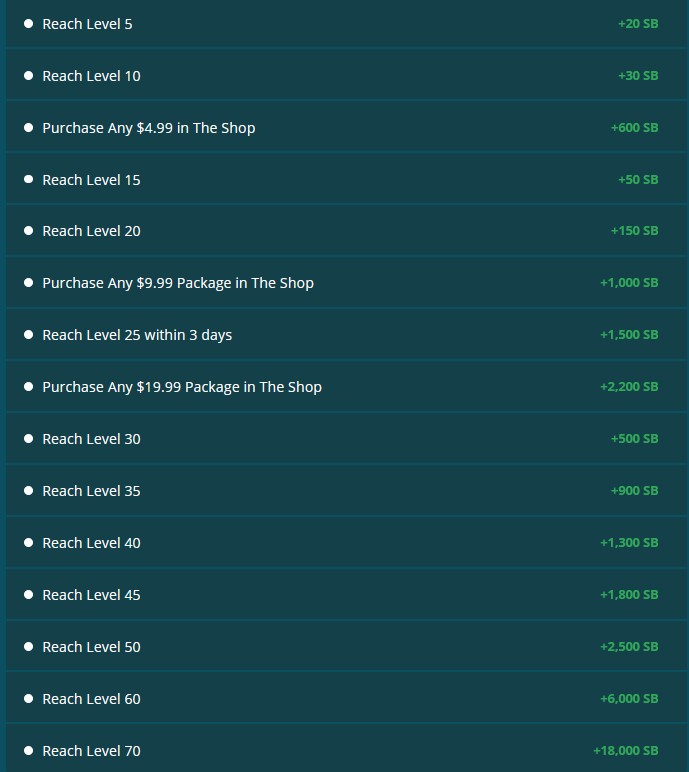
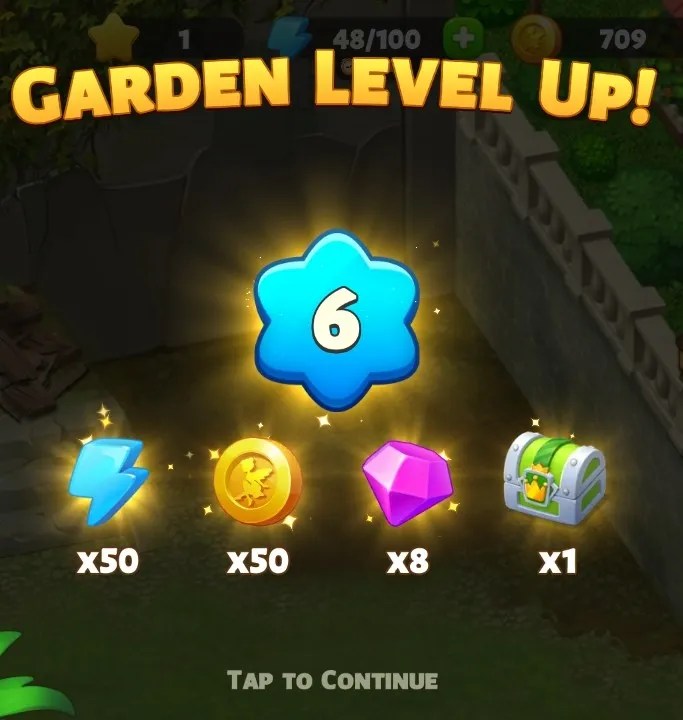
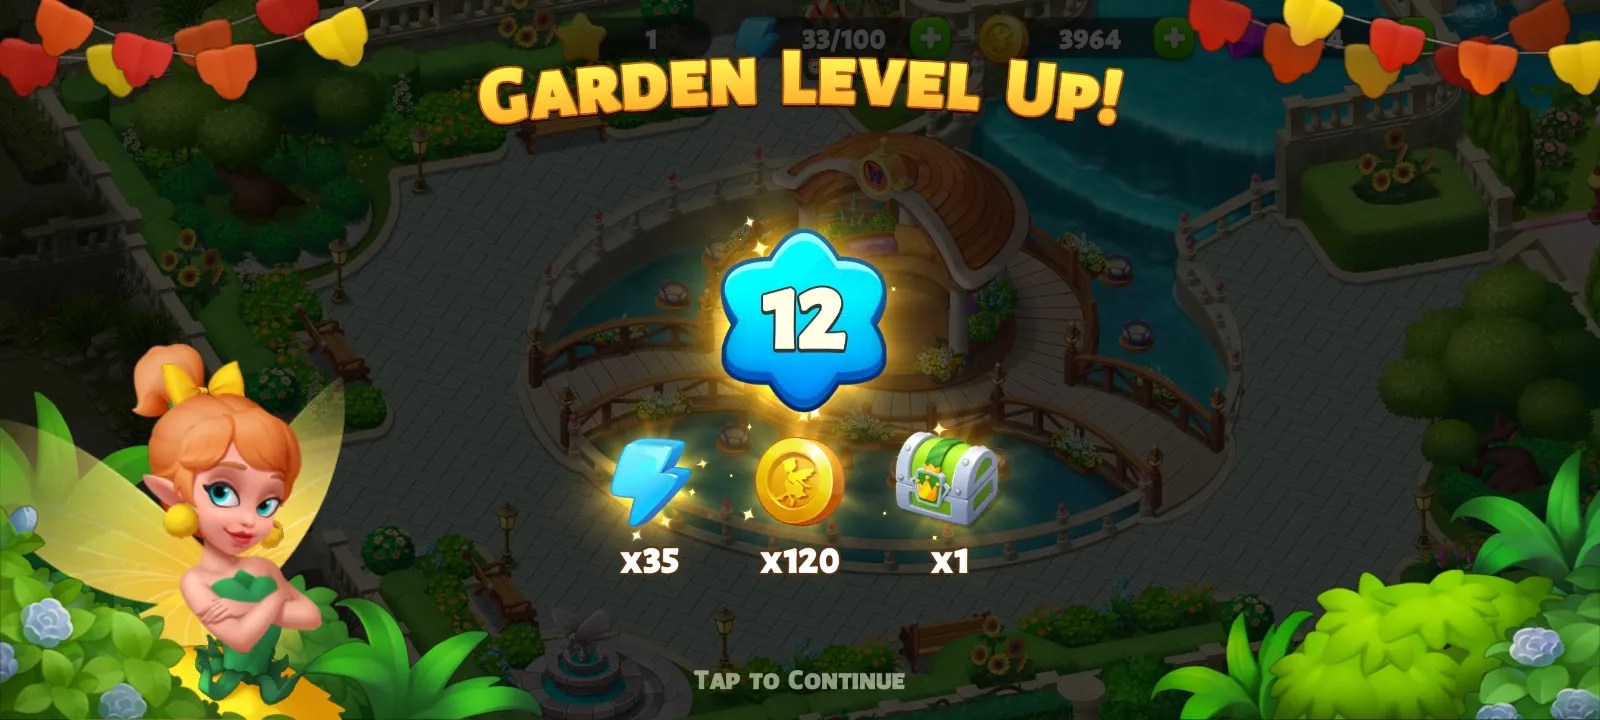
We play the merging game to collect Stars, which can be used to upgrade the house and adjoining property. Using Stars will generate EXP points, which will increase your player level.
Each level up includes some extra Coins, Energy, and Gems.
It took me 2 days to reach Island 3. I don’t think it will be possible to get to island 17 within a week without spending money, and even then, it would be expensive. (I reached Island 13 on my 7th day of play).
On day 12, I managed to finish Chapter 4 (Island 16). This is the stage you have to beat in 7 days to get the bonus SB.


Starting on the 15th day of play, I stopped receiving the option to watch an ad to get energy. I don’t know what caused it, but the option just isn’t appearing when I tap on energy now.
Chapter 5, Island 4, was really long. One of the items you need to merge is a red panda. Starting at stage 3, the red panda requires Sun Magic Staves to rank up, and there are 7 stages in total. I needed 37 staves altogether. It was grueling and took 3 days to finish.
Merging Blocks
If you merge 3, you will only get 1 resulting item, and merging six gives 2. But if you merge in multiples of 5, you get a bonus item. So, when combining items, it is best to do it in multiples of 5 (10, 15, 20, etc.).

Combining enough Wands will generate a fairy, which can be used to quickly build any structure on the map. The fairy and other premium items have capacity limits. Excess items will be placed directly on the field.
| Fairy = 10 |
| Magnet = 15 |
| Axe = Never had more than 3 |
| Magic Stone = Only available through purchases |


Game Ads
You can watch an ad to reduce the timer by 15 minutes. There is a limit to how often it presents you with the skip option.
Server reset was at Noon PST. All ad watch opportunities reset, and the publisher posted a new Community Coin link on their FB page.
NSFW Ads
| There were also some adult dating and hook-up apps, as well as localized ads for feminine hygiene products and dental services. These ads referenced businesses in a neighboring county. |
| There were also ads featuring children’s cartoon characters that had been “aged up” using AI to make them alluring. Each included a disclaimer saying the characters were all in their “adult form.” |
| There were also some adult dating and hook-up apps, and some localized ads, including feminine hygiene products and dental services. These ads referenced businesses in a neighboring county. |
| One ad in particular was especially cringe (DopaAI). It encouraged users to upload photos of two people, with the AI generating a video of the two individuals kissing. The ad showed a clip of a couple kissing. The app is rated Teen, and there is no disclaimer about the content of the app, which is mostly user-generated. However, the splash screen upon installation is entirely explicit. A fully naked woman engaged in sexual intercourse, including penetration. Both male and female gentilia are distinctly visible. Several more images and videos are displayed down the page. There are functions for uploading pictures of girls and women for the AI to “undress,” with examples being provided. Another function will generate a bukkake of any image uploaded. |
Timers
You can also use a fairy to skip timers. The fairy is the final stage for those pink wands.
In the shop, you can watch an ad for two freebies. An object and some currency, typically.
Sometimes, a free item will fly overhead that looks like a movie director’s slate. This is also an ad.
TIP: Timers may continue to count down while you are watching an ad. If there are countdown timers on multiple items, it is possible that after viewing an ad, you will lose the other items.

Events
In addition to weekly events, there are separate islands that last 24 hours. These can be a source of additional Coins and Gems, and they use their own set of Energy, so you don’t waste the home map (blue) Energy by playing on them.


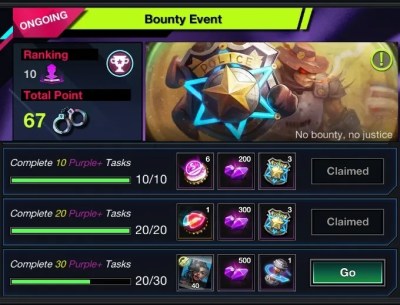
Some events will feature a leaderboard and prizes, depending on the finishing rank.
TIP: When merging, the game will prioritize normal blocks over event-flagged blocks. If you have 4 items (3 normal and 1 with an event marker) and you merge them together, the game will only merge the normal items and omit the event item.
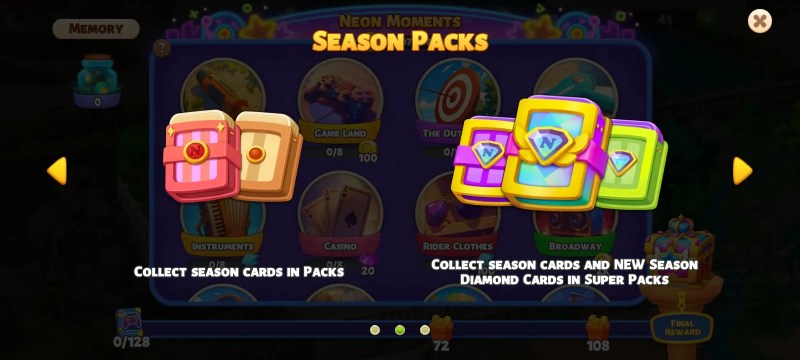
Card Collecting
Neon Lights, the card-collecting game, ran for 60 days and included an exchange shop with premium Special items (fairy, magnets, wands, etc.). I saved 500 points to get a card pack, but I didn’t get anything good.
I would suggest using your points on fairies or water drops. Big prizes are paid out for reaching 30, 72, and 108 unique cards collected.
After the season ends, a new 60-day event begins. Summer Sports is the next seasonal event.
July 4th
When I started playing, the 4th of July (American Independence Day) event was active. The events each have different themes, but the rewards are mostly the same. Garden decor included red, white, and blue-themed ornaments. These were purely cosmetic additions.
Bunny Rally
This is a short 8-hour event. Look for little carrot icons on the objects in your field. If you merge these blocks, you will earn points for the event.

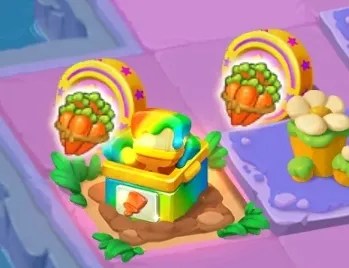
The carrot sizes differ, and bigger carrots will provide more points. You can see your position and possible prize on the leaderboard. The higher the level of the item, the more carrots it can potentially have.
Fairy’s Cup
The Fairy’s Cup is a 36-hour event where you earn points for spending Energy and Gems. The point breakdown is 1 for each Energy and 5 for every Gem.

Master Digger

Pretty straightforward game, you get pickaxes and clear tiles of the board to find fossils. Clearing the map rewards static prizes. I tried screenshotting the piece locations, but they change between games. There are 6 stages to the event, and I only ever made it to the 5th stage prize, which was a piñata of Energy.
Pikoko’s Leisure Time


There is a puzzle piece hunting game with 3 puzzles to complete. The final reward, though, came days after the offer was completed, so I didn’t get much out of it. There was some Energy for clearing each individual puzzle.
Fruit Fusion
This is a mini version of the main map. The controls are simplified, we only merge blocks of 3 items. When you merge, the blocks morph into a single higher tier block.
This was a good map to gain Gems, Energy, and Coins. The stages are easy to clear and don’t take much thinking.


Wonderful Flower

The first flower requires 20 Wonderful Pieces (water drops) to complete the first stage. There are 3 stages before the flower blooms completely. Between stages, there is a 20-minute break for building. The second and third stages cost 30 and 40 drops, respectively.
After the first intro, flowers come, mushrooms, and other flowers, which need many more water drops to complete. The rewards do increase, but not by much.
Tip: Starting construction of the flower just before placing the final structures for a map will cause the flower to be instantly completed when you start the next map. You can skip the 20-minute construction.

You will receive rewards for completing each stage. They are not great; however, there is no way to throw away the water drops, so they will clog up your board if you don’t use the flower.
You can temporarily move the flower bubble to the side of the screen (over the water) when starting a new map.

There are multiple flower spots in the garden. After you complete a bloom, a new flower bud will be provided. Water drops can be bought in the Coin Shop (Specials) near the end of the list.
| Flower | Reward |
|---|---|
| Mini (20 Water) | |
| Small (30 Water) | |
| Growing (40 Water) |
| Mushroom | Reward |
|---|---|
| Mini Mushroom | 15 Energy |
| Small Mushroom | 100 Coins |
| Growing Mushroom | 1 Fairy |
| Great Mushroom | 200 Coins |
| Enchanted Mushroom | 300 Coins |
| Wonderful Mushroom (70 Water) | 2k Coins, 5 Gems, 1 Magnet |
| Tulip | Reward |
|---|---|
| Tulip Sprout (30 Water) | 20 Energy |
| Tulip Bud | 150 Coins |
| Mini Tulip | 1 Fairy |
| Great Tulip (50 Water) | 300 Coins |
| Enchanted Tulip (70 Water) | 400 Coins |
| Wonderful Tulip | 3k Coins, 5 Gems, 1 Magnet |
After completing the Tulip, we get a garden set starting with the Cala Lily. A new item is needed to complete the flower. Now we are collecting Sunshine and Waterdrops.
You will get lots of unused Water before you get all of the Sunshine needed to make the upgrade. You can swap for Suneshines in the card trading exchange.

| Garden | Reward |
|---|---|
| Calla Lily Sprout (15 Water, 10 Sunshine) | 25 Energy |
| Calla Lily Bud (25 Water, 15 Sunshine) | 200 Coins |
| Mini Calla Lily (35 Water, 25 Sunshine) | 1 Fairy |
| Great Calla Lily (45 Water, 30 Sunshine) | 400 Coins |
| Enchanted Calla Lily (55 Water, 35 Sunshine) | Unknown |
Achievements
55 possible Achievements can be completed, and each will provide a reward to players. Rewards generally include Gems and Coins, but may also include special avatars and frames.
Tapping on the 3 bars in the top-right of the screen will open a sub-menu which includes the list of achievements. There are too many to list here if you include the stages.